Feature overview:
This feature enables the Admin/Supervisor users to see the full list of pending / approved absences which is not possible to do in a monthly calendar view. The list-view makes it easier to approve or reject the absences in one place.
Page reference: Absences
Where can I find the absence list view option?
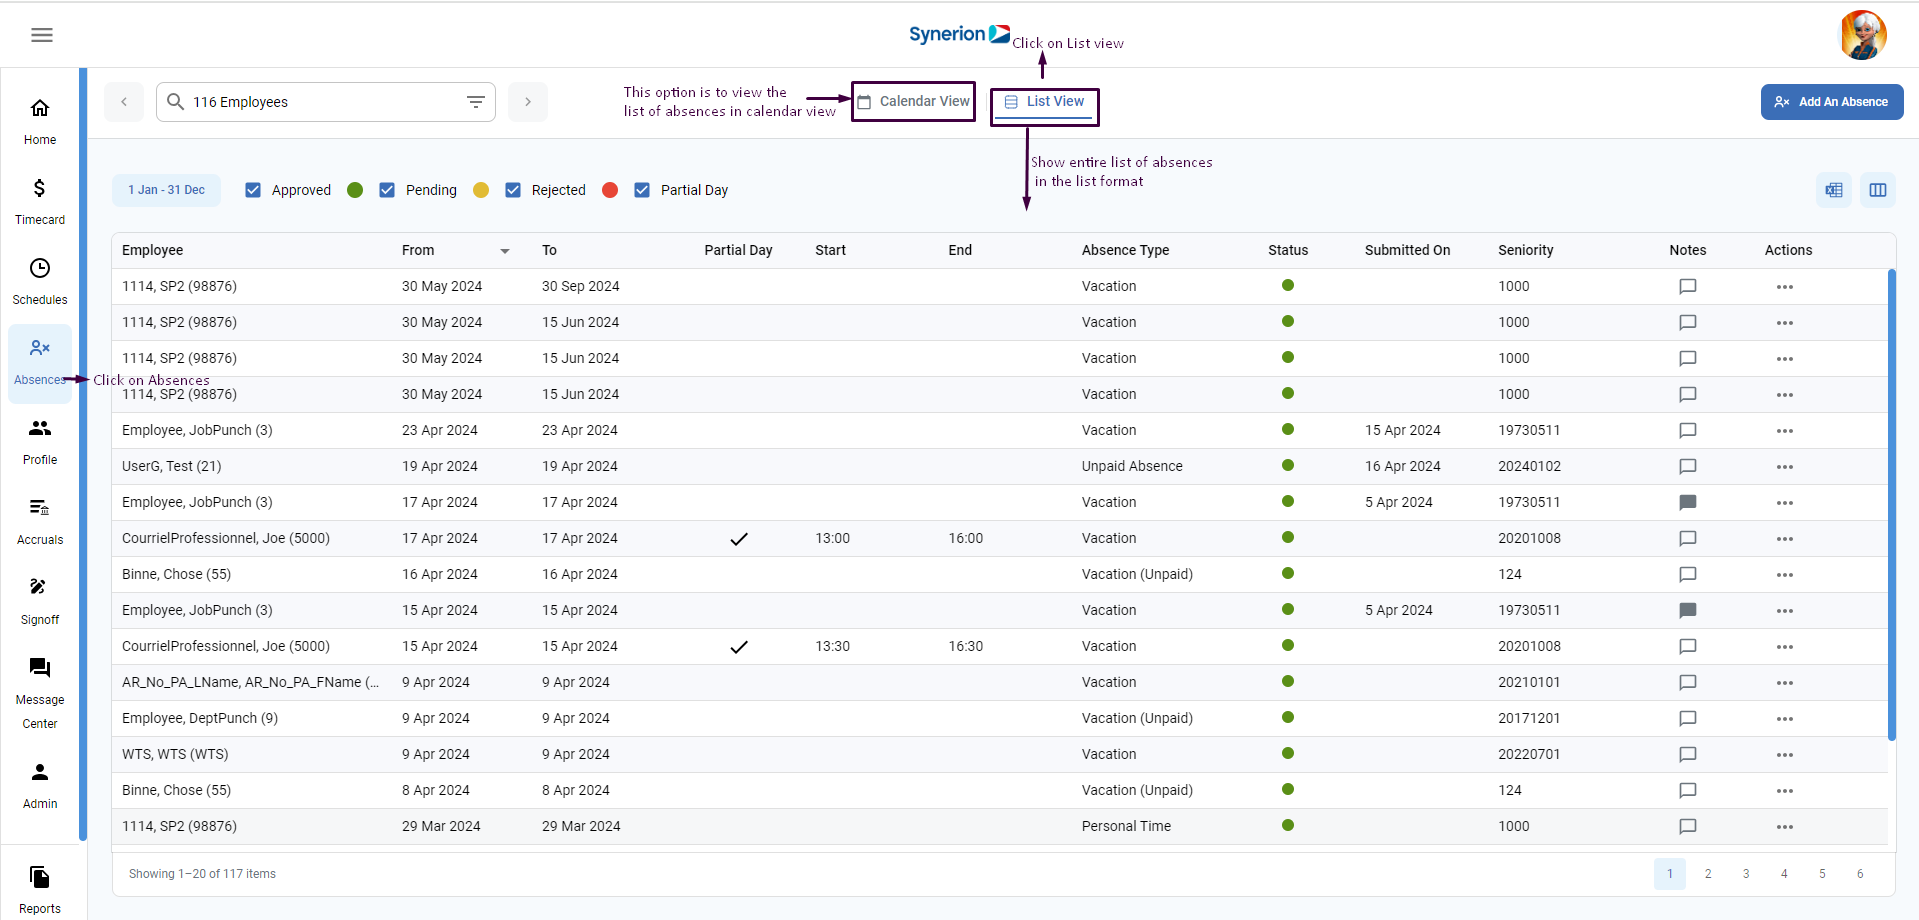
- Click on Absences from the main menu.
- At the top (next to employee search filter), there are 2 options- calendar view and list view (as highlighted in the below picture).
- Clicking on the list view will show the full list of absences in the list format. (Calendar view is the default view).
Date Selector in List view:
Date selector is available below the employee selector filter. By-default, it shows the current calendar year. However, user can change the view to Show future only, or Date range by specifying the start and end date.

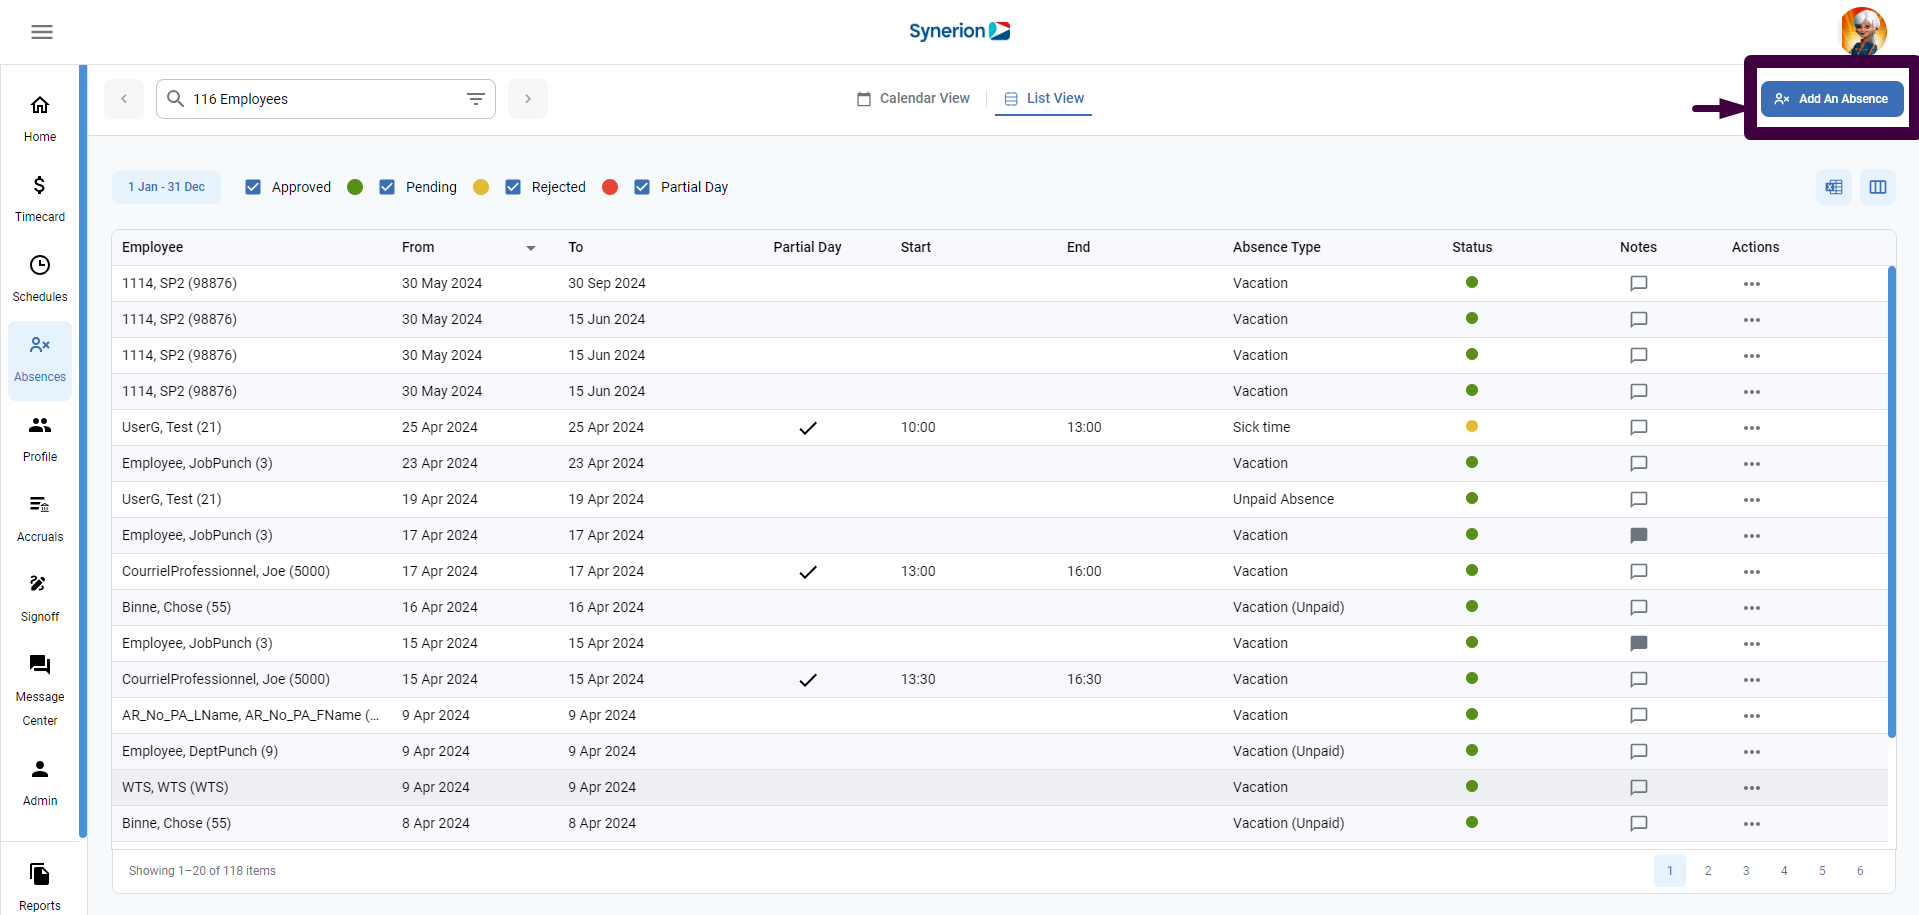
What can I view in the absence list view grid?
When user selects the absence’s list view, user can view below information in the grid:
- Employee name
- Absence’s start date and end date (i.e., From and to)
- Partial Day: If it is a partial absence, user will see the check mark in the cell.
- Start and End column: If it is a partial absence, these cells will show the absence’s start and end time.
- Absence Type
- Status: it shows different status of absences. Example: Approved, Rejected, and Pending
- Submitted on: It shows the date when user has submitted the absence request.
- Seniority
- Notes: hovering over the note icon will show the notes added (if any)
- Actions: Clicking on three dots … icon, give an option to the user to view the absence
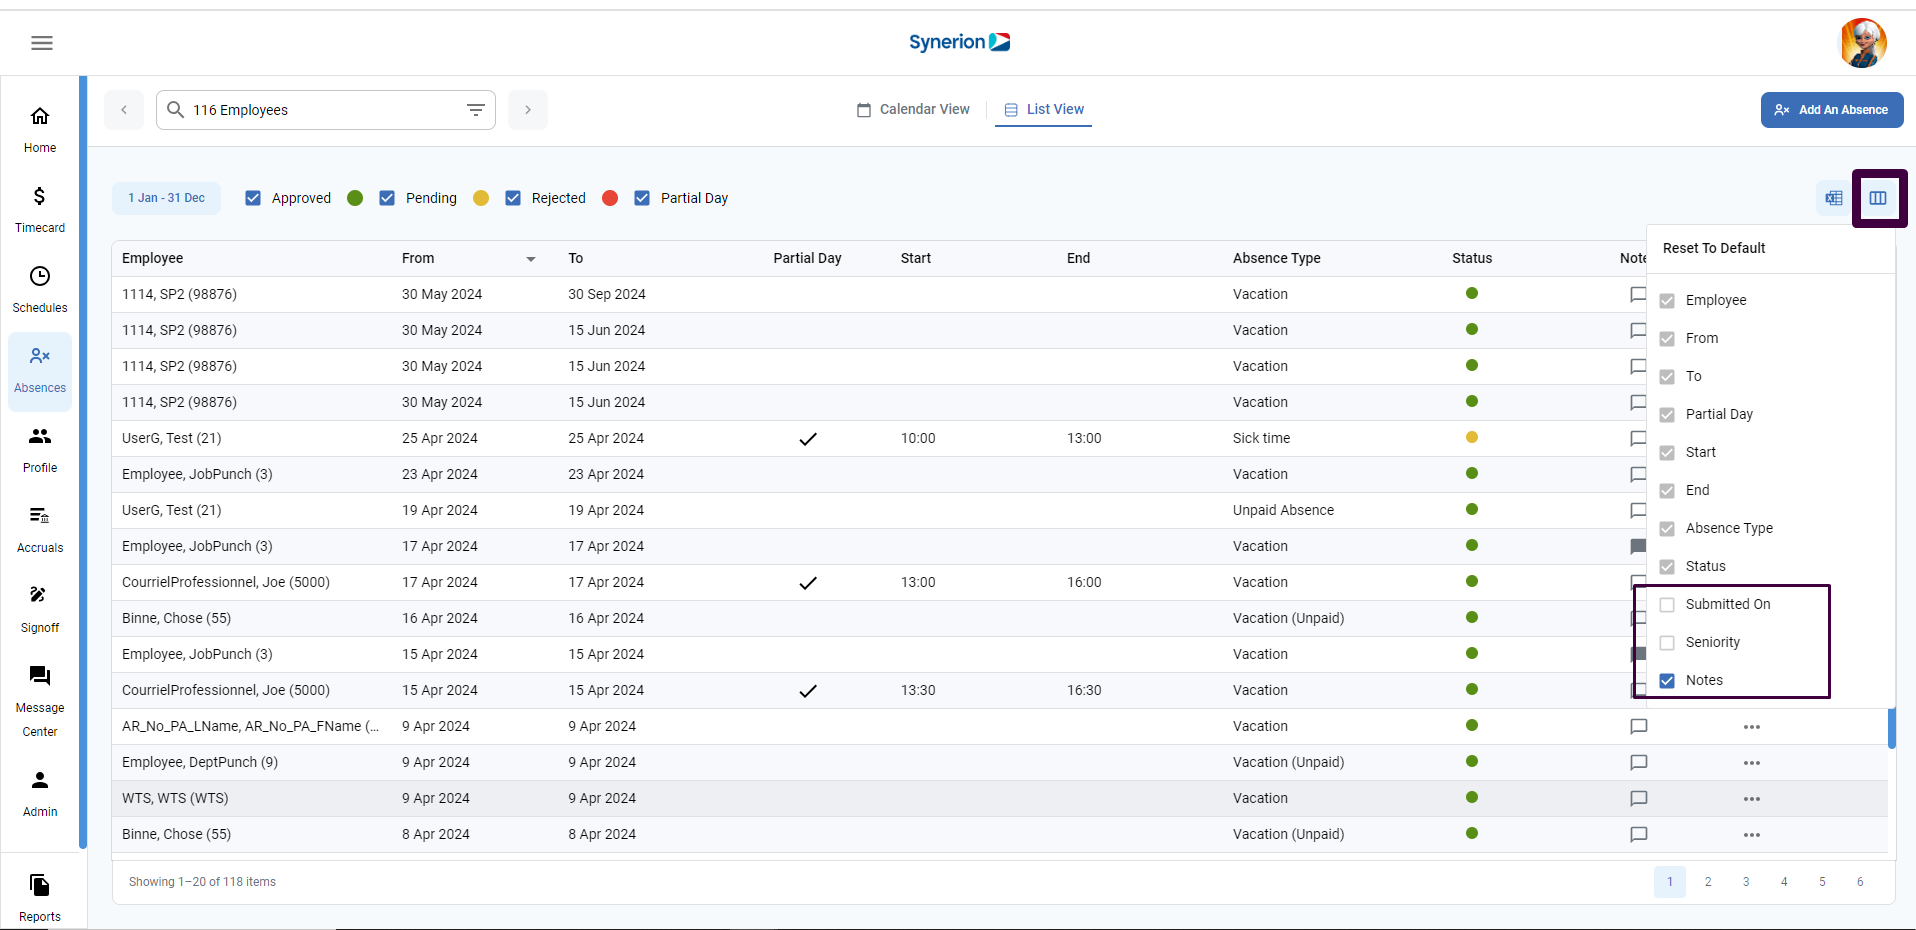
Columns – Submitted on, Seniortity, and Notes are optional and if user wishes not to view them in the grid, user can deselect these 3 columns by clicking on the reset icon (as highlighted in the below picture).
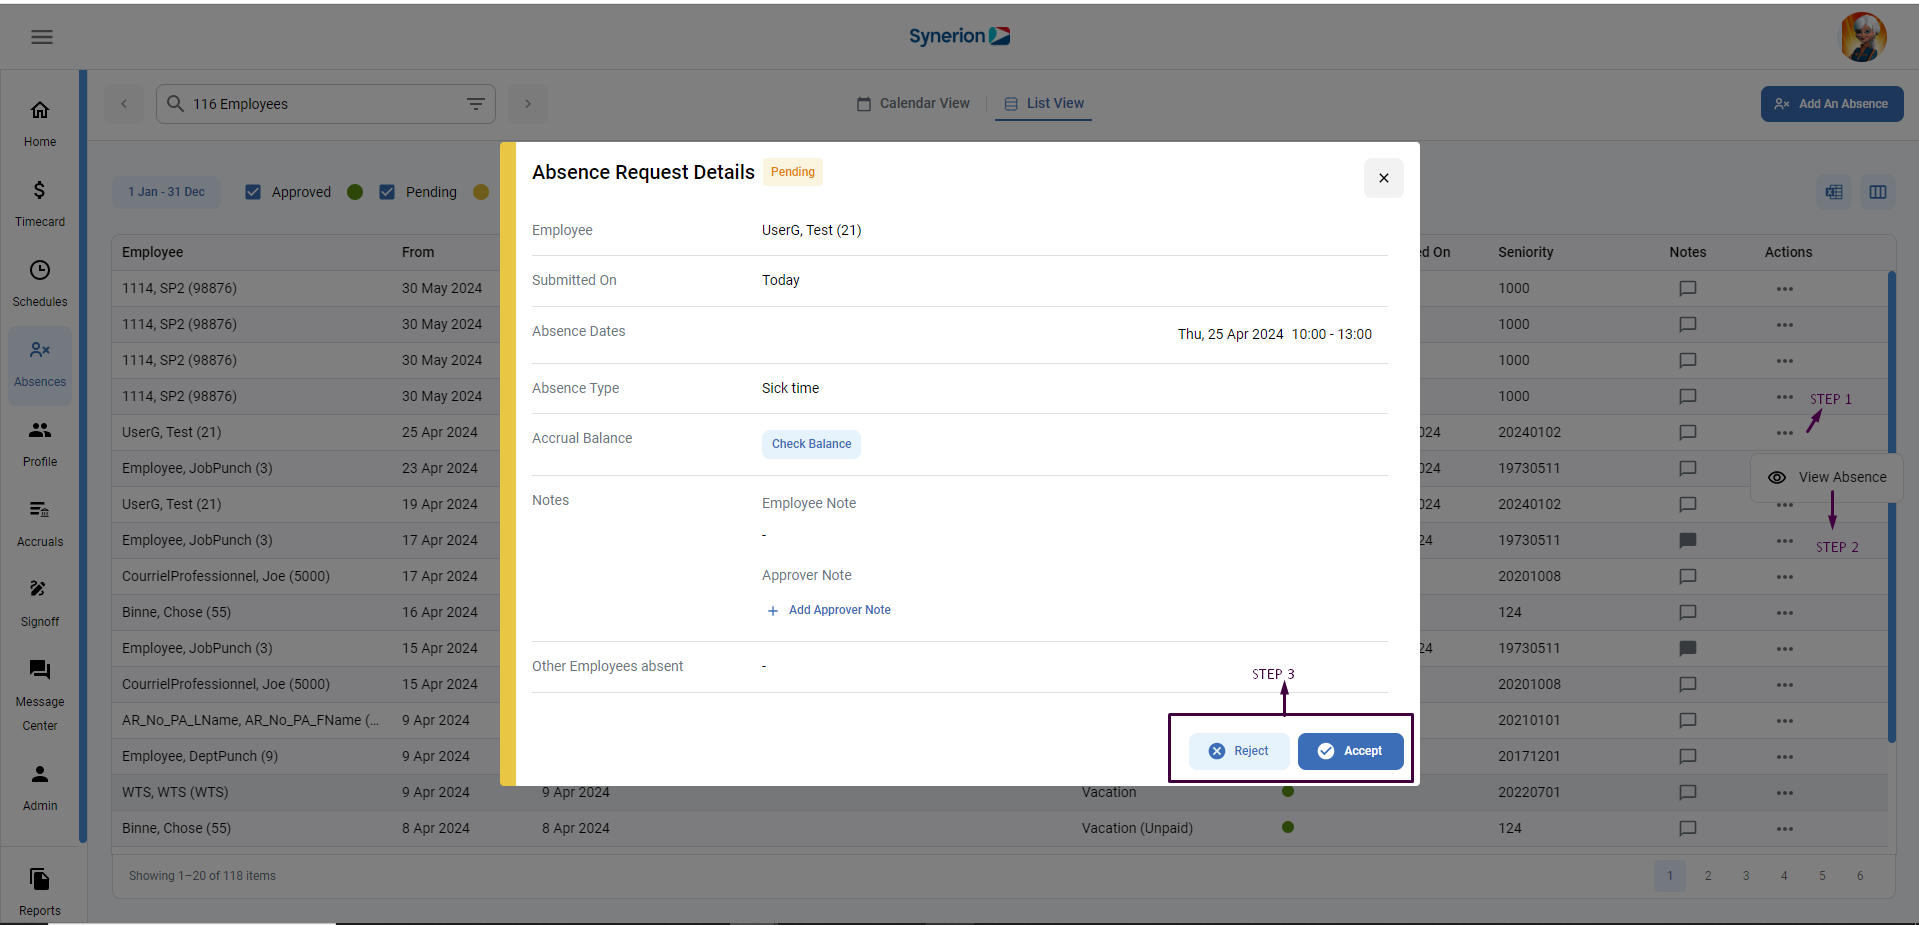
How to view the absence details?
There are two ways to view the absence details:
- By clicking anywhere in the row.
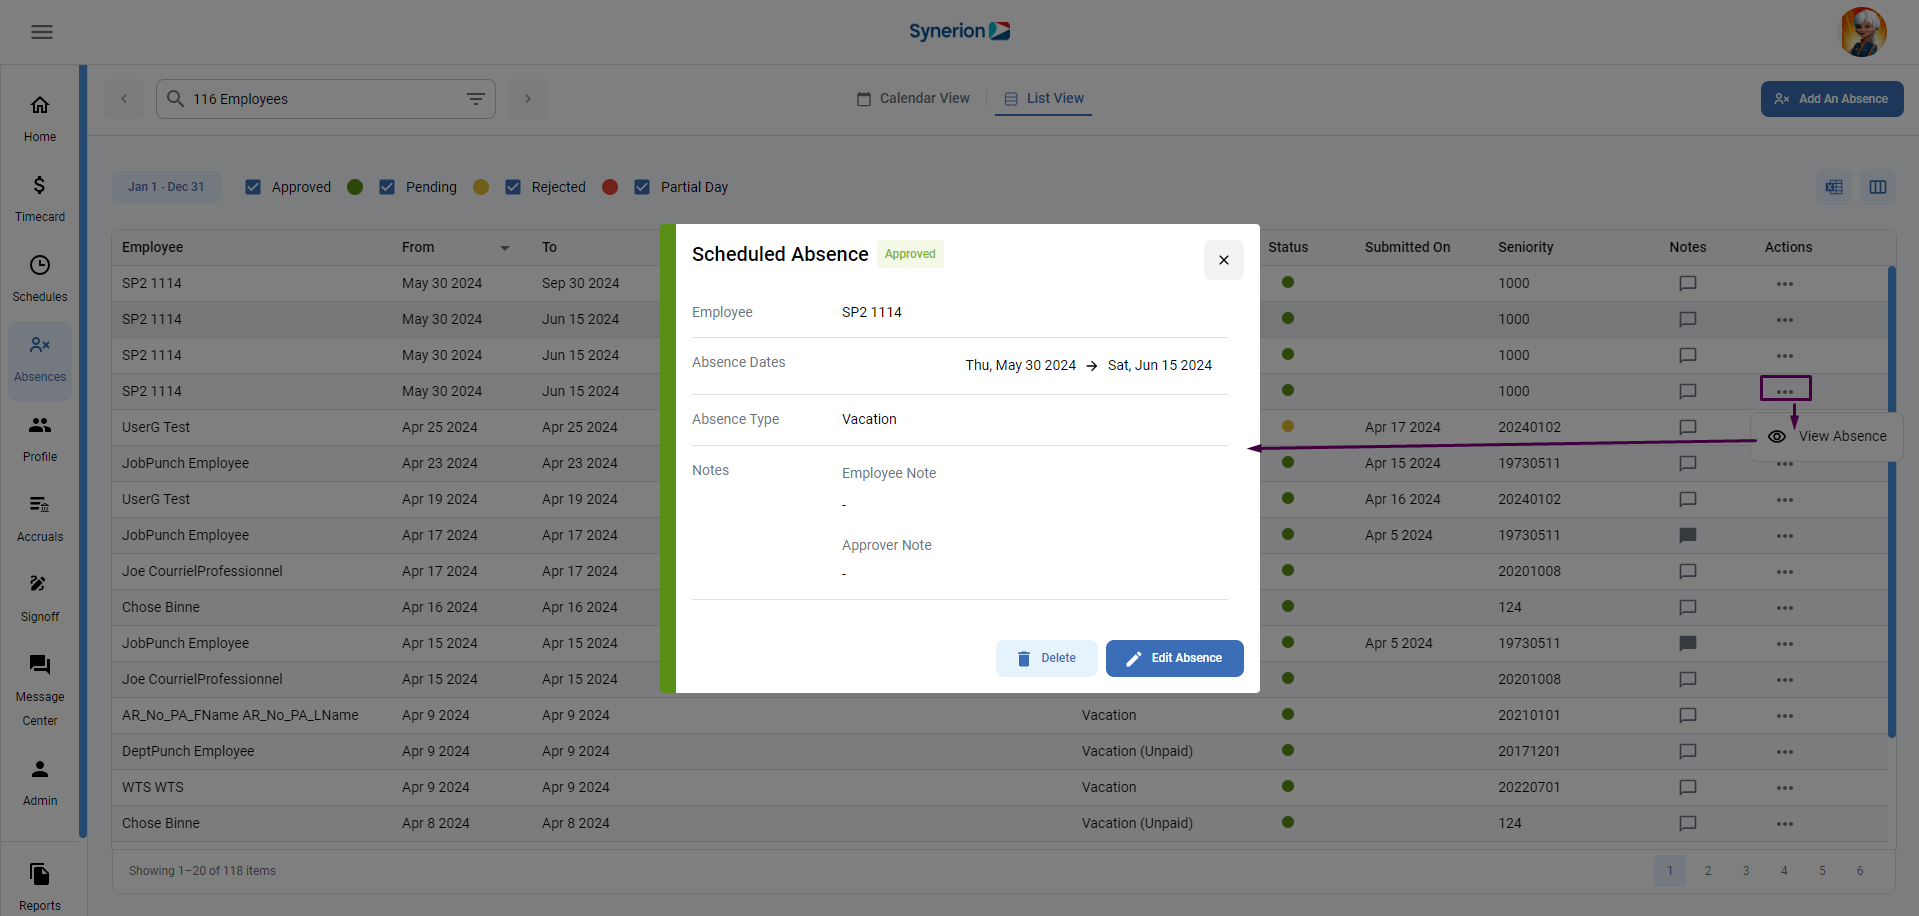
- Via “Actions”. Steps are as mentioned below:
- Click on 3 dots (…) icon under Actions column.
- Click on the view absence.
- It will open the dialog box with absence information (as shown in the screenshot)
How to approve/reject the absence in the list view?
When absence is in the list view, user can approve/reject the absence as below:
- Click on 3 dots (…) icon under Actions column.
- Click on “View Absence.”
- It will open the dialog box with absence information and buttons to “Reject” and “Approve” the absence.
Add an Absence:
Required permission: EmployeeSchedAbsence-Edit
System setting: ITRConstants.SP_AbsenceRequest_PartialAbsences_Enabled
If above system setting is enabled, partial absence is allowed.
On Absences page, Admin/Supervisor can add an absence by clicking on the button “Add An Absence.”
When user clicks on “Add An Absence”, it will open the side drawer where user can add the absence. User needs to:
- Check marks the partial day checkbox if absence is partial day. Else, leave it unchecked.
- From the employee filter, select the employee user wishes to add an absence.
- Select the from and to dates, i.e., absence start date and end date.
- When user clicks on the “Select Absence Type”, it will show the drop down with list of absence types. Select the absence type.
- If user wants to check the balance, user can click on the “Check Balance” button which will display the balance of absences.
- To save the absence, click on the “Save” button.

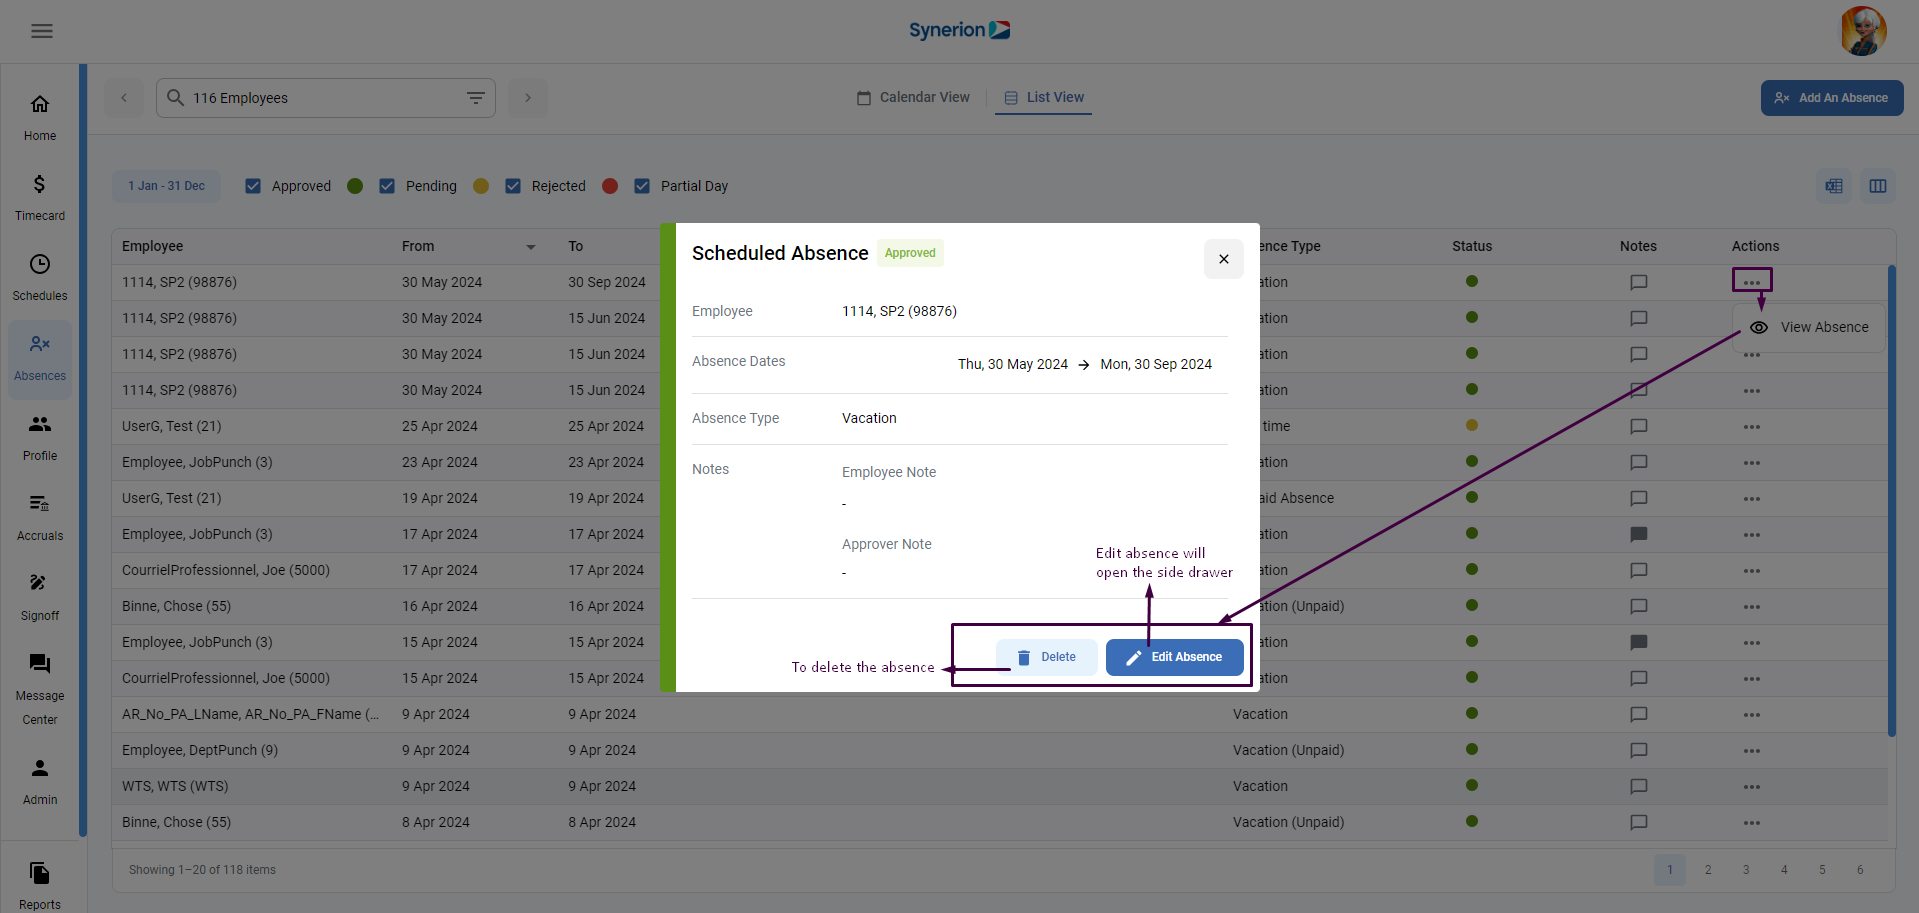
Edit or delete the absence:
User can edit or delete the absence that are added by Admin/Supervisor. Below are the steps to edit/delete the absence:
- Click on 3 dots (…) icon under Actions column.
- Click on the view absence.
- It will open the dialog box with absence information and buttons to “Delete” and “Edit Absence” the absence.
- If user clicks on Delete, it will delete show the delete confirmation dialog. To delete, user can click on delete or to cancel the action, user can click on Cancel appearing on the confirmation dialog.
- If user clicks on the “Edit Absence”, it will open the side drawer where user can update the absence information as needed. User can edit the from/to, date range, absence type, change full shift absence to partial absence and vice versa.
NOTE: User will not be able to add/edit/delete a scheduled absence if date is overlapping with system lock date. If user tries to do so, it will show an error message.
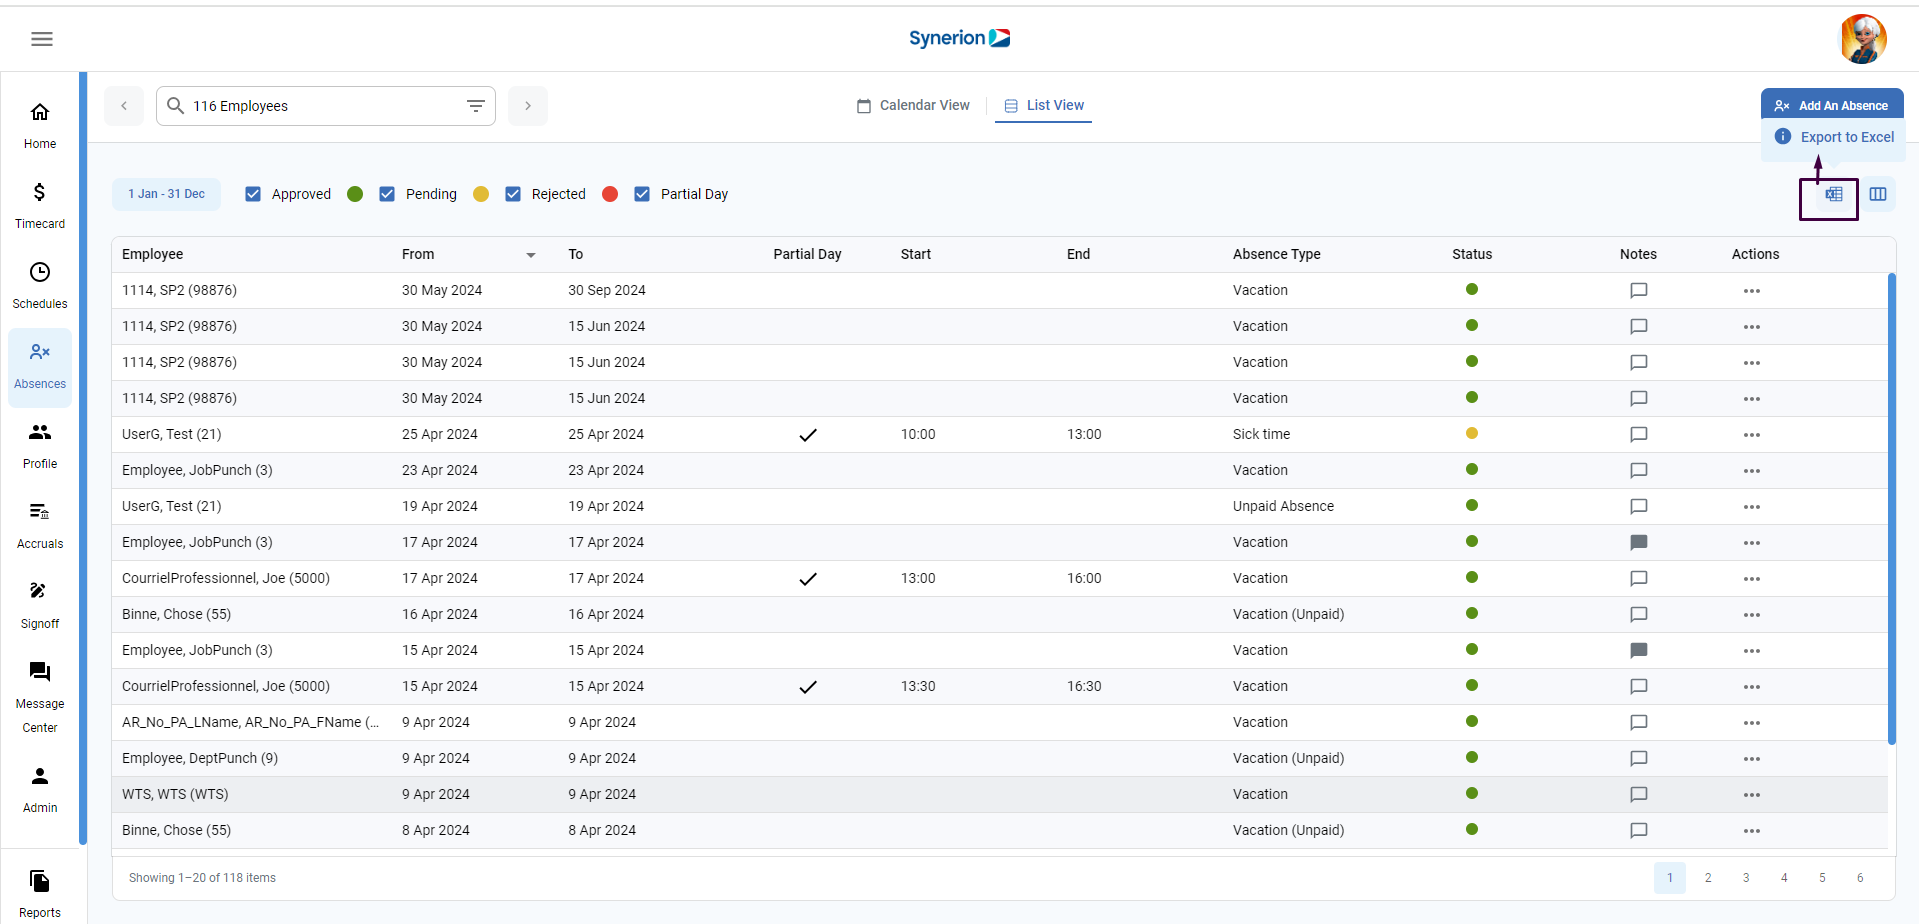
Export Absence list view to excel:
To export the absence list view to excel, user can click on the export icon (as shown in the below picture). Clicking on the icon will download the excel format sheet of absence list view.