
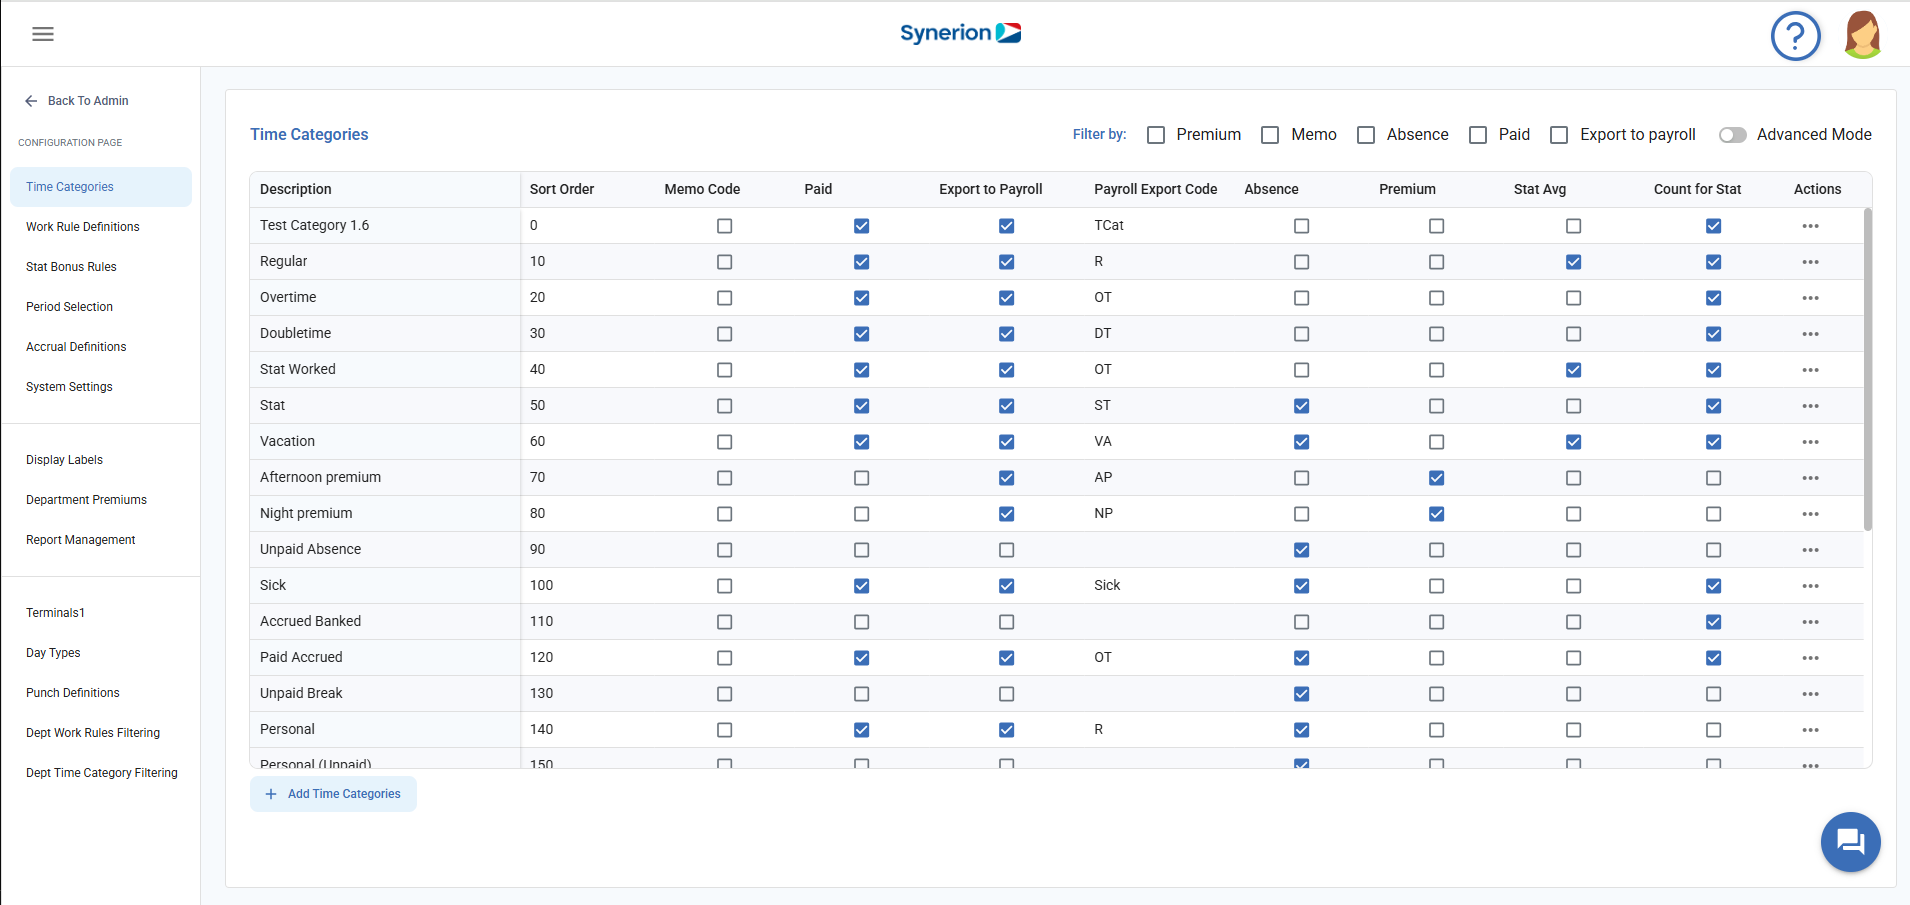
This page provides a configurable interface for managing and categorizing various types of employee time entries. Each time category, such as “Paid Accrued,” “Unpaid Break,” “Vacation (Unpaid),” or “Commute Expense,” includes attributes like:
- Sort order
- Flags to indicate if the time is Paid, a Memo, counts as an Absence, or qualifies as a Premium
- Options to Export to Payroll, assign a Payroll Export Code, and include in Stat Averages
Admin can easily add a new time category and edit or delete entries. User can also view the data based on the filter by checkboxes. It checks for And condition.
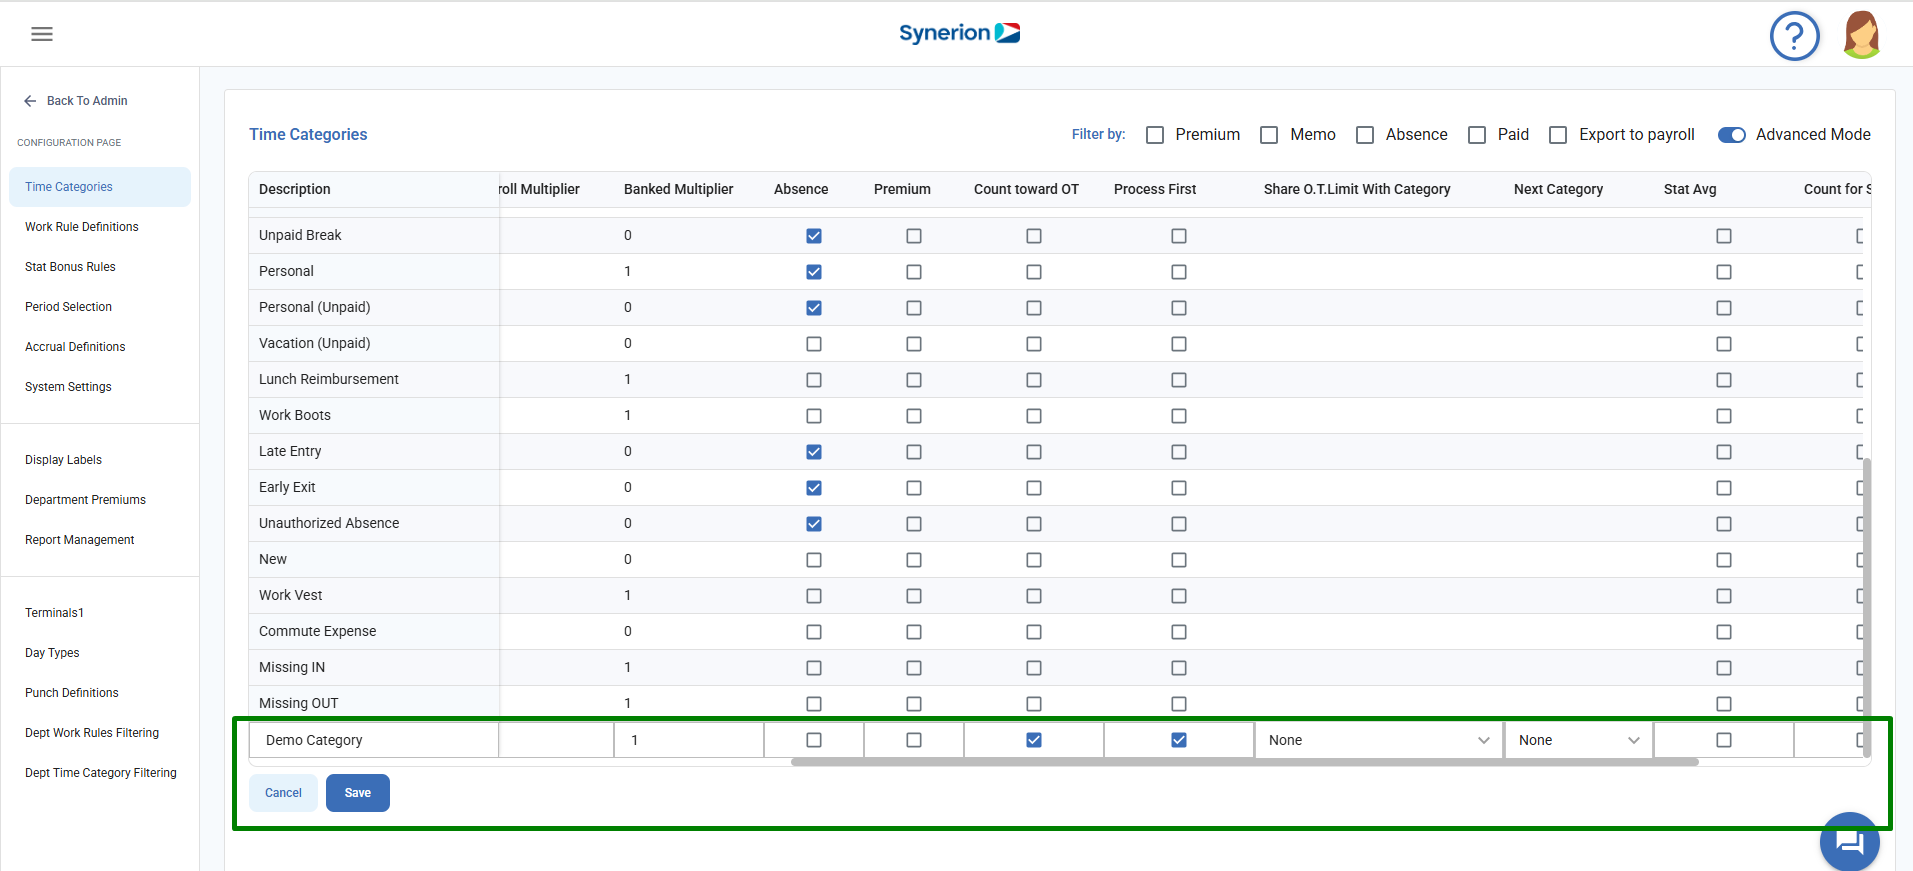
Advanced Options toggle
To view more advanced options, user can turn on the toggle “Advanced Mode”. Advanced Mode include Export with Payroll Multiplier, Payroll Multiplier, Banked Multiplier, Count toward OT, Process First, Share OT limit with category, Next category, and Accrue stat.
Add Time Categories
Follow the below steps to add time categories:
- Click on Admin menu on left-side dashboard
- Navigate to the Time Categories option under Configuration menu.
- Click on button “+ Add Time Categories”
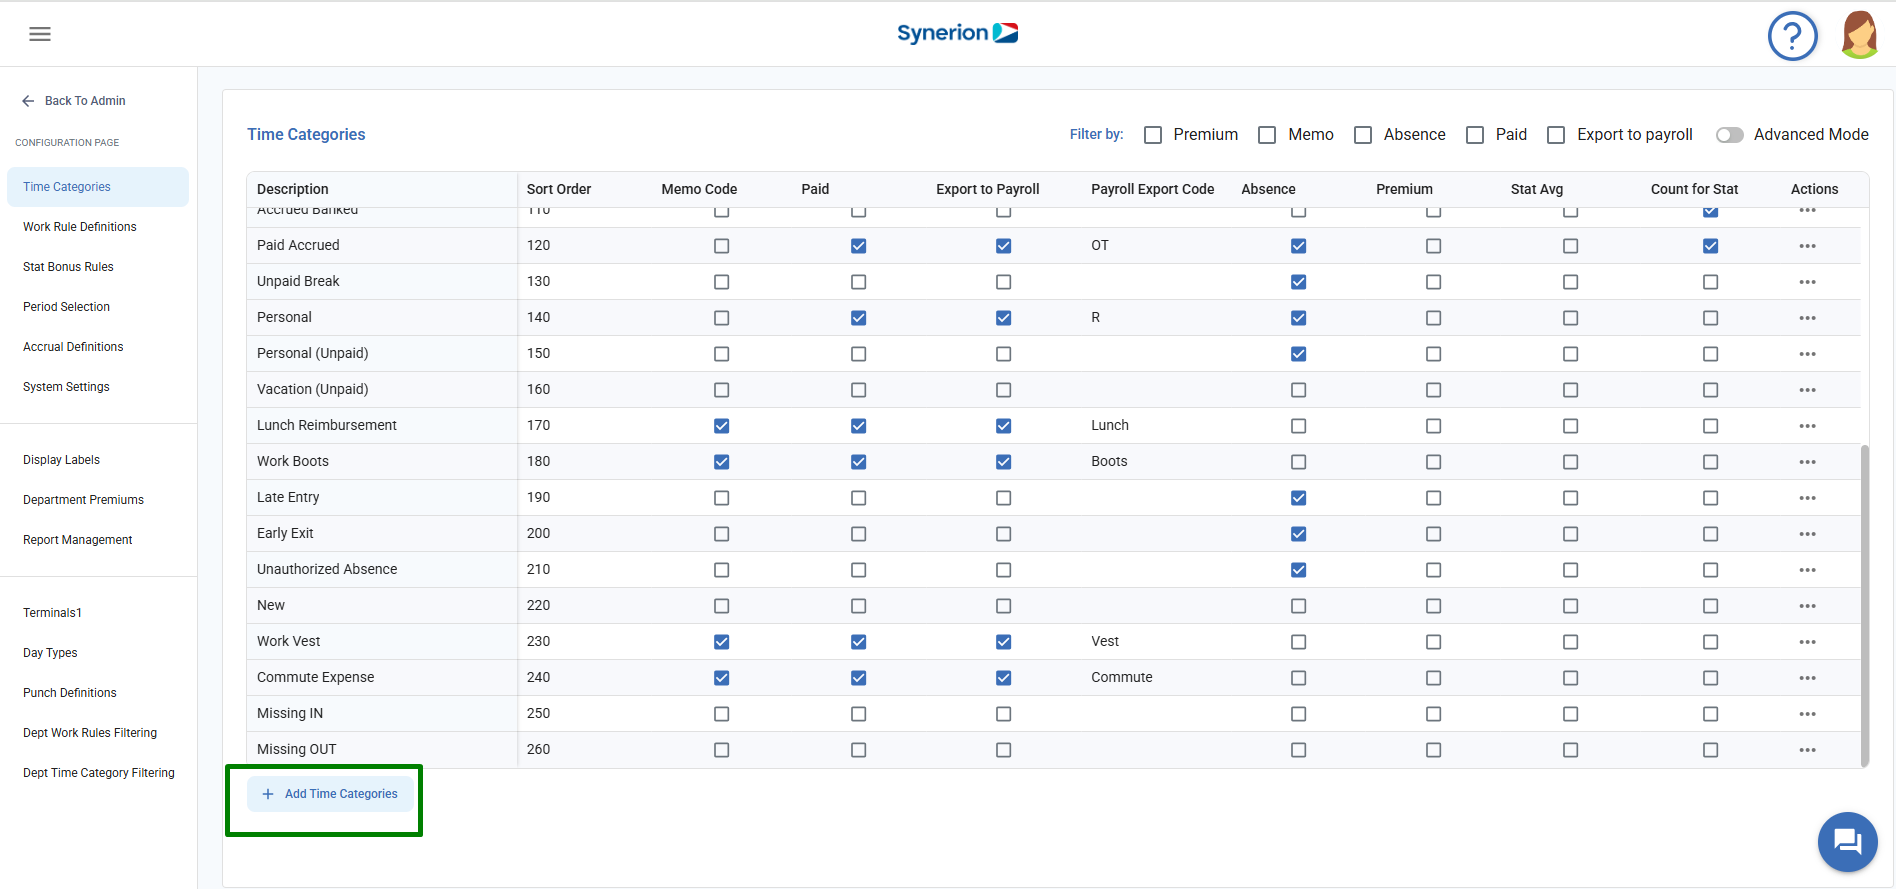
4. It will show an active column at the end of the existing list of time categories.
5. Enter the required fields (description, sort order) and optional fields can be left blank.
6. Click on “Save” . Once it is saved successfully, it will show the success toast message and update the grid with newly added time category.

NOTE:
- Description and Sort order must be unique and are required fields.
- If Export to Payroll is checked, user must have provided the Payroll Export code. Otherwise, it will throw an error.
- User can turn the toggle “Advanced Mode” on if user wants to add other advanced information.
- Payroll Multiplier and Banked Multiplier will be set to 1 by-default.
- Share OT Limit with Category and Next category will be defaulted to None. However, user can select other options from the drop-down menu.
Edit Time Category
Follow the below steps to edit time categories:
- Click on Admin menu on left-side dashboard
- Navigate to the Time Categories option under Configuration menu.
- Click on 3 dot(…) icon for the category user wants to edit.
- Click on “Edit” option
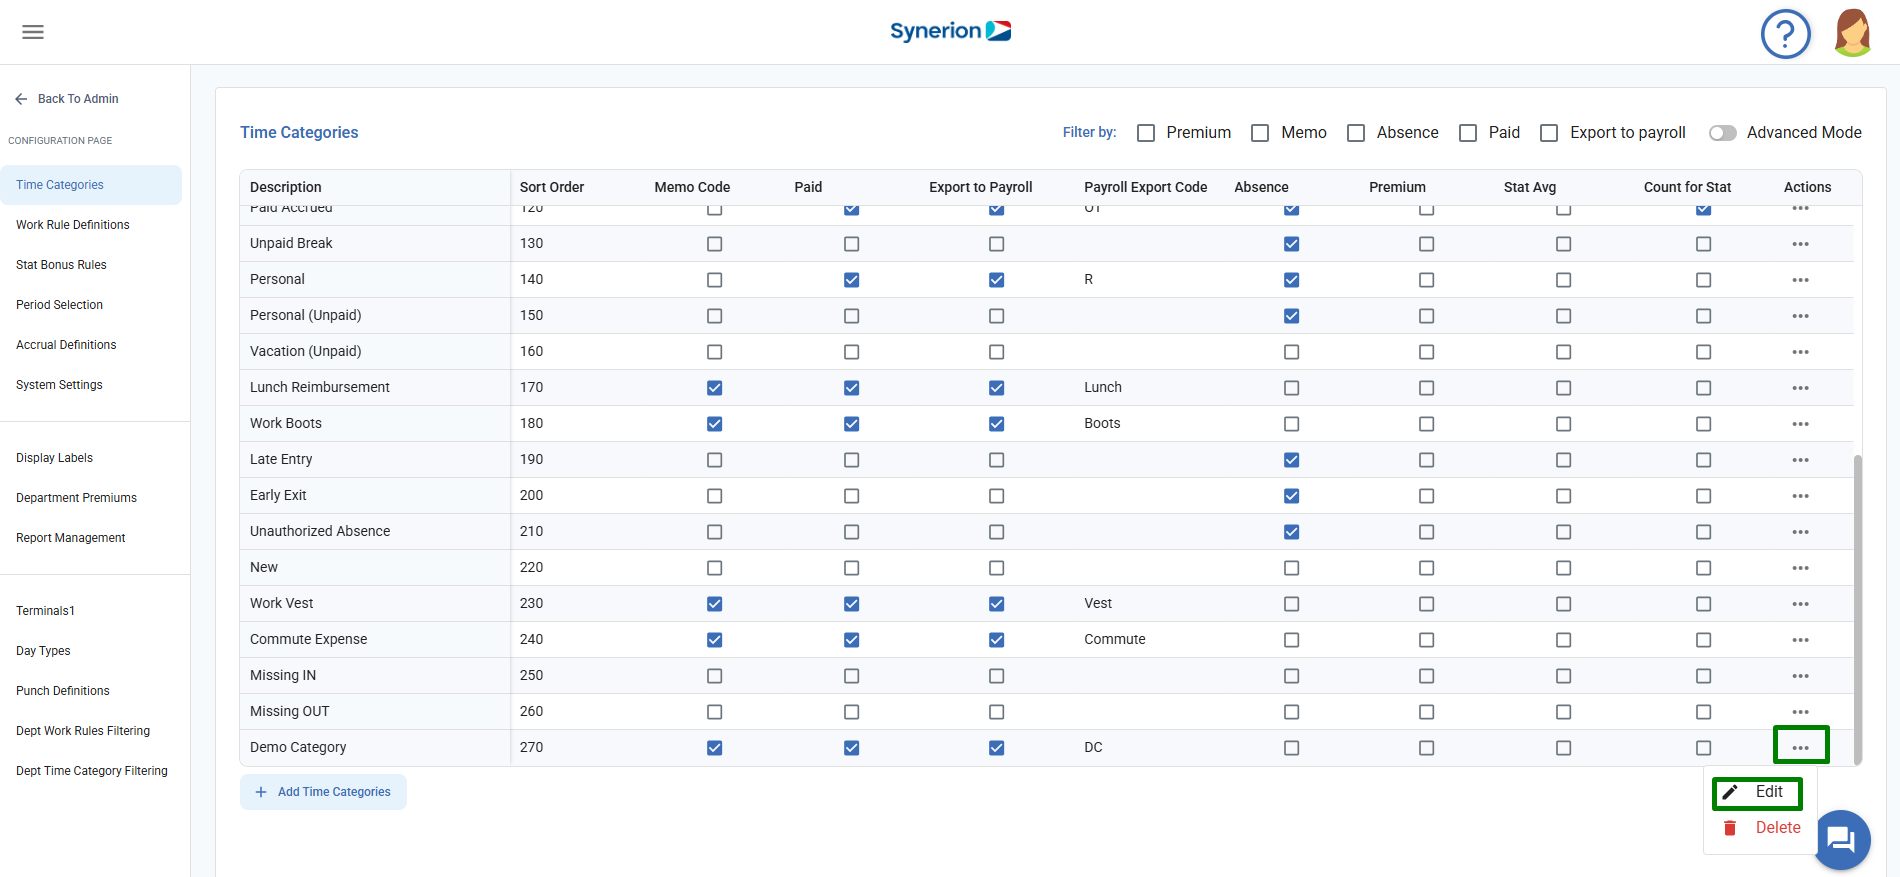
5. Update the information or select/unselect the check boxes.
6. Click on “Save” . Once it is saved successfully, it will show the success toast message and update the grid with newly updated time category.
NOTE:
- Description and Sort order must be unique and are required fields.
- If Export to Payroll is checked, user must have provided the Payroll Export code. Otherwise, it will throw an error.
- User can turn the toggle “Advanced Mode” on if user wants to add other advanced information.
- Payroll Multiplier and Banked Multiplier will be set to 1 by-default.
- Share OT Limit with Category and Next category will be defaulted to None. However, user can select other options from the drop-down menu.
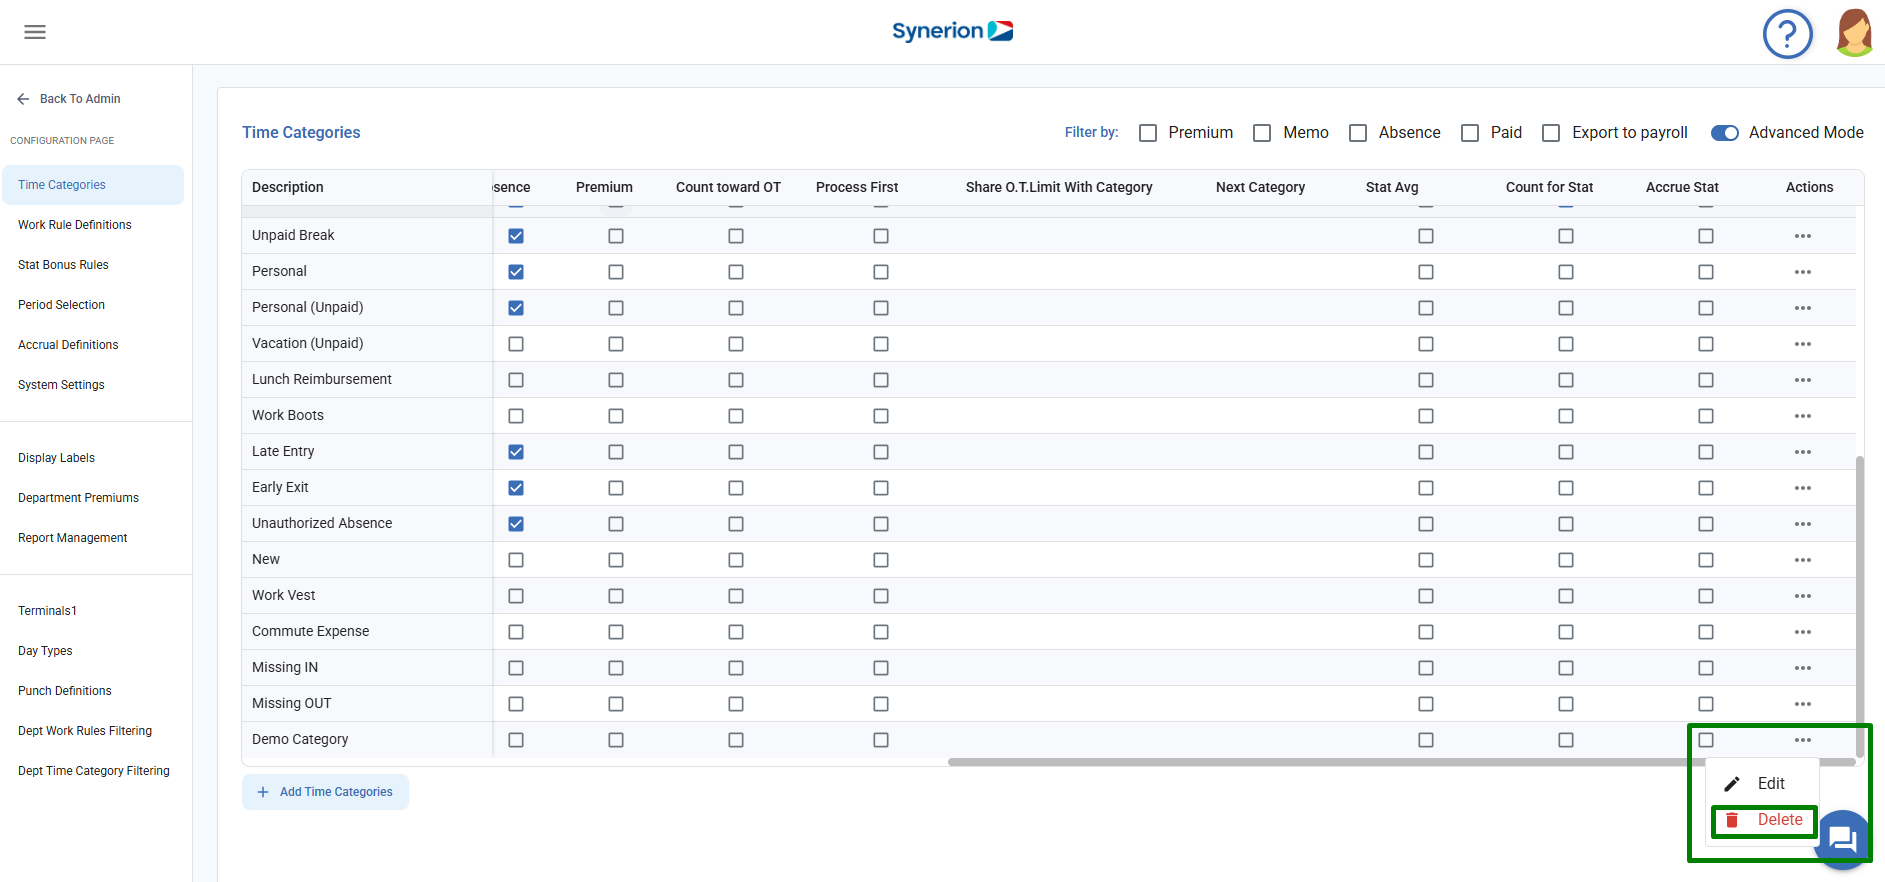
Delete Time Category
Follow the below steps to delete time categories:
- Click on Admin menu on left-side dashboard
- Navigate to the Time Categories option under Configuration menu.
- Click on 3 dot(…) icon for the category user wants to edit.
- Click on “Delete” option

- Click on “Delete” appearing on the delete confirmation dialog.
- Once it is deleted, it will show the success toast message and update the grid.
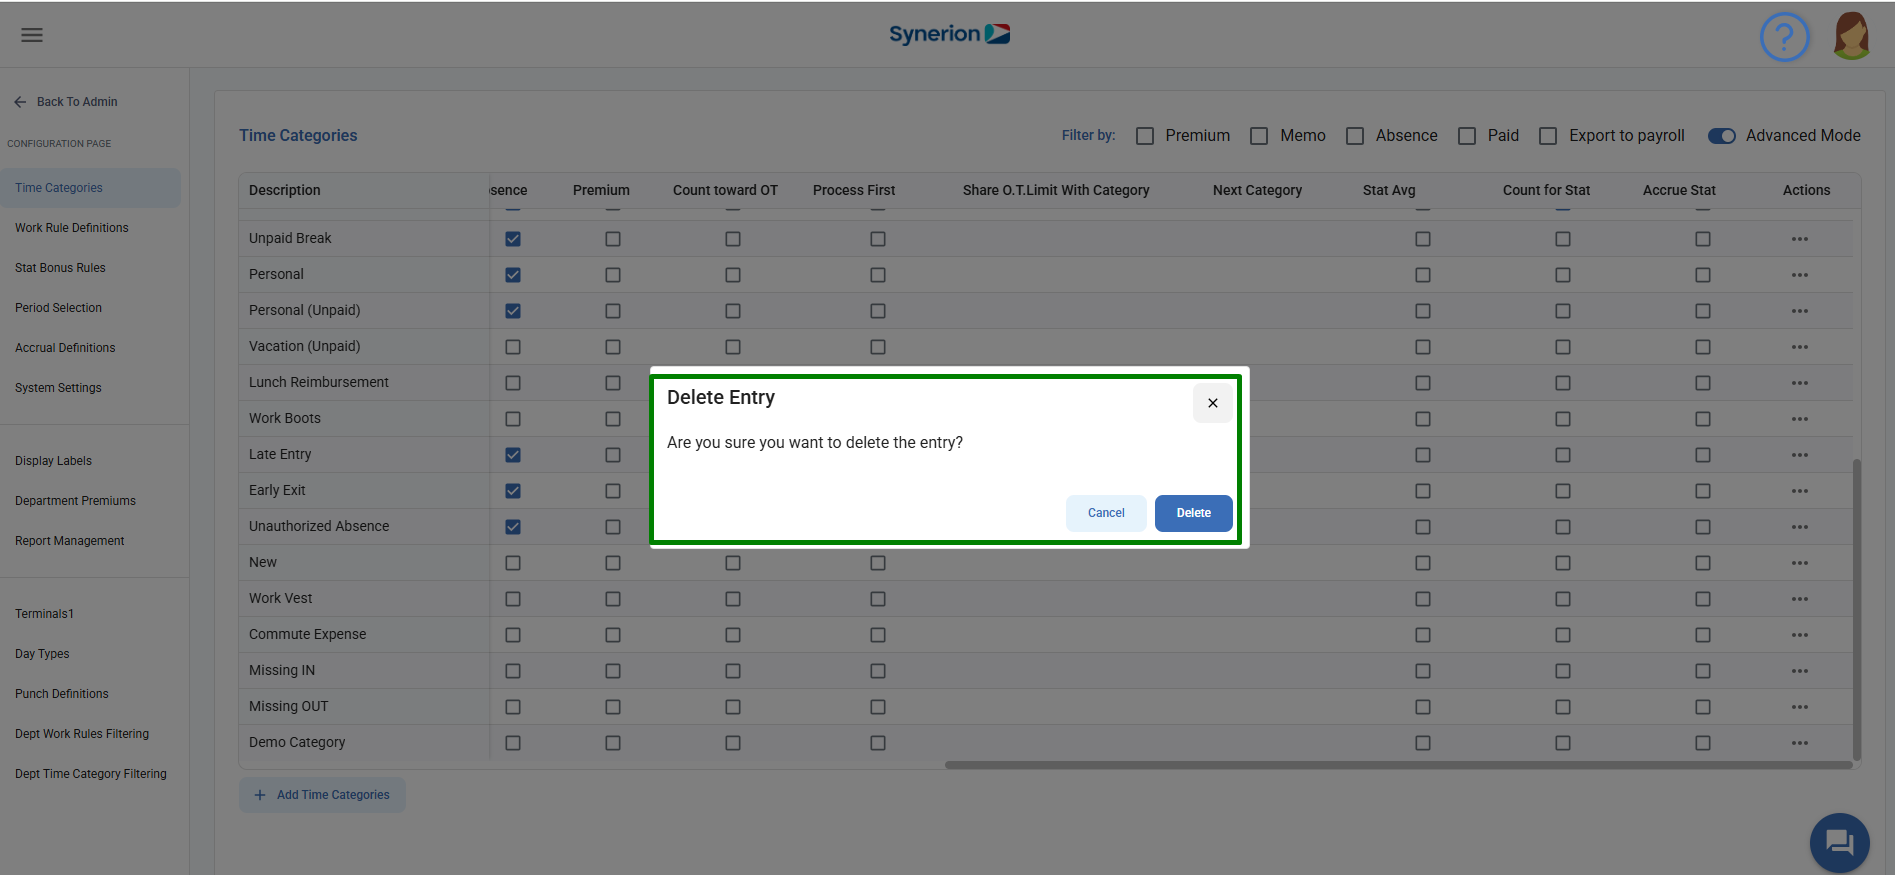
NOTE: Users cannot delete a time category that is currently being used by the system.