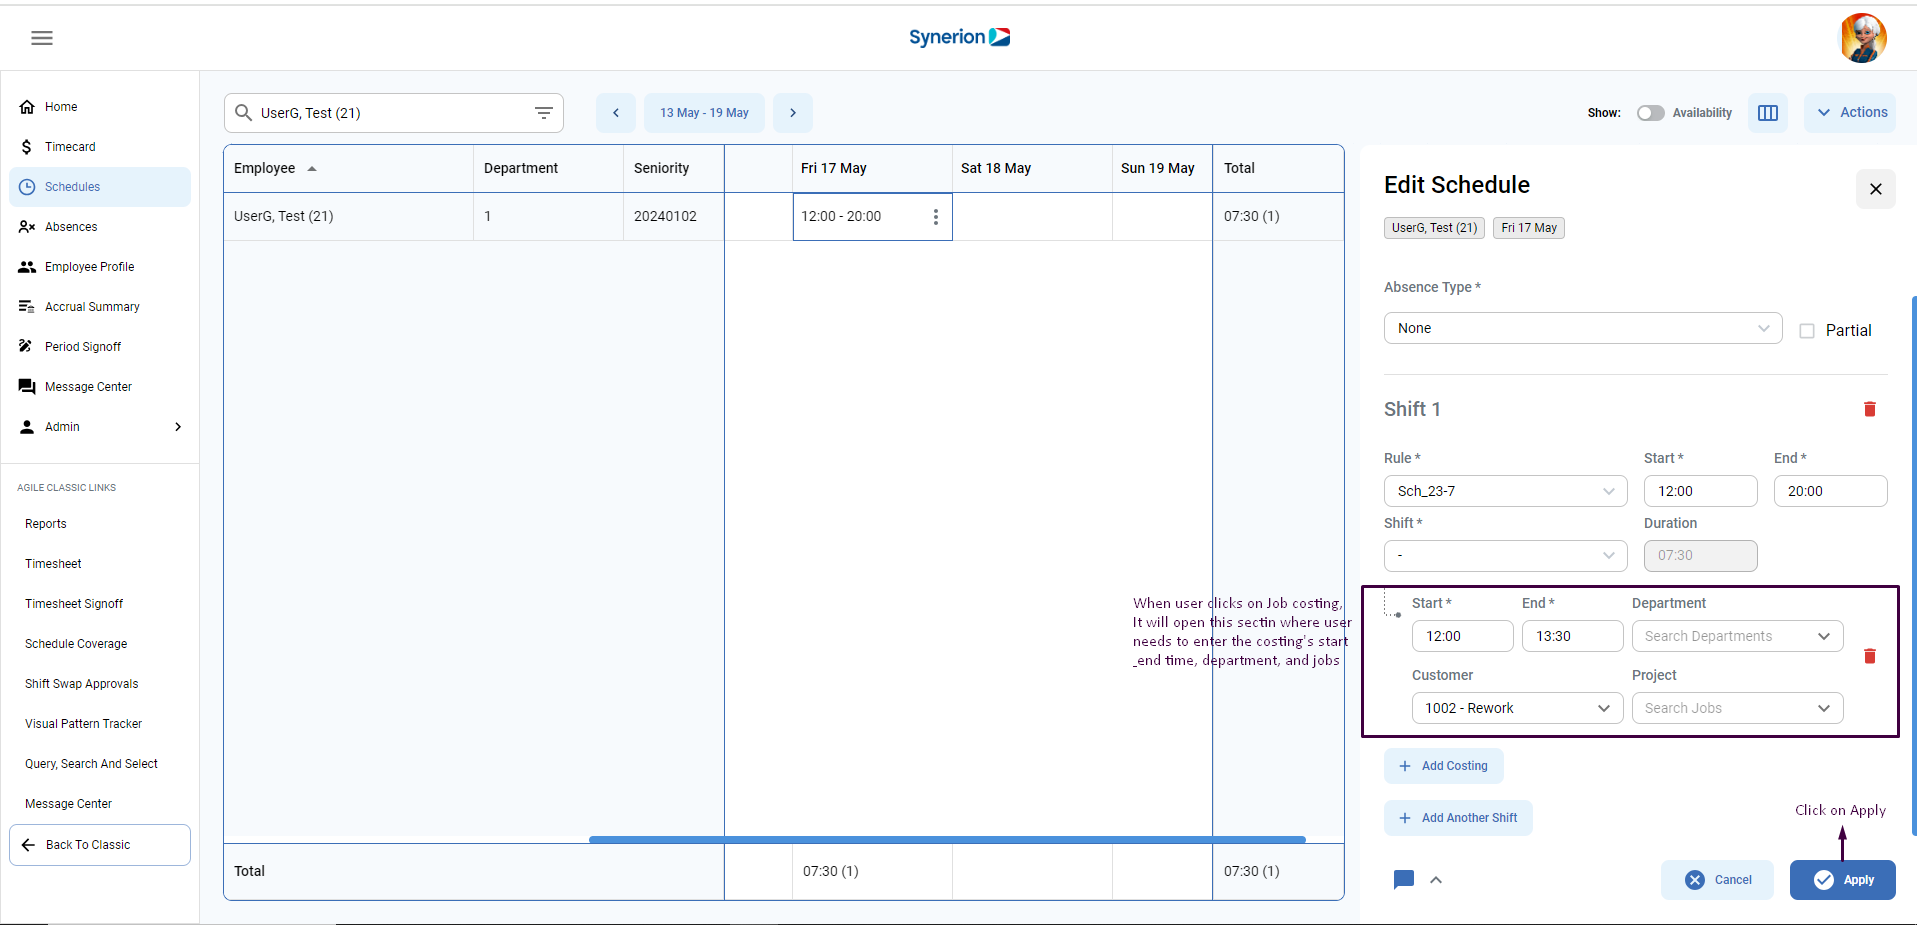
- Employees can be scheduled with costing data ahead of time, in order to allocate their worked time to a specific department or job
To add the job costing, user can do this via side drawer:
- Click in the cell
- Click on the context menu (…)
- Click on the Edit Schedule
- Click on “+Add Costing” (Note: if there is no existing schedule, user needs to add the schedule prior to adding the job costing)
- User needs to enter the start and end time.
- User needs to specify at least one job level.
- If user do not specify any department, it will pick the user’s default department.
- Click on “Apply” once job costing is added.
Refer to below Screenshot 1 and Screenshot 2
Screenshot 1
Screenshot 2
How to view the added scheduled job or department (SSLA)?
When SSLA is added to the schedule, user can view it by hovering over the SSLA icon appearing in the schedule cell. It will show it as a tooltip. Other way to view the job costing is via side drawer. Click on 3 dots (…) > Edit Schedule, a side drawer will open, and user can see the job costing in the side drawer. (refer to below screenshot)


