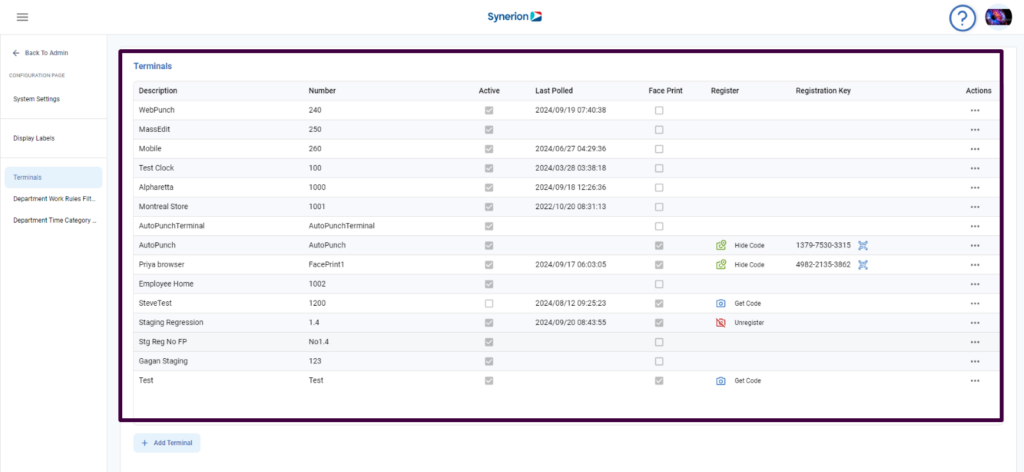
Terminals feature allow user to view, add, or edit terminals defined in the system.
On Terminals page, user can view
- Terminal description
- Number
- State (as an active/inactive)
- Last polled
- Face print
- Register
- Registration key
- Under Actions, Edit and Delete the terminal options
- Add terminal button

NOTE:
- Unlike Legacy, Bolt does not show Timezone and Source columns on Terminals page.
- All columns are sortable.
- Columns – Face Print, Register, and Register key will only be visible if faceprint is licensed and “FacePrint.Enabled” system setting is set to “yes”
Add Terminal
To add terminal,
- Click on Admin icon
- Click on “Configuration page” option available under Admin menu
- Click on “Terminals” option under configuration page menu
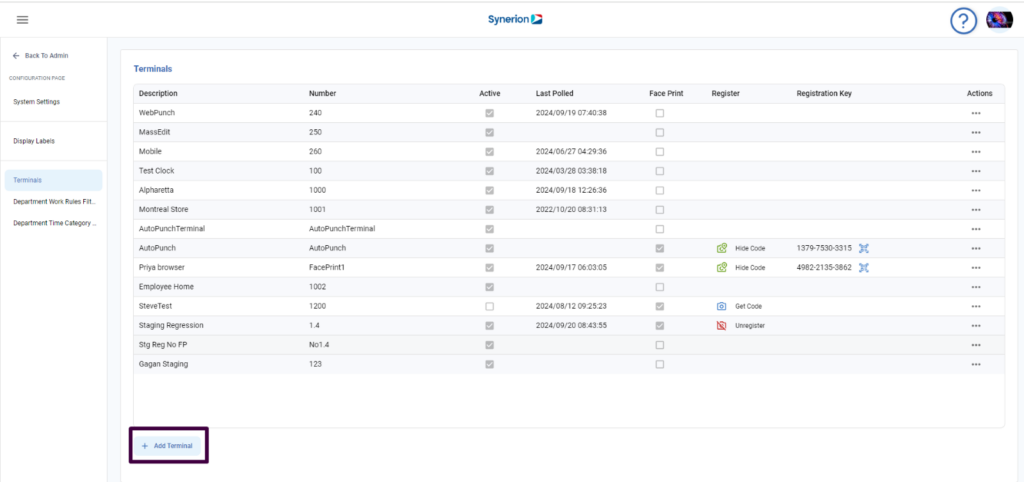
- Click on button “+ Add Terminal”

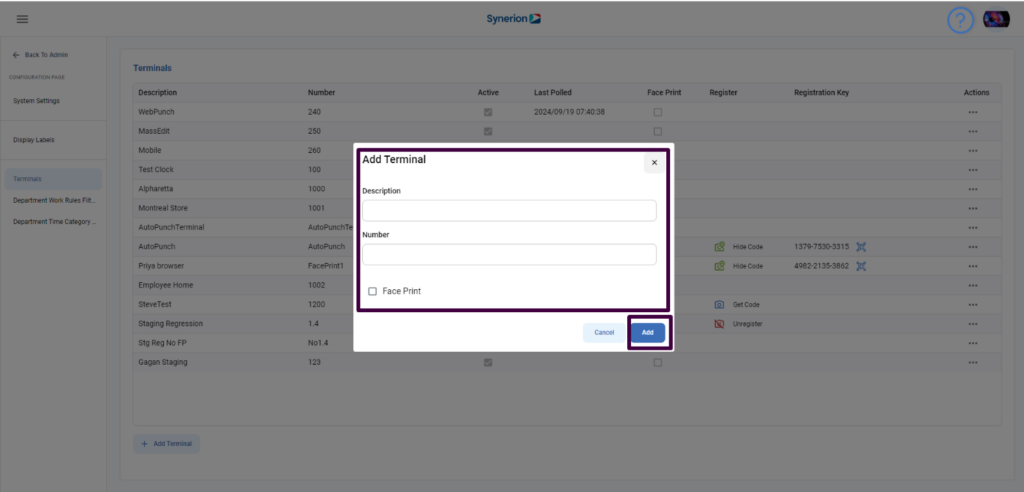
- It will open a Add Terminal dialog box

- Enter Description and Number (Both are mandatory fields)
- Selecting the face print checkbox is optional. Select only if user wants to enable the face print.
- Click on “Save”
- It will show a success toast message and refresh the grid with newly added terminal. It shows the terminal as active by-default.
NOTE:
- Terminal number should be unique.
- User cannot provide spaces in the terminal number
- Terminal name can be duplicated
- On Add Terminal pop up, Face print checkbox will be hidden if user has no face print licensed and “FacePrint.Enabled” system setting is set to “No”
Edit Terminal
User can edit existing terminals’ name, number, state active/inactive, and enable or disable the face print. To edit a terminal,
- Click on Admin icon
- Click on “Configuration page” option available under Admin menu
- Click on “Terminals” option under configuration page menu
- Under Actions column, click on 3-dots icon(…) for a terminal user wants to edit
- Click on “Edit” option
- A “Edit Terminal” dialog will pop up. User can edit the description, number, can select/unselect the Is Active and Face print checkboxes
- Once edits are done, click on “Save”
- It will show a success toast message and refresh the grid with updated info
NOTE:
- Terminal number should be unique.
- User cannot provide spaces in the terminal number
- Terminal name can be duplicated
- On Edit Terminal pop up, Face print checkbox will be hidden if user has no face print licensed and “FacePrint.Enabled” system setting is set to “No”
Delete Terminal
To delete a terminal,
- Click on Admin icon
- Click on “Configuration page” option available under Admin menu
- Click on “Terminals” option under configuration page menu
- Under Actions column, click on 3-dots icon(…) for a terminal user wants to delete
- Click on “Delete” option
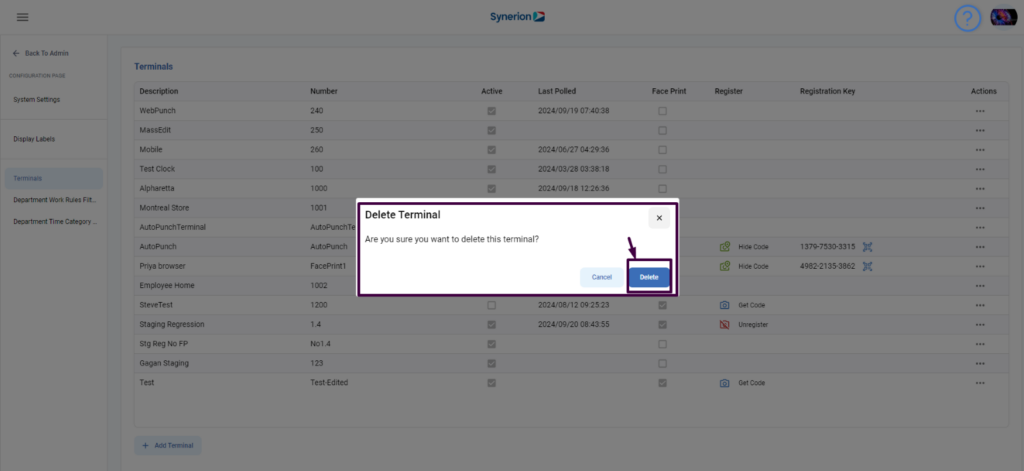
- It will show the confirmation dialog

- Click on “Delete” to delete the terminal
- It will show success toast message and refresh the terminal grid and will remove the deleted terminal from the list.
NOTE: If user tries to delete a terminal that is currently being used, it will throw an error message “The selected item is in use by the system and cannot be deleted” and will not delete in-use terminal.
