Payroll Export feature allows Admin users to export data for one or multiple employees across various pay periods. Exports can be performed on different configured payroll providers.
Before initiating an export, the system performs several validations including:
- Ensuring all required signoffs (Daily/Period) are completed.
- Timesheet signoff errors.
- Confirming there is no overlap with the system lock date.
Once the export is successfully completed, the system lock date is updated to the last day of the exported period.
How to Export a Payroll
To export a payroll, follow the below steps:
Step 1: Select Pay Period Range
- Use the Pay Period dropdown to choose a pay period.
- The dropdown displays the current pay period and two previous periods. By default, previous pay period is selected.
- If user wants to select the start and end date manually, user must enable the system setting- OverridePeriodDates.
Step 2: Select Employees
- User can select one or more employees, select employees from departments or Teams or both.
Step 3: Select Payroll Settings
- Select a Period Group from the drop-down. By-default, it will show the period group having a greater number of employees.
- Select a Payroll Configuration from the drop-down (or proceed with the default).
Step 4: Payroll File section
- User can view the
- Selected Payroll Provider
- Total number of employees included in the export
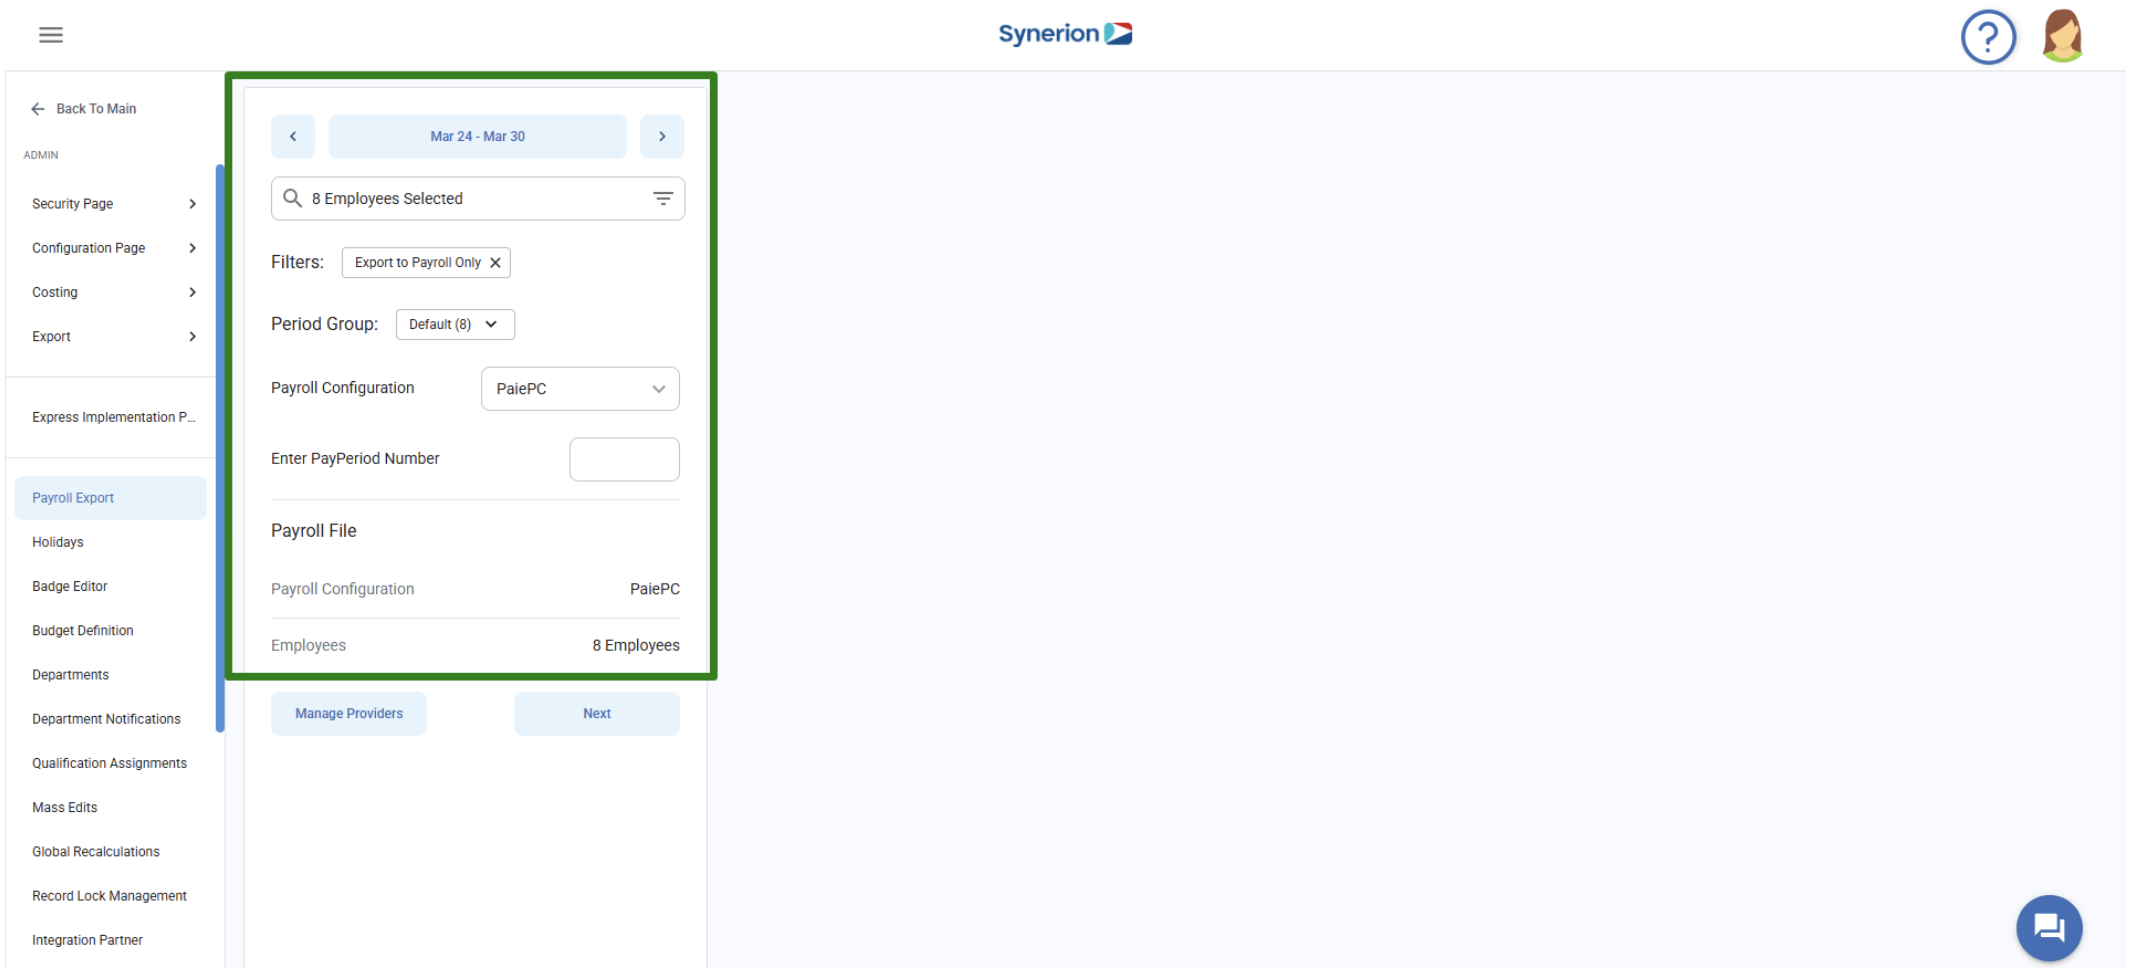
Step 5: Proceed to “Next”
NOTE: Before, clicking on Next, review the selected information. As on payroll export page, these fields will be locked. To edit, user must click on “Start Over”.
- Click on “Next” to move to the export the payroll.
- Here, you can only view (not edit):
- Employee Number
- Period Group
- Payroll Provider
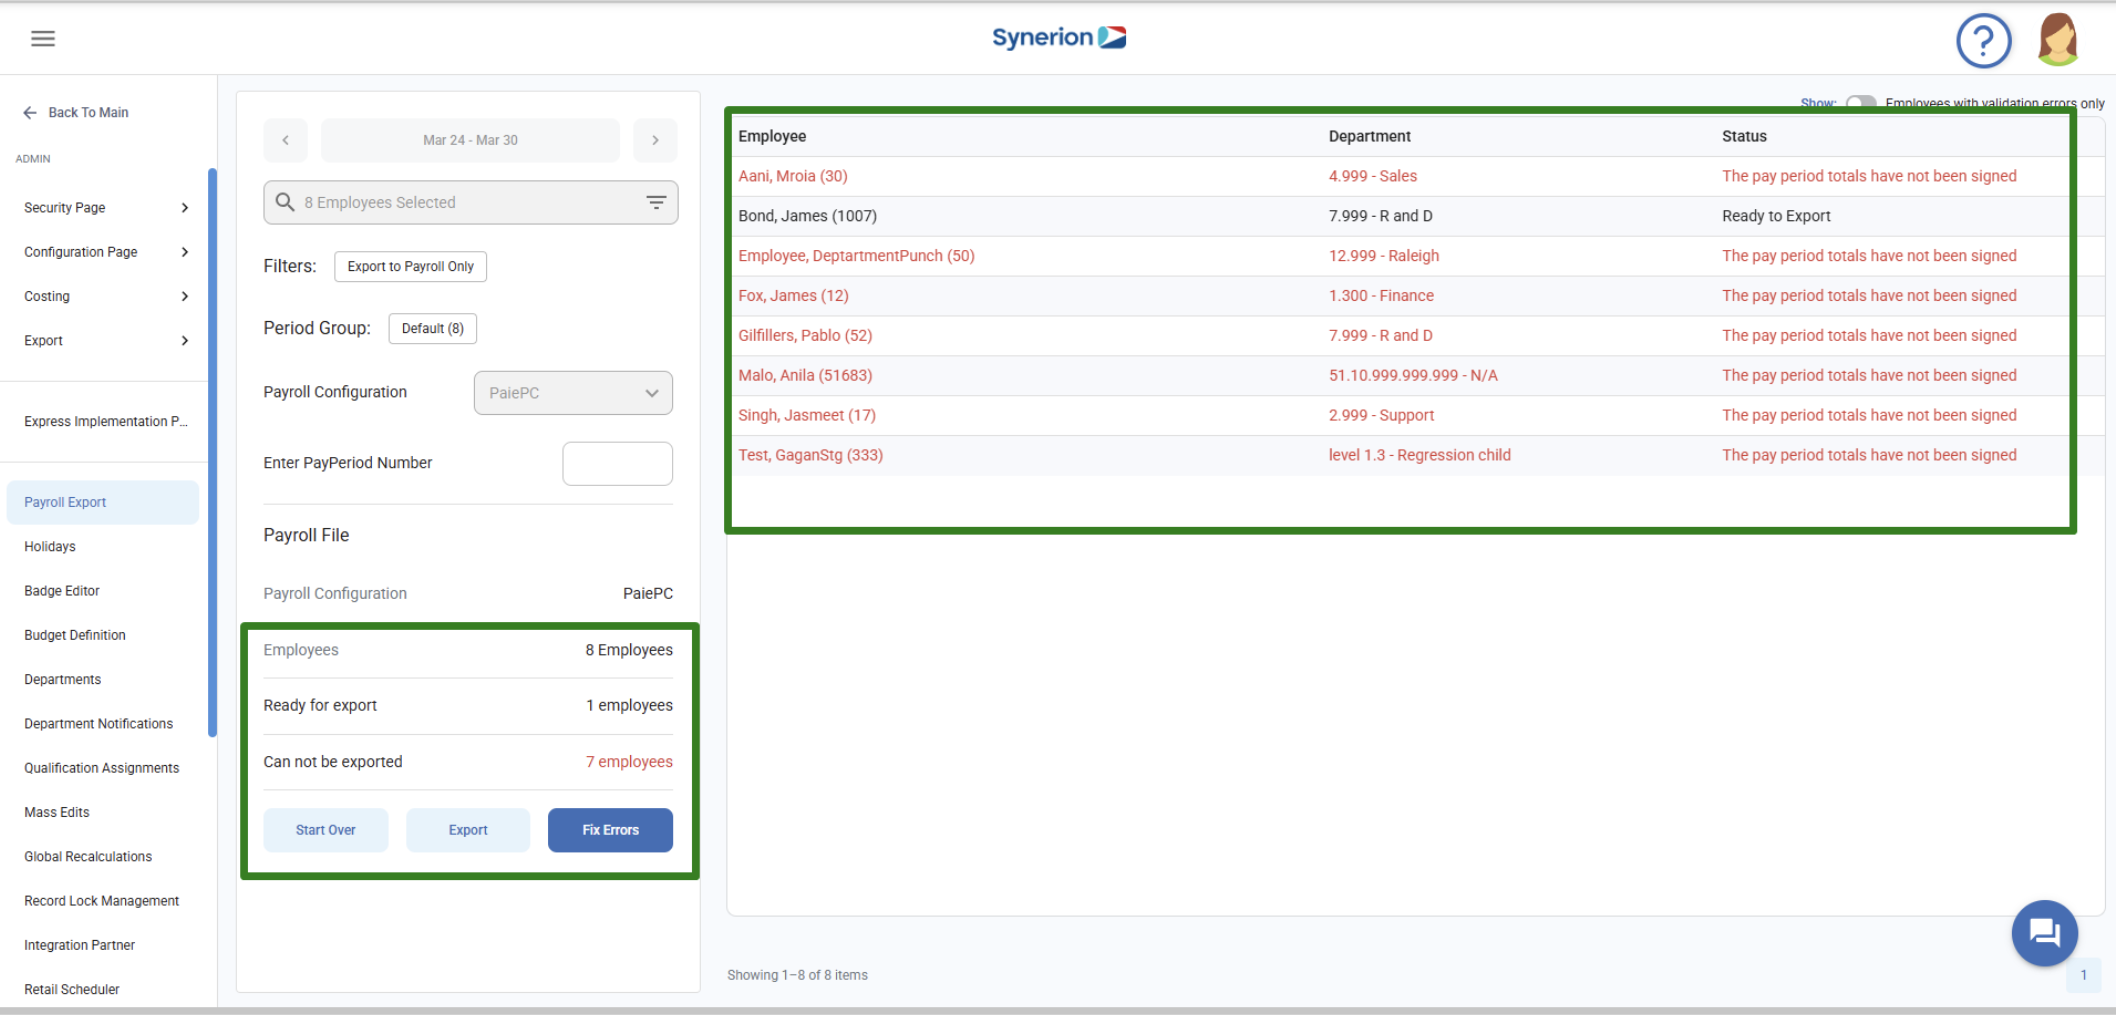
Step 6: Check Payroll File Section
- User can view payroll provider name and total number of employees
- Employees ready for export
- Employees cannot be exported (due to errors or missing signoffs)
- If an employee is already exported or has a lock date, a toggle “skip exported employees” appears. By default, toggle will be turned on.
Step 7: Fix Errors (If Needed)
- If there are validation errors (e.g., missing signoffs), user will see a button “Fix Errors” and button “Export” will be disabled (only if all selected employees have errors)
- In the grid, user can view the errors under Status column.
- Click on “Fix Errors” to resolve them before proceeding.
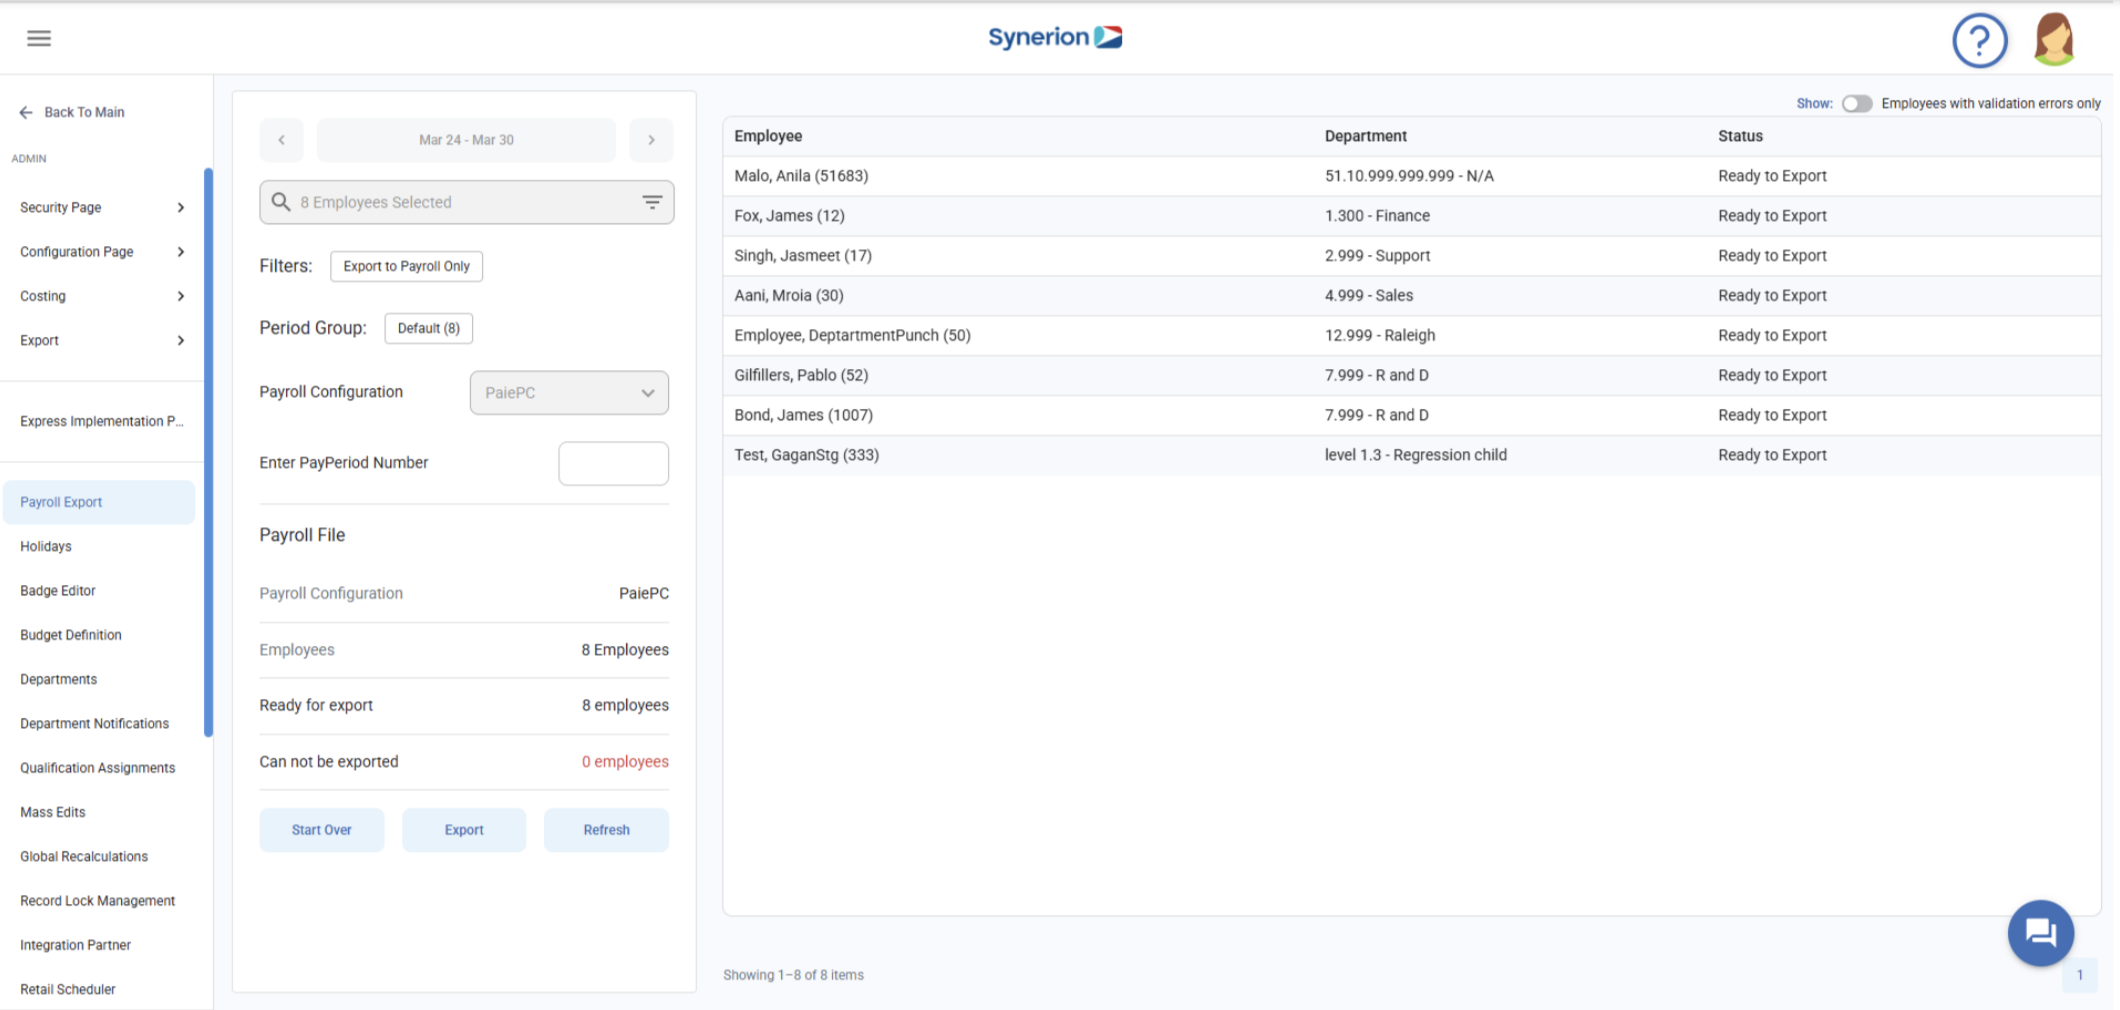
Step 8: Export Payroll
- If no errors exist, the Export button will be enabled.
- Clicking on button Export will show a confirmation dialog box.
- The Status column will update to “Exported”.

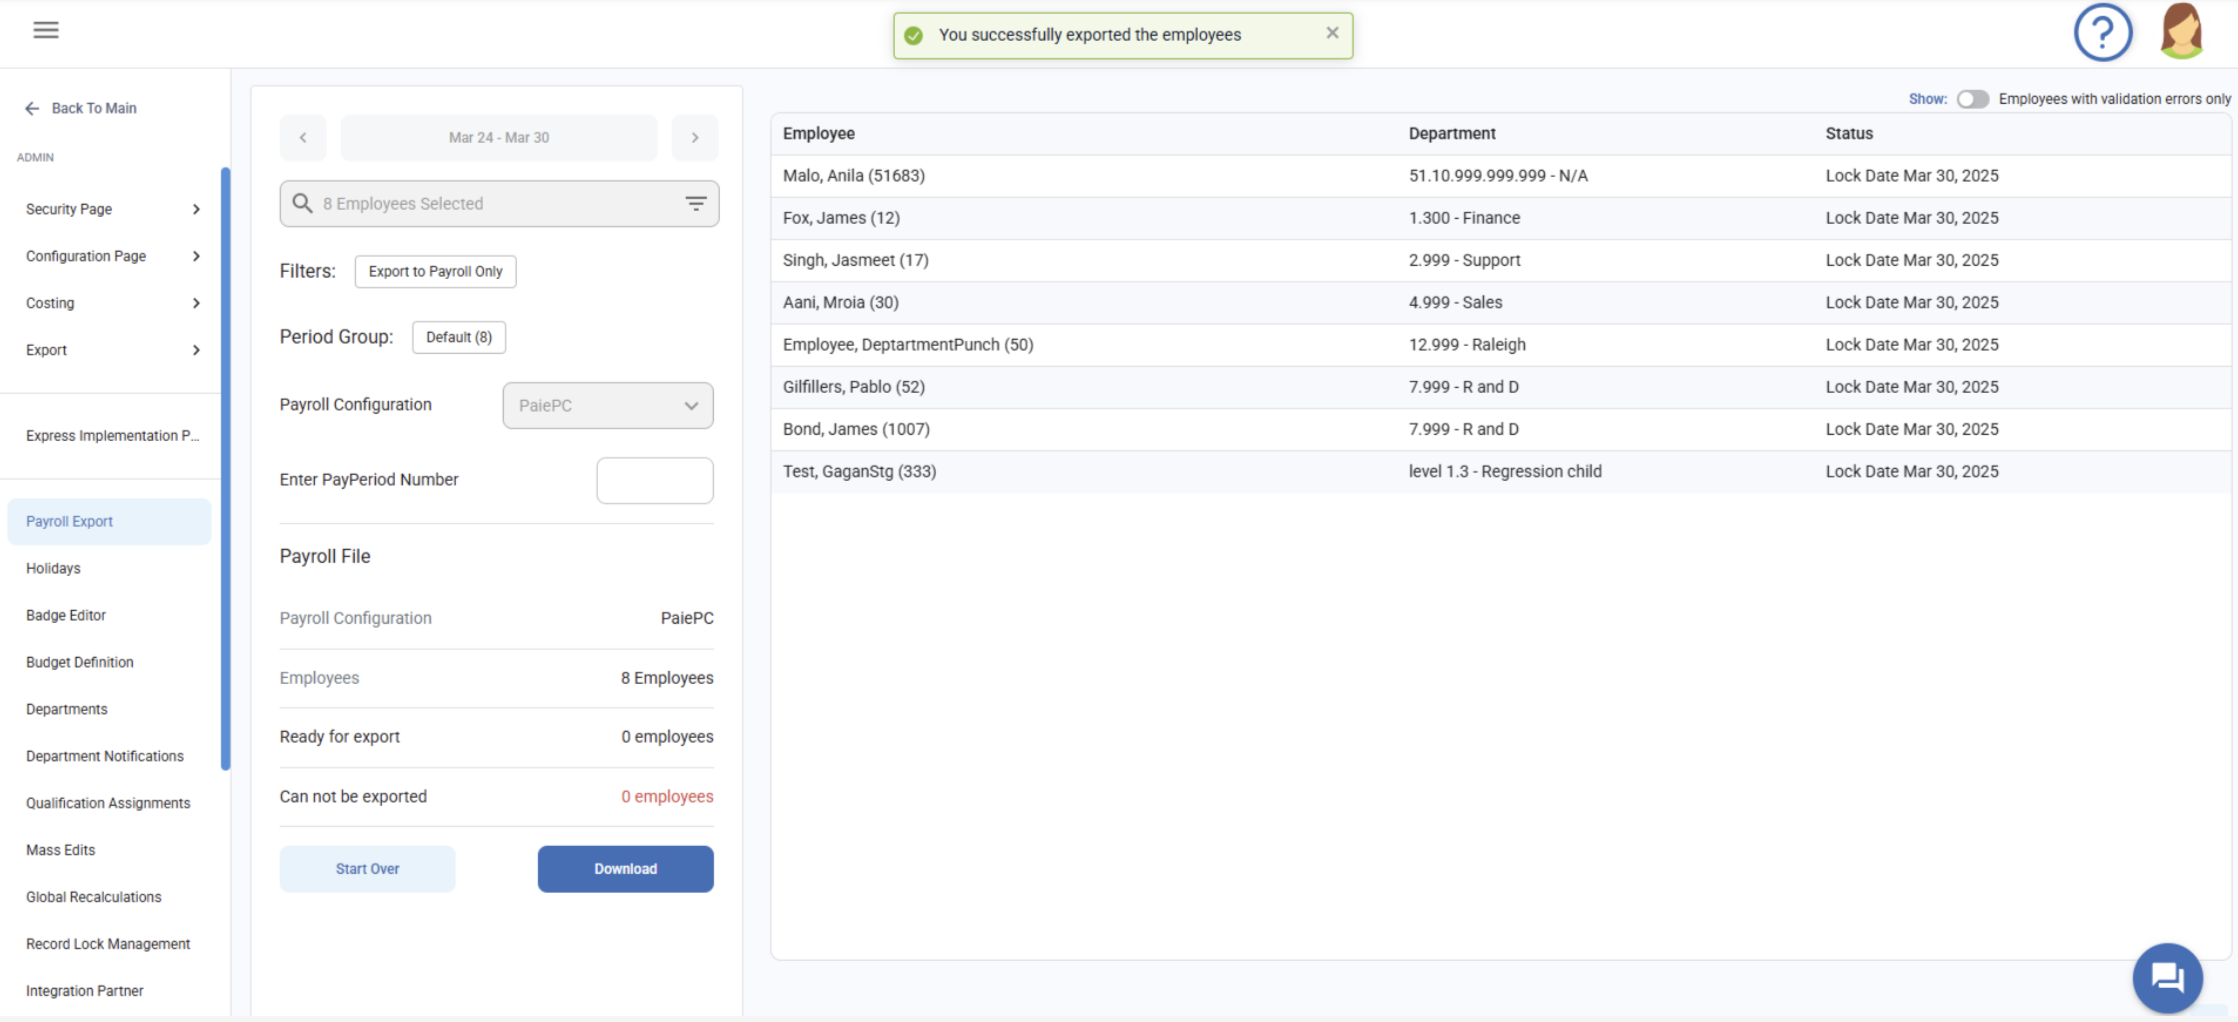
Step 9: Download Export Report
- Once the export is complete, a Download button will appear.
- Click on it to download the payroll export report.