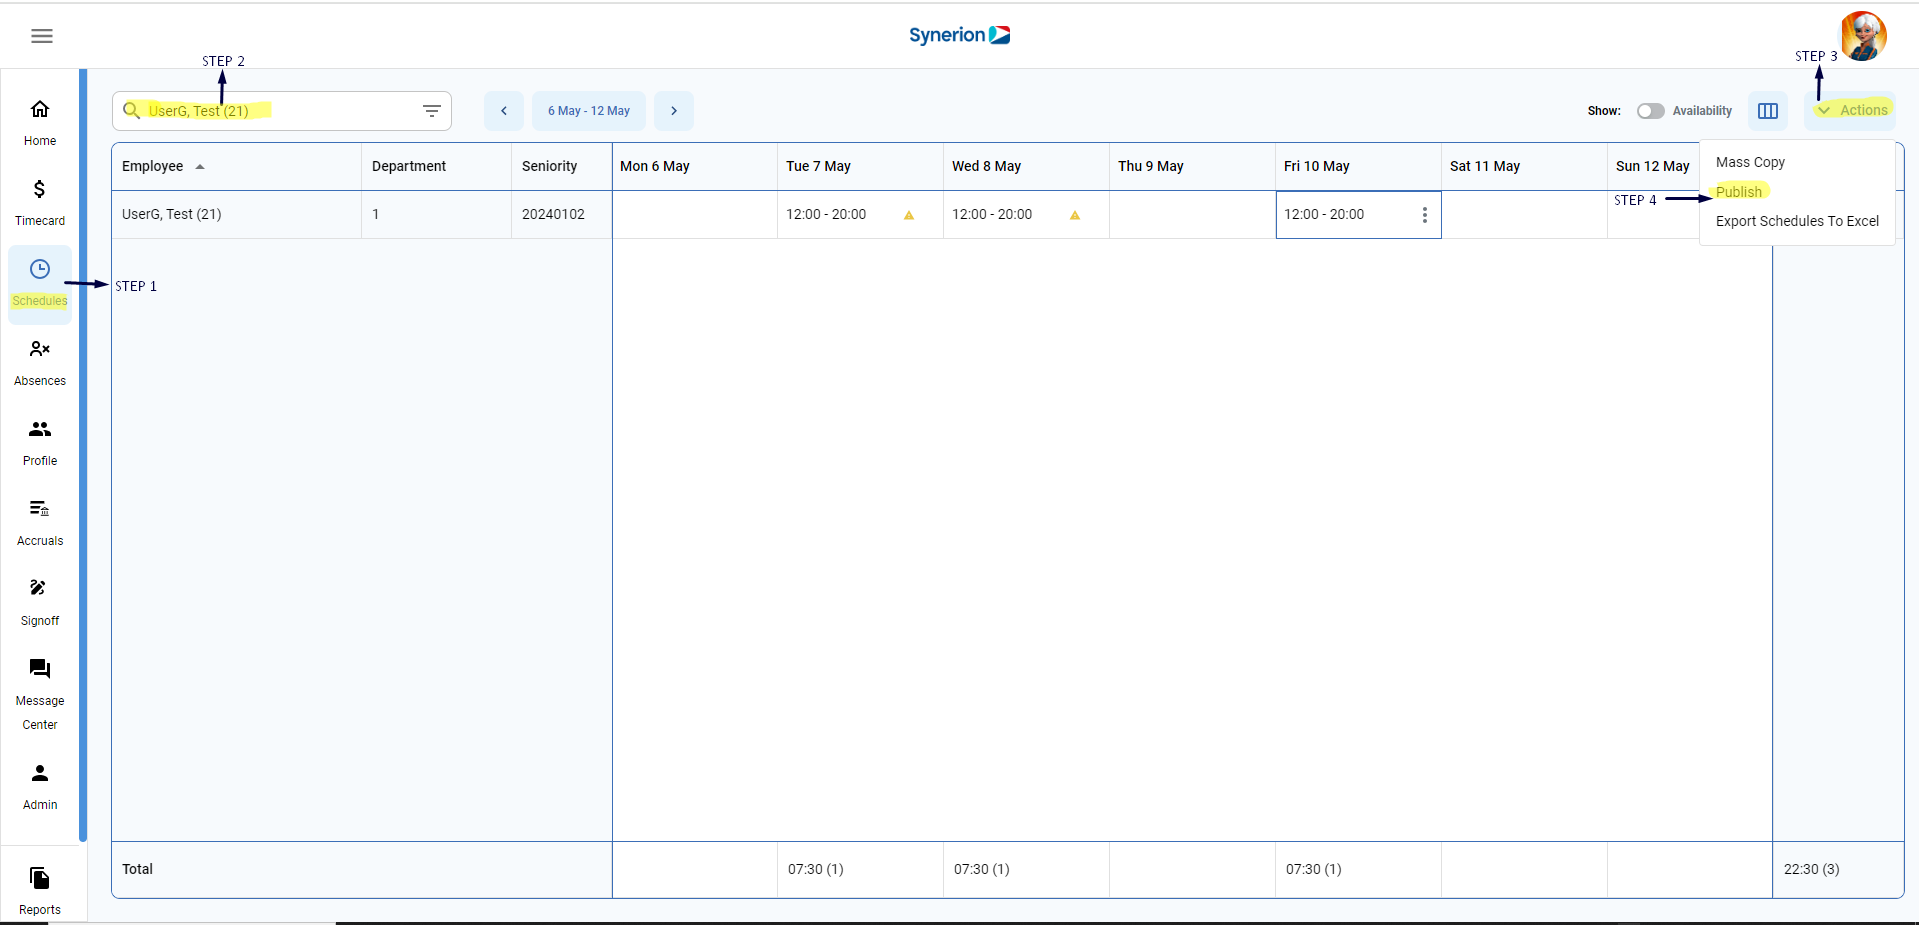
- The publish schedules function is used along with the Employee Self Service module
- Employees can look up their schedules by logging in to their Employee Self Service website
- When you create schedules, they will be in unpublished status by default, this means that employees will not be able to view their schedule yet
- Once you click the publish button, all schedules showing on the screen will be put in published status and show in green
- They can now be viewed by employees
Once user publishes the schedule, it will be visible to employees through the employee self-service function.
How to publish schedule:
- Select the Schedules from the side menu.
- Select employees and specify date range user wish to publish the schedule for, from the employee selector.
- Click on the Actions button appearing on top-right corner.
- Click on Publish
- User will see the “Publish Schedule” confirmation dialog.

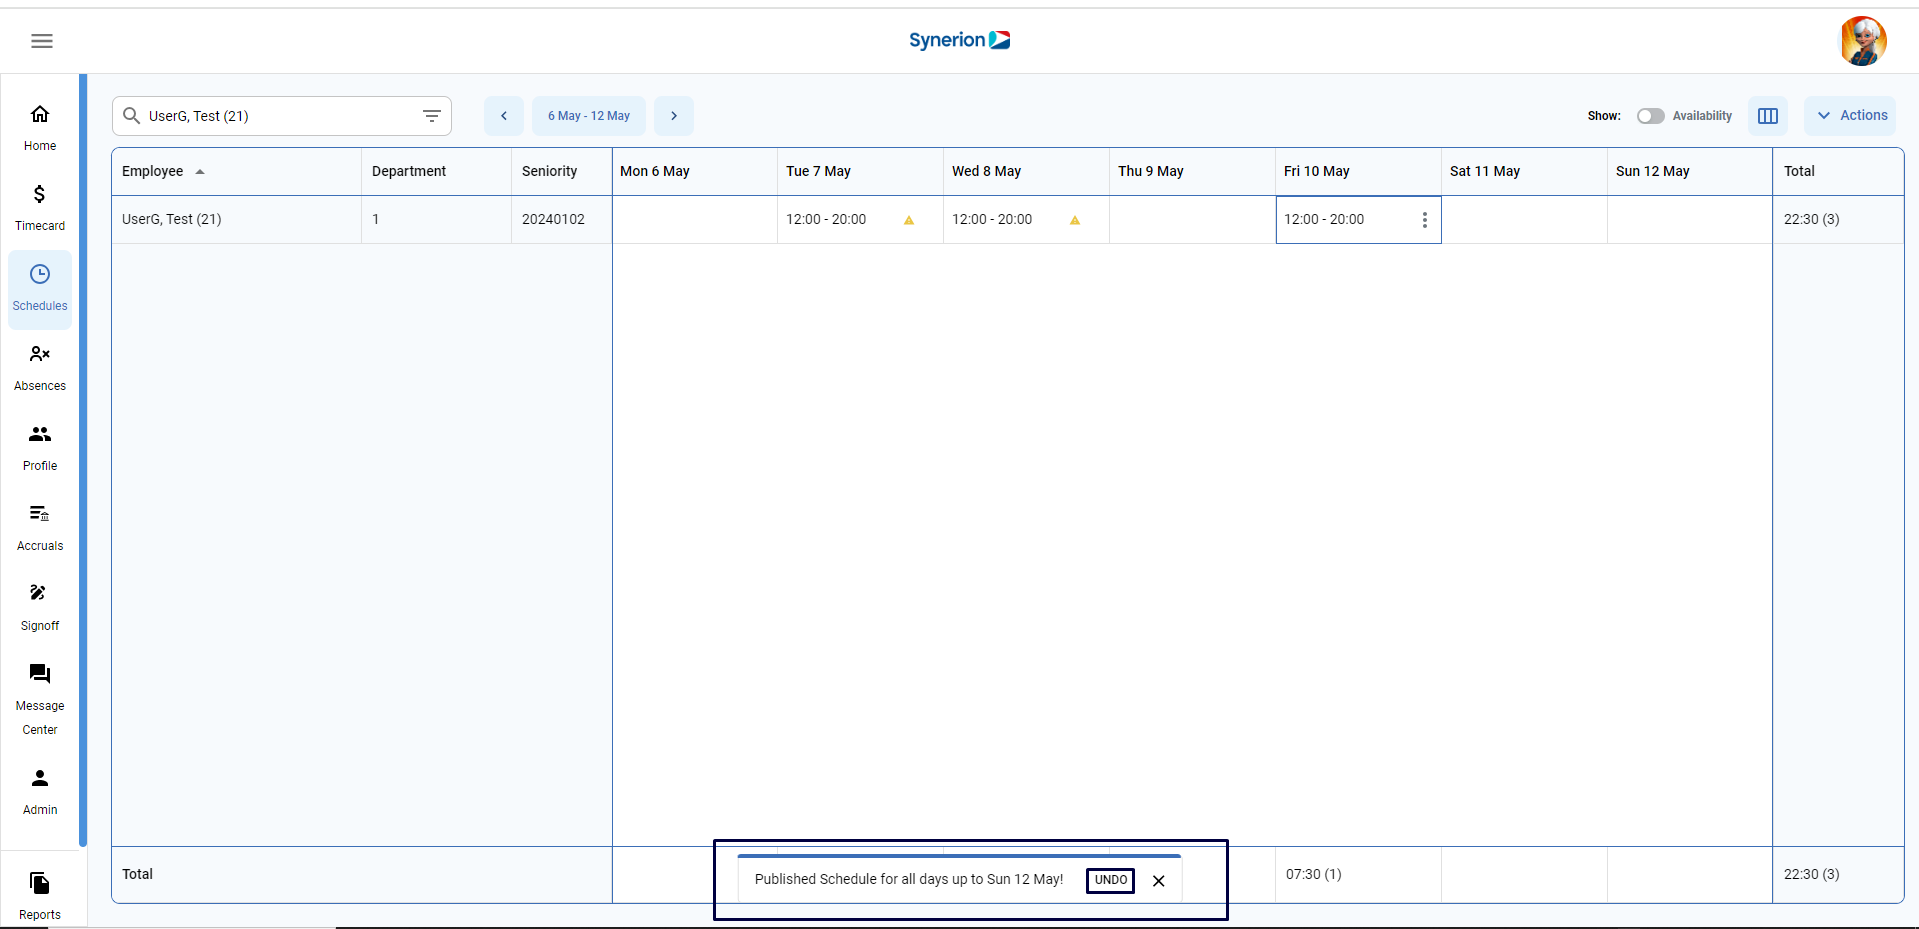
Once user confirms the publish schedule, it will show the progress bar at the bottom with undo action timer:
- If user clicks on undo, it will not publish the schedule and show the bottom timer as “action undone”.
- If user does not click on undo, send the request publish to API, show the successful toast message, and update the grid with published background.

POINTS TO REMEMBER
- ‘Publish’ button will be disabled if schedule is:
- in the past date.
- already published.
- ‘Publish’ button becomes active and visible when:
- in system settings, PublishSchedule.RestrictViewEnabled is set to Yes.
- Shift Schedule – edit permission is available.
- Schedule is in the future date and unpublished.
- “Publish Schedule” confirmation dialog:
- Confirmation dialog will show the message as “Are you sure you want to publish this schedule to {n} employees for all days up to {week’s end date}?” if AppEvents.ScheduleChange.NotificationEnabled is set to No in System settings.
- Confirmation dialog will show the message as “Are you sure you want to publish this schedule to {n} employees for all days up to {week’s end date}? This action will send an SMS/email to all published employees. if AppEvents.ScheduleChange.NotificationEnabled is set to Yes in System settings.
- If the schedules are already published and user is making any subsequent changes to the schedule,
- User will see the confirmation dialog “You are changing one or more schedules that will result in a notification being sent to {employee name}, do you want to proceed?” if System setting AppEvents.ScheduleChange.NotificationEnabled is set to Yes.
- If System setting AppEvents.ScheduleChange.NotificationEnabled is set to No, user will not see any confirmation dialog, it will update the schedule and show the success toast message.
Required permission: ShiftSchedule-Edit
Required System settings:
- PublishSchedule.RestrictViewEnabled > to make the “Publish” option active and visible.
- AppEvents.ScheduleChange.NotificationEnabled > for notification confirmation dialog
