This page allows user to select different user roles and view their assigned and unassigned permissions. Along with viewing the permissions, user can also add, remove, or revoke the permissions. User can also create a new role and copy the existing role.
Required permission: FeatureRoles and Permissions
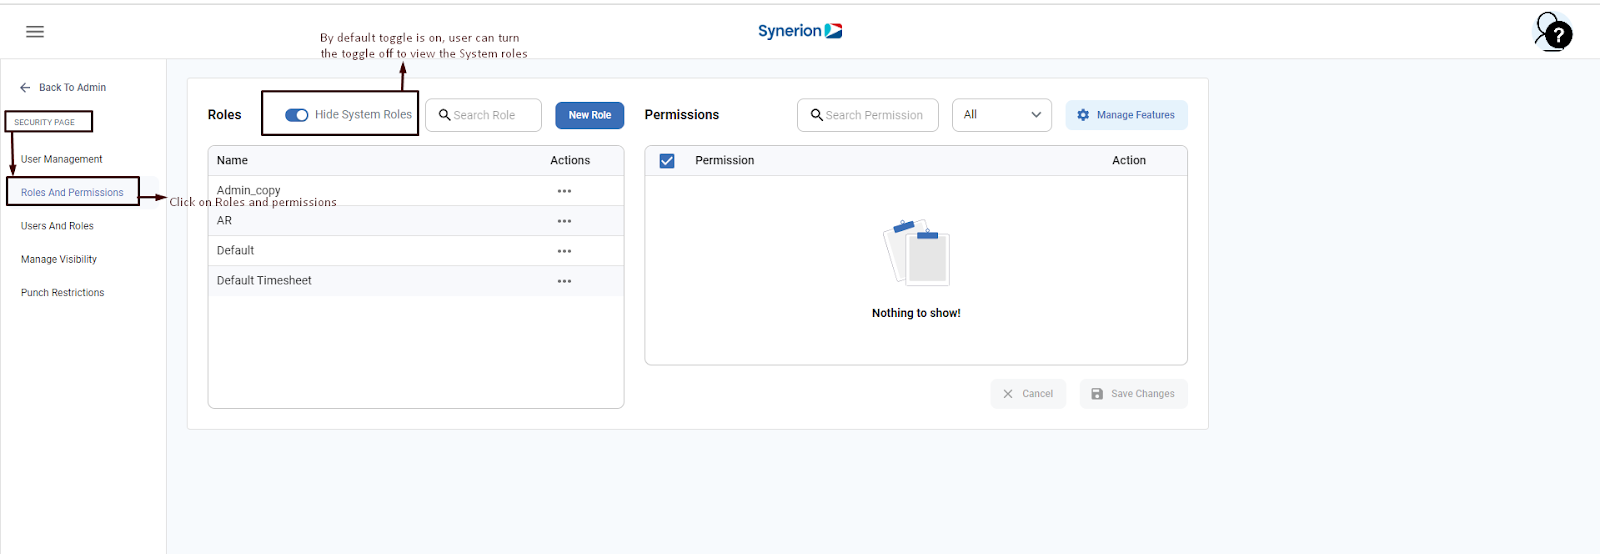
Hide/Unhide System roles
User could hide or unhide the system roles. By default, toggle is on (which means system roles are hidden). User can view the system roles by turning the toggle off.
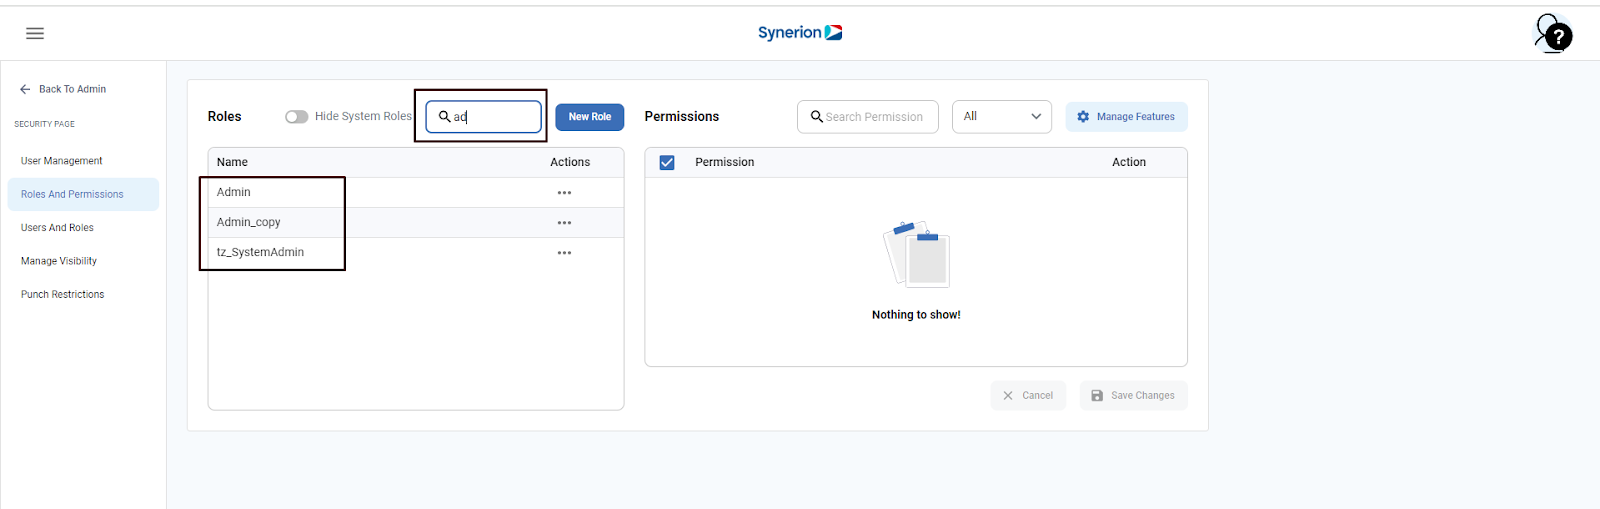
Search Role
If user wants to search for a particular role without scrolling through the list, user can use the “Search Role” text field appearing next to “Hide System Roles” toggle.
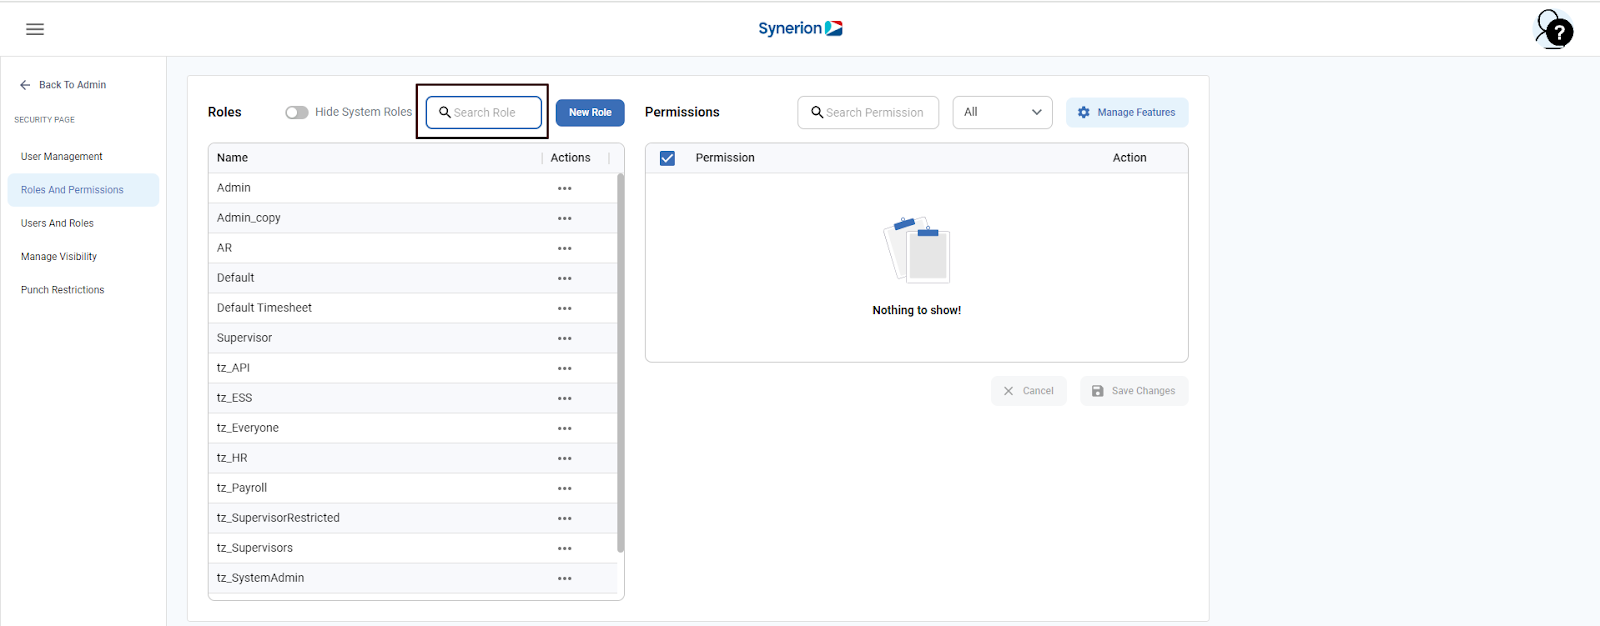
When user starts typing in the “search role” text, it will filter the list based on the entered text.
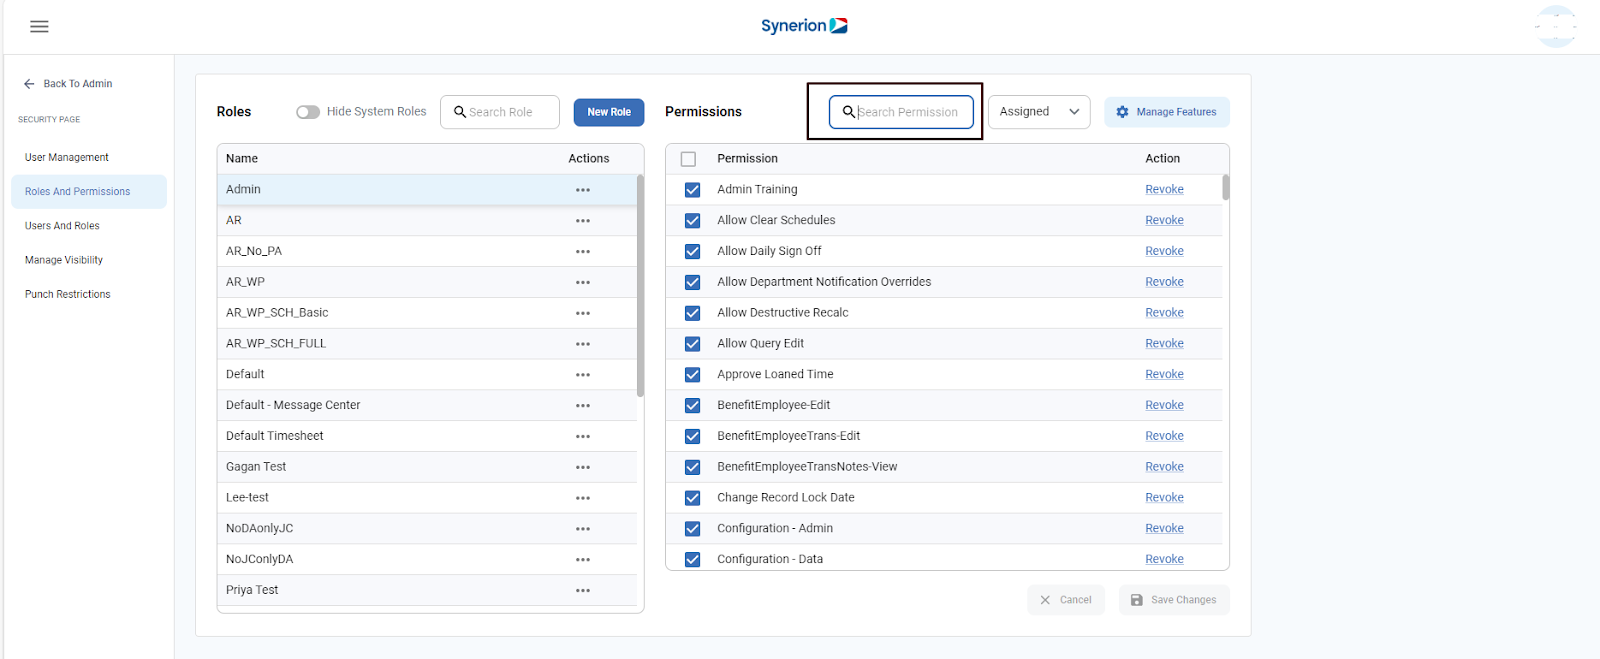
Search Permission
If user wants to search for a particular permission without scrolling through the list, user can use the “Search Permission” text field appearing above the permissions tab.
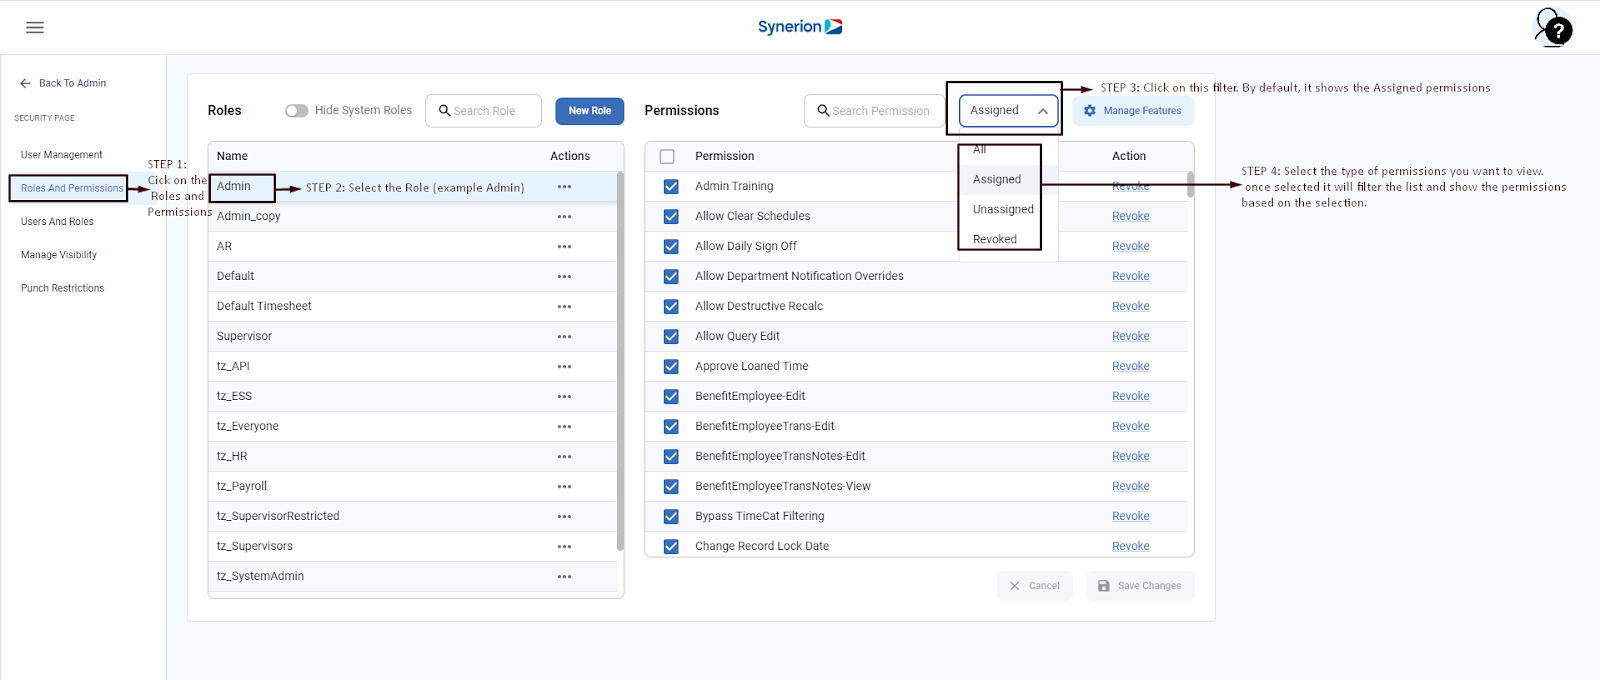
View Assigned, Unassigned, Revoke, or All permissions
User can view different type of permissions- assigned, unassigned, revoked, or all, by using the filter appearing above “Permissions” tab. To view different type of permissions,
- Click on Admin page
- Click on Security page
- Click on Roles and Permissions
- Select a role user wants to view the permissions
- Once role is selected, on left panel, it will show the assigned permissions, having a checkmark, by default
- Click on the “Assigned” filter
- A drop-down will appear, user can select any option based on the requirement (All, Assigned, Unassigned, or Revoked)
- Once user selects an option from the filter, it will update the permissions list based on the selection.
- If there is no permission available based on the selected type, it will show “Nothing to show” message under permissions tab.
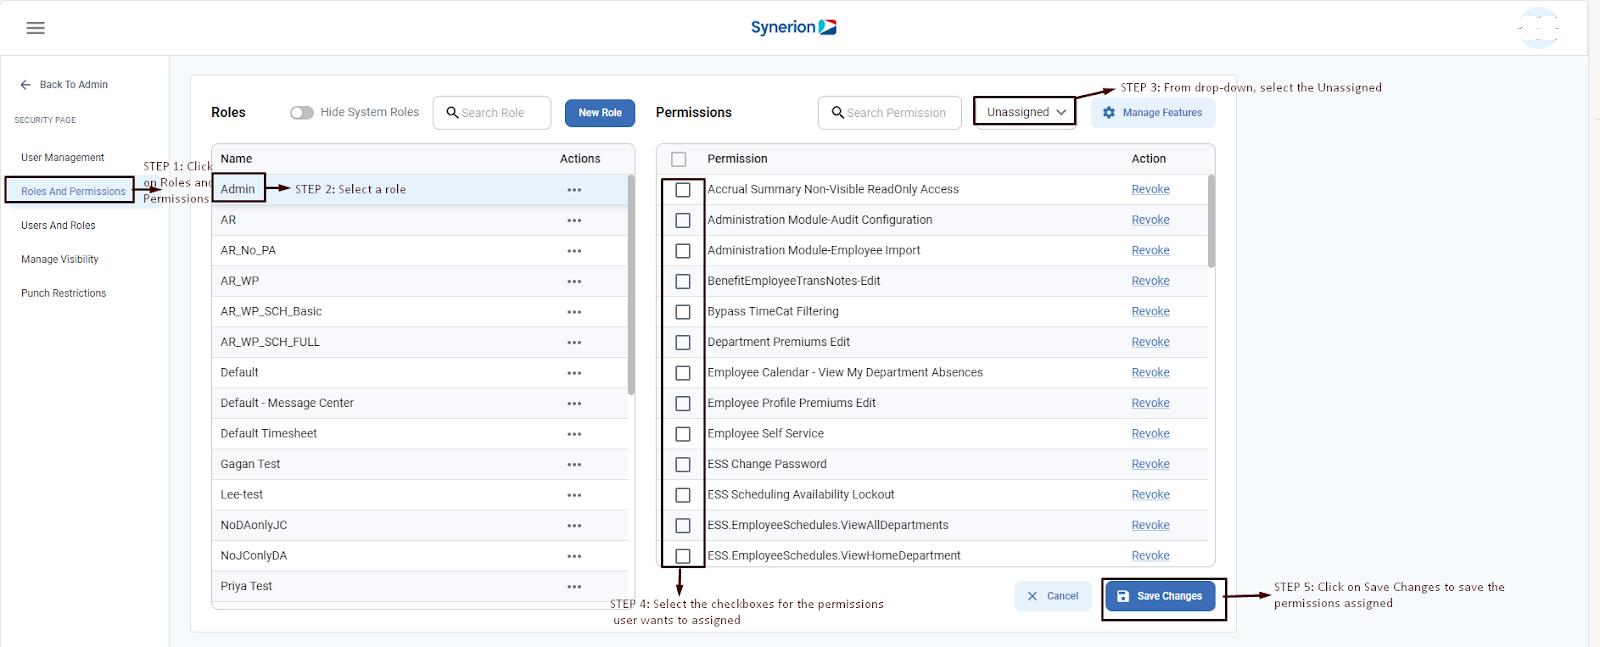
Assign a Permission
To assign a permission,
- Click on Admin page
- Click on Security page
- Click on Roles and Permissions
- Select a role user wants to view the permissions
- Once role is selected, on left panel, it will show the assigned permissions, having a checkmark, by default
- Click on the “Assigned” filter
- Select “Unassigned” from the drop-down. It will list out all the unassigned permissions
- Select the checkbox for a permission you want to assign
- Once user selects the permission, it will enable the “Save Changes” and “Cancel” button
- To save the changes, click on “Save Changes” . It will show the success toast message “Permission(s) saved successfully”
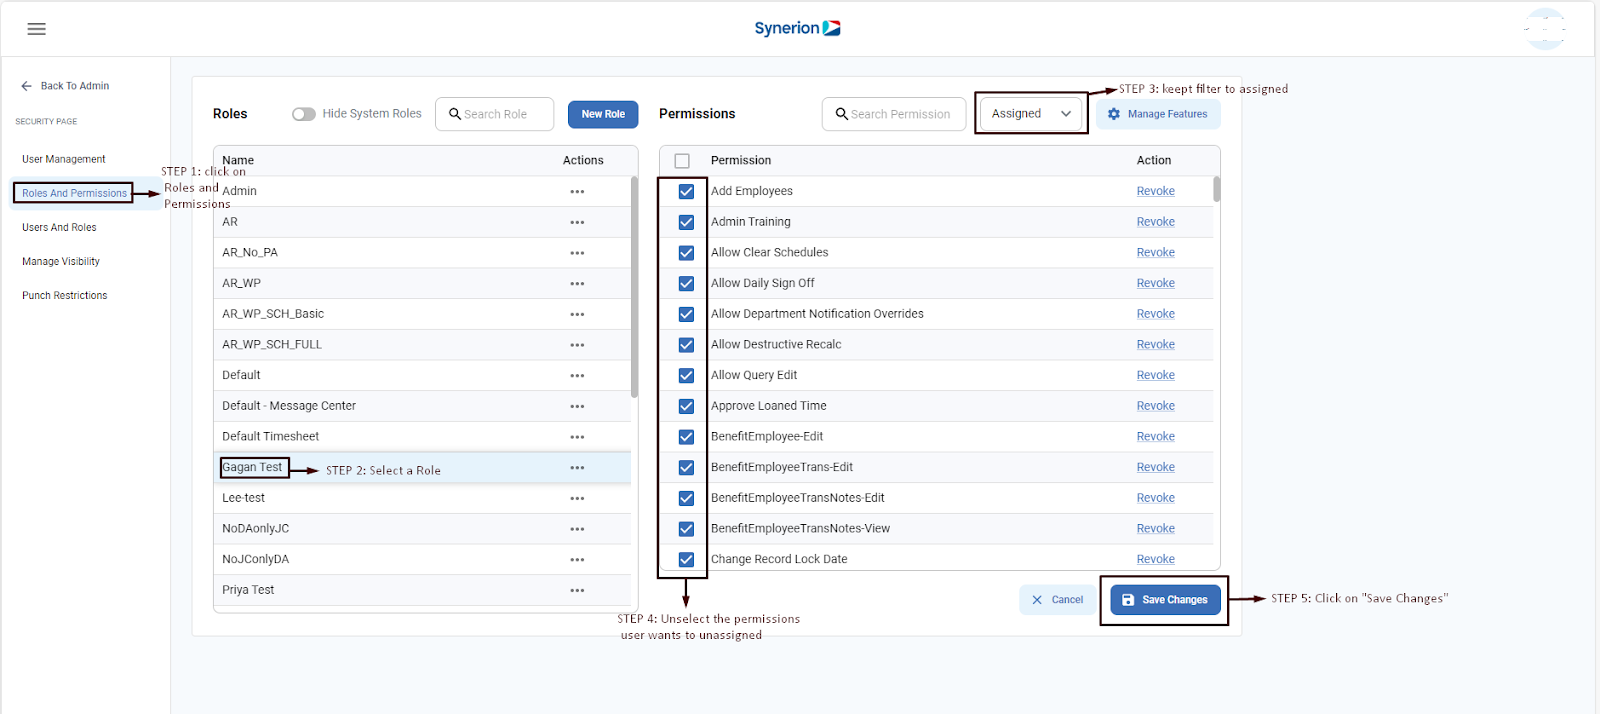
Unassign a Permission
To unassign a permission,
- Click on Admin page
- Click on Security page
- Click on Roles and Permissions
- Select a role user wants to view the permissions
- Once role is selected, on left panel, it will show the assigned permissions, having a checkmark, by default
- Unselect the checkbox for a permission you want to unassign
- Once user unselects the permissions, it will enable the “Save Changes” and “Cancel” button
- To save the changes, click on “Save Changes”. It will show the success toast message “Permission(s) saved successfully”
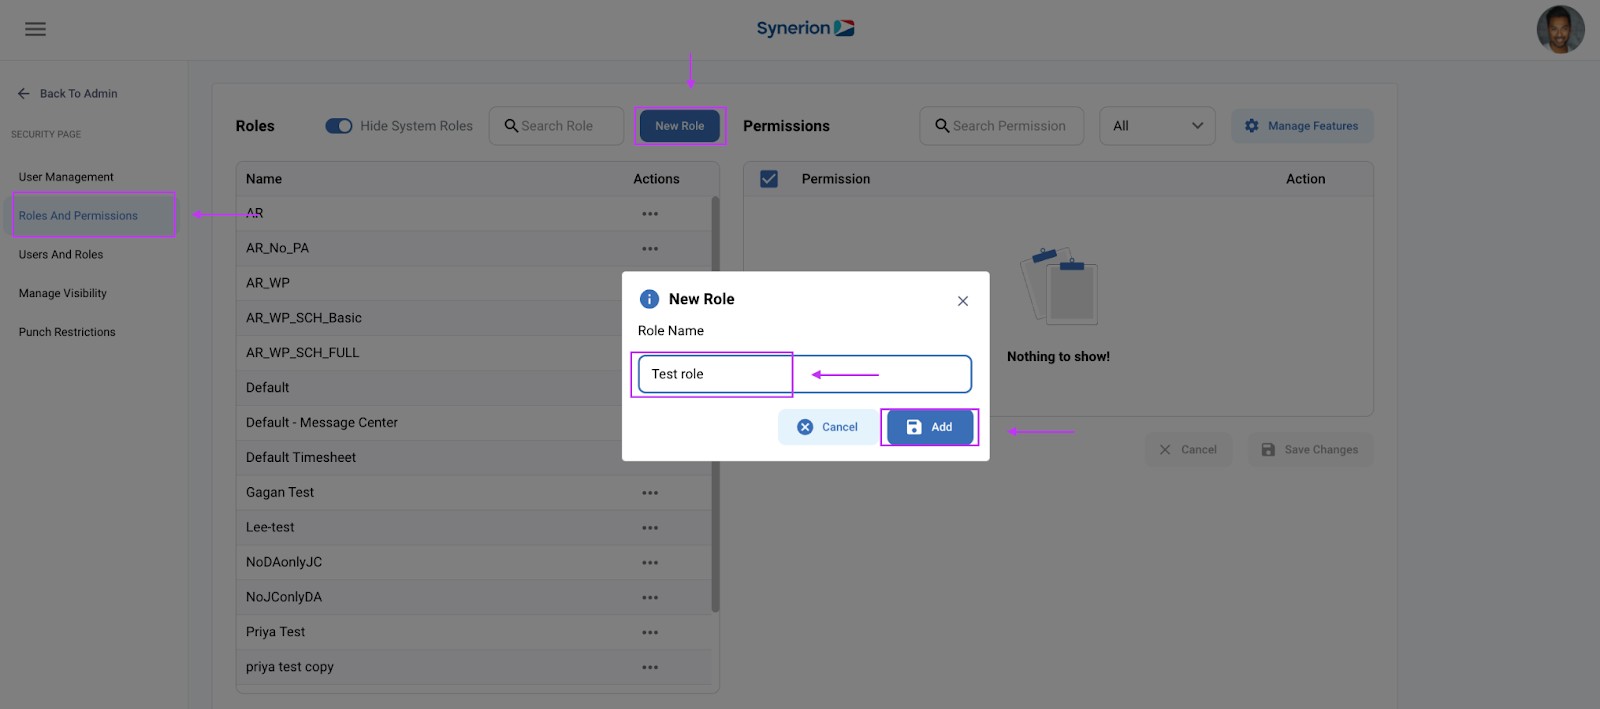
Add a new Role
To add a new role,
- Click on Admin page
- Click on Security page
- Click on Roles and Permissions
- Click on button “New Role”
- Like Legacy, it will open the pop up
- Enter the role name
- To save the role, click on button “Add”
- Once role is added successfully, it will show a success toast message “You have successfully created a role”
Copy/Delete/Rename a Role
User can copy, delete, or rename a role by clicking on three dots (…) under Actions tab.
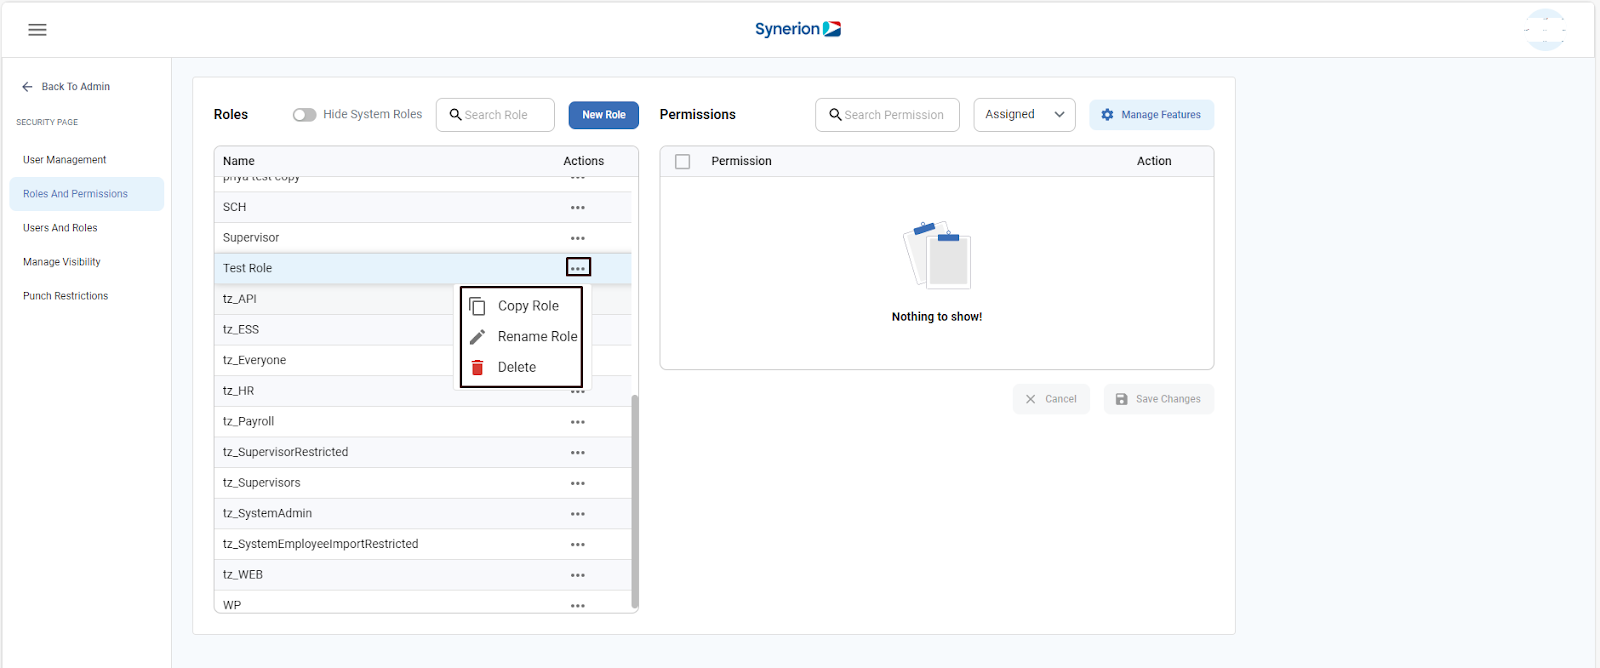
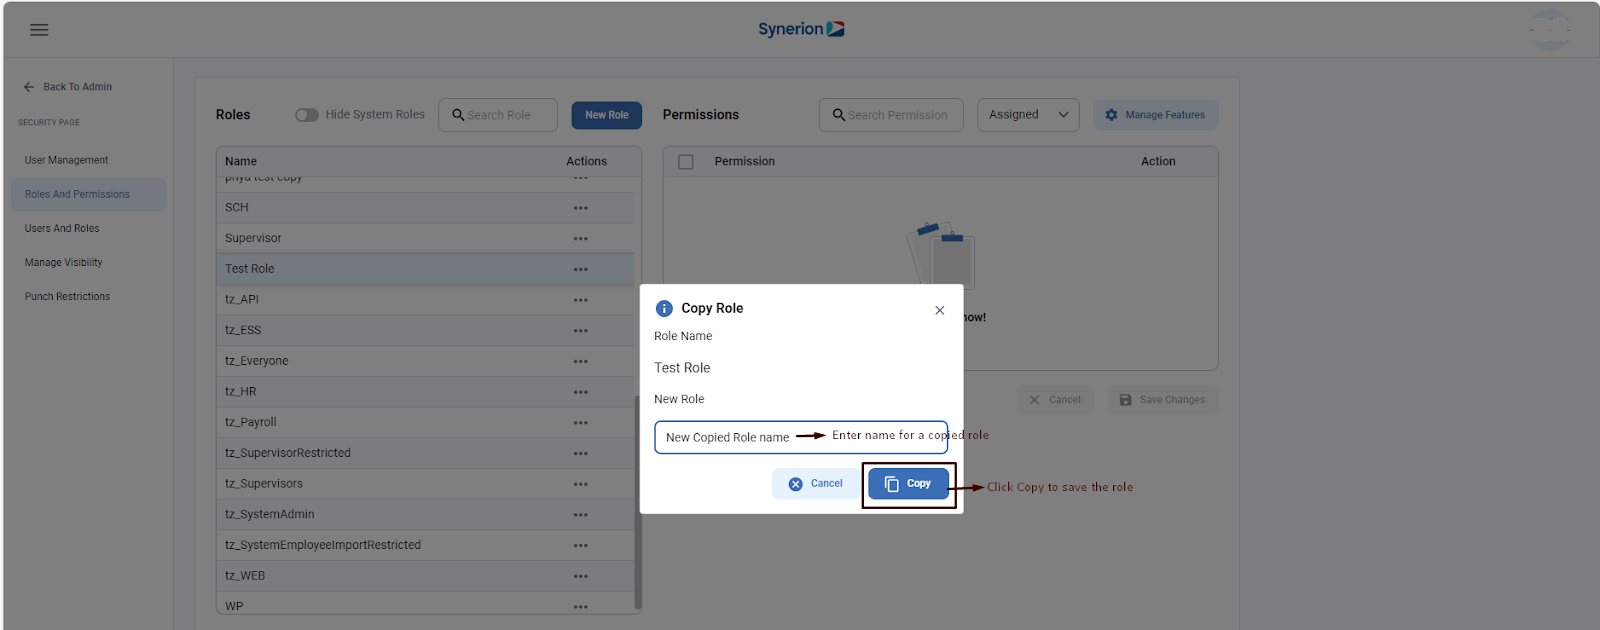
Copy a Role
- Select a role user wants to copy
- Click on 3 dots (…)
- Click on “Copy Role” option
- It will open a pop up where user can enter a name for new copied role
- Click on “Copy” to save the role
- Once role is successfully copied, it will show success toast message “You have successfully copied a role”
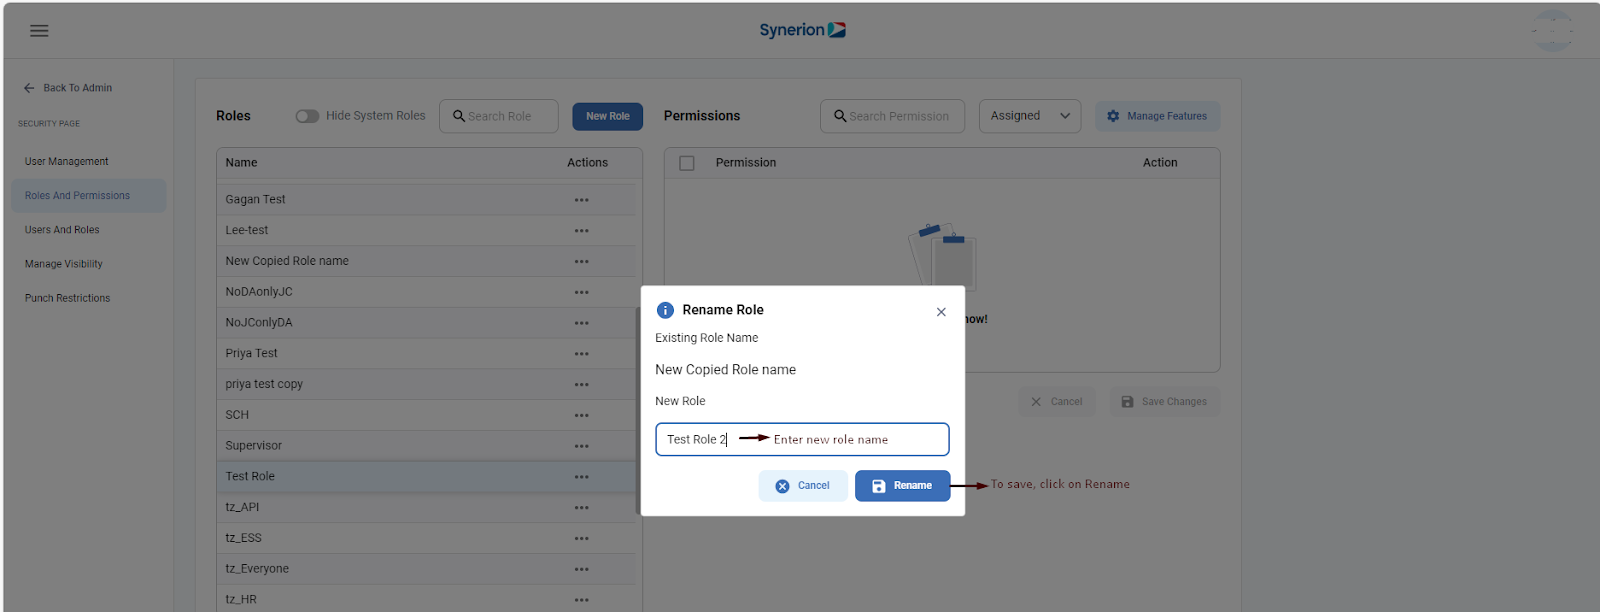
Rename a Role
- Select a role user wants to copy
- Click on 3 dots (…)
- Click on “Rename Role” option
- It will open a pop up where user can enter a new name for an existing role
- Click on “Rename” to save new name
- Once role is successfully renamed, it will show success toast message “You have successfully renamed a role”
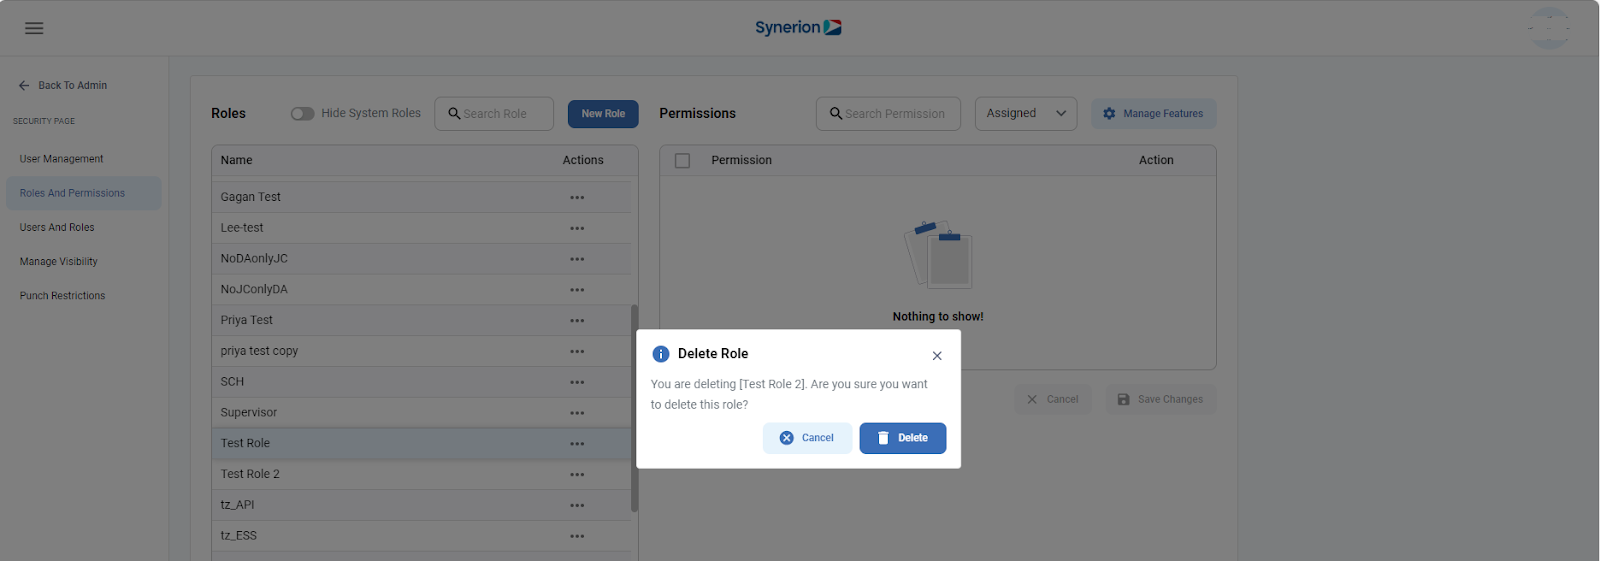
Delete a Role
- Select a role user wants to Delete
- Click on 3 dots (…)
- Click on “Delete” option
- It will show the confirmation dialog to delete a role
- Click on button “Delete”
- Once role is deleted successfully, it will show success toast message “You have successfully deleted the role”