
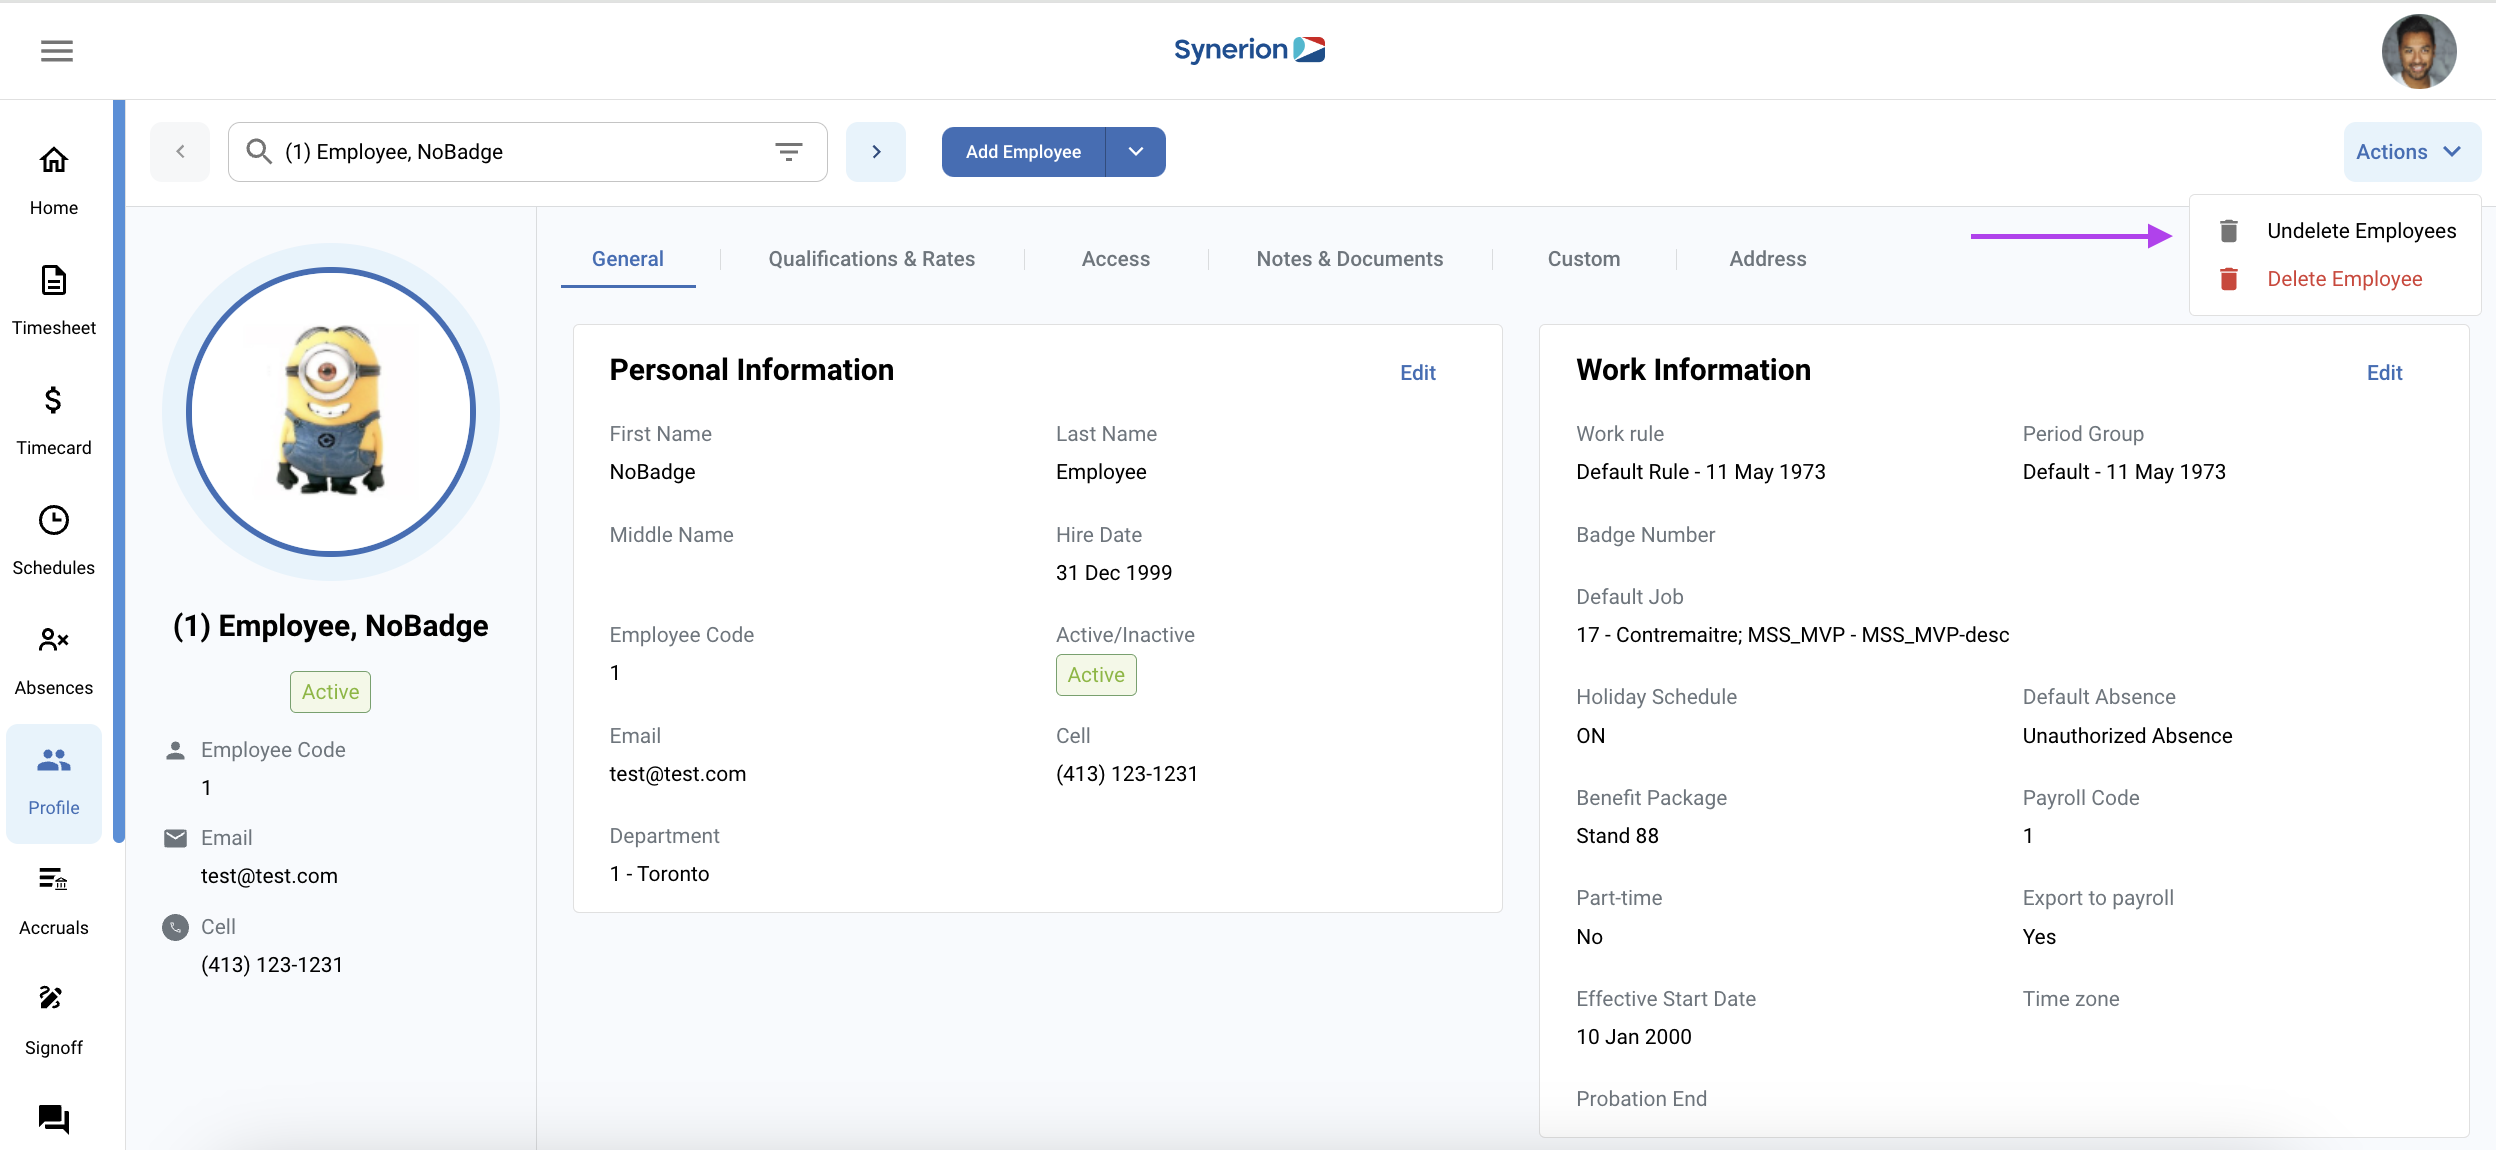
The employee profile is now designed to give you all the critical information for an employee on the first tab when you click on the employee profile from the menu.
We have taken all the most important information (from a workforce management perspective) and put it on the first tab including:
Name, email, cell phone, employee code, work rule, holidays, badge number, export to payroll, part-time flag, department and more…
If you want to edit that information, click on the edit button in the top right corner of the section in question and a side panel will open up, enabling you to edit any information.
The panel on the far left of the screen (just right of the menu), is some basic information about the employee that will stay shown no matter where you navigate to in the employee profile.
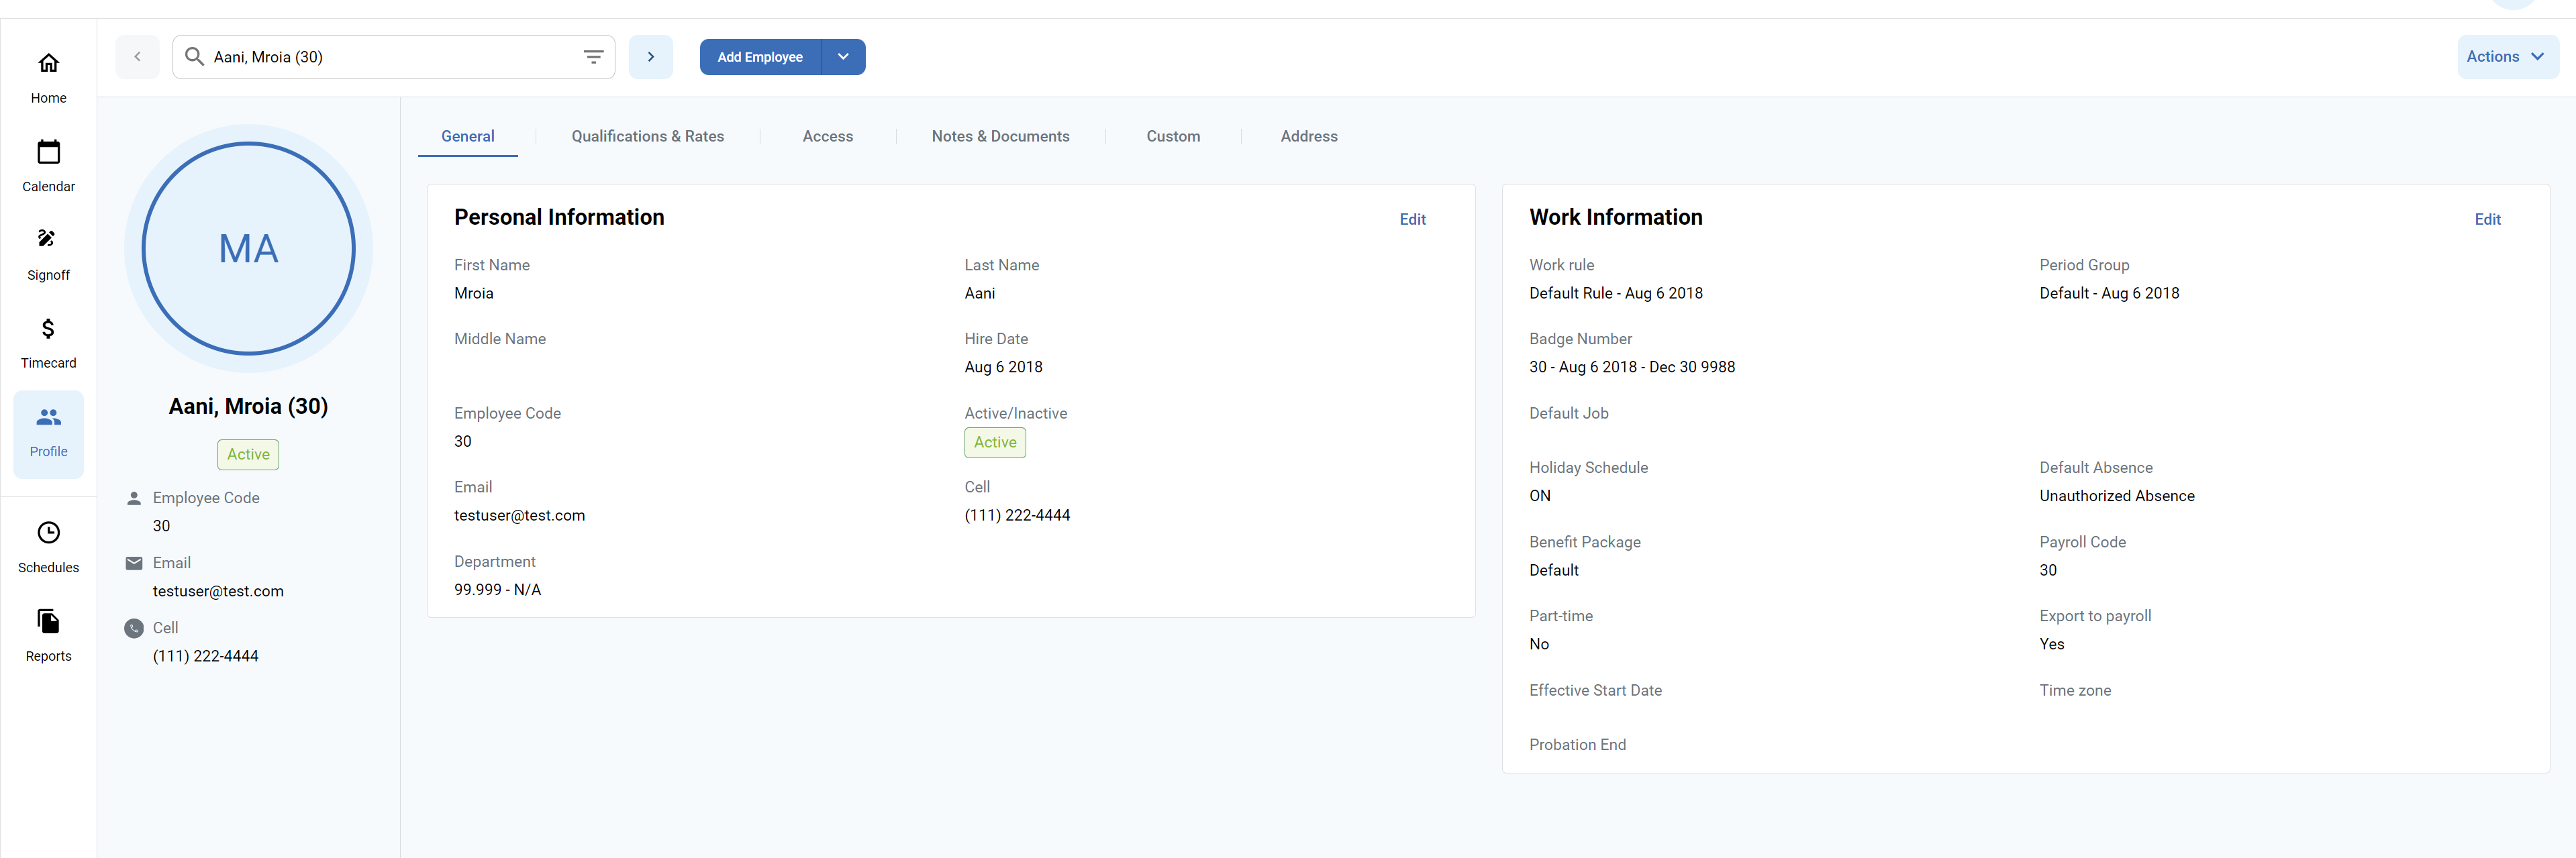
We have combined the old tabs so that there are fewer tabs to go searching through to find stuff, and we have added a new important tab called “Access”
The access tab will give you information on who can see an employee, who can approve the employee’s vacations, and ability to reset the employee’s password on their behalf (moved from the employee implementation portal … )
Add an Employee
In the Agile classic experience there is a commonly used function called “Quick Add”. It is a simplified way of adding an employee in the product and the only way users should add employees moving forward. In Agile Bolt, when a user clicks on “Add Employee”, the side panel opens up and provides the same experience as quick add to the user.
Duplicate from existing employee
On top of the new add an employee function, we have also given users an even easier way to add new employees, by copying an existing employee who is just like them….
User can click on the down arrow next to “Add Employee” and selects “Duplicate an Employee”
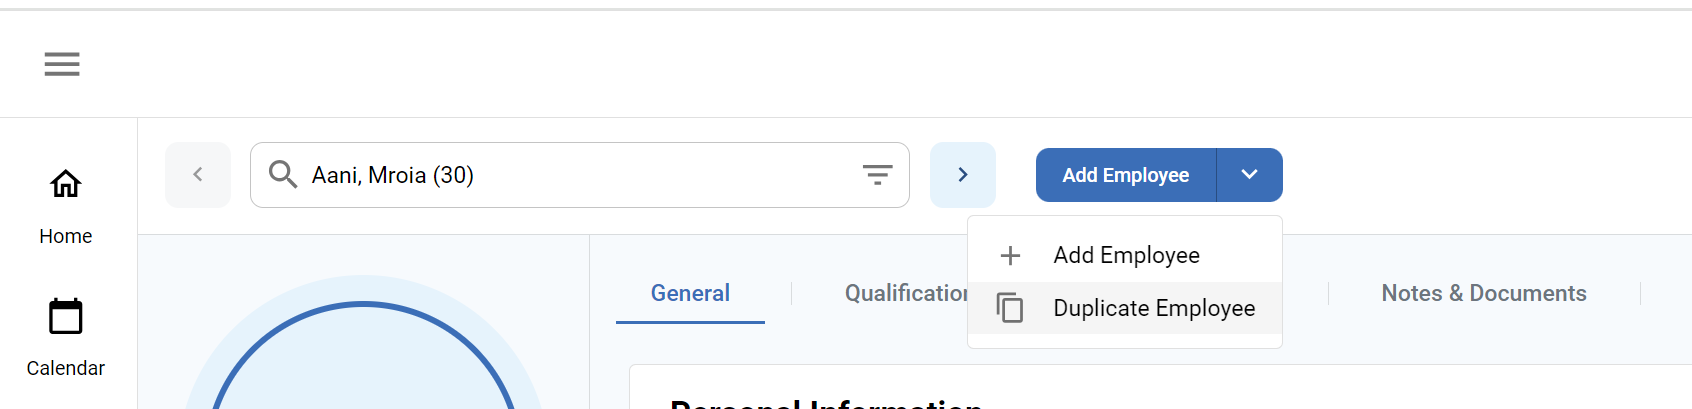
Once clicked the user is presented with a pop-up that asks the employee’s name, number, email, cell phone and hire date (defaulted to today).
Once filled, the side panel opens up with all fields populated. The user can simply click “Apply and Close” and the employee is created !
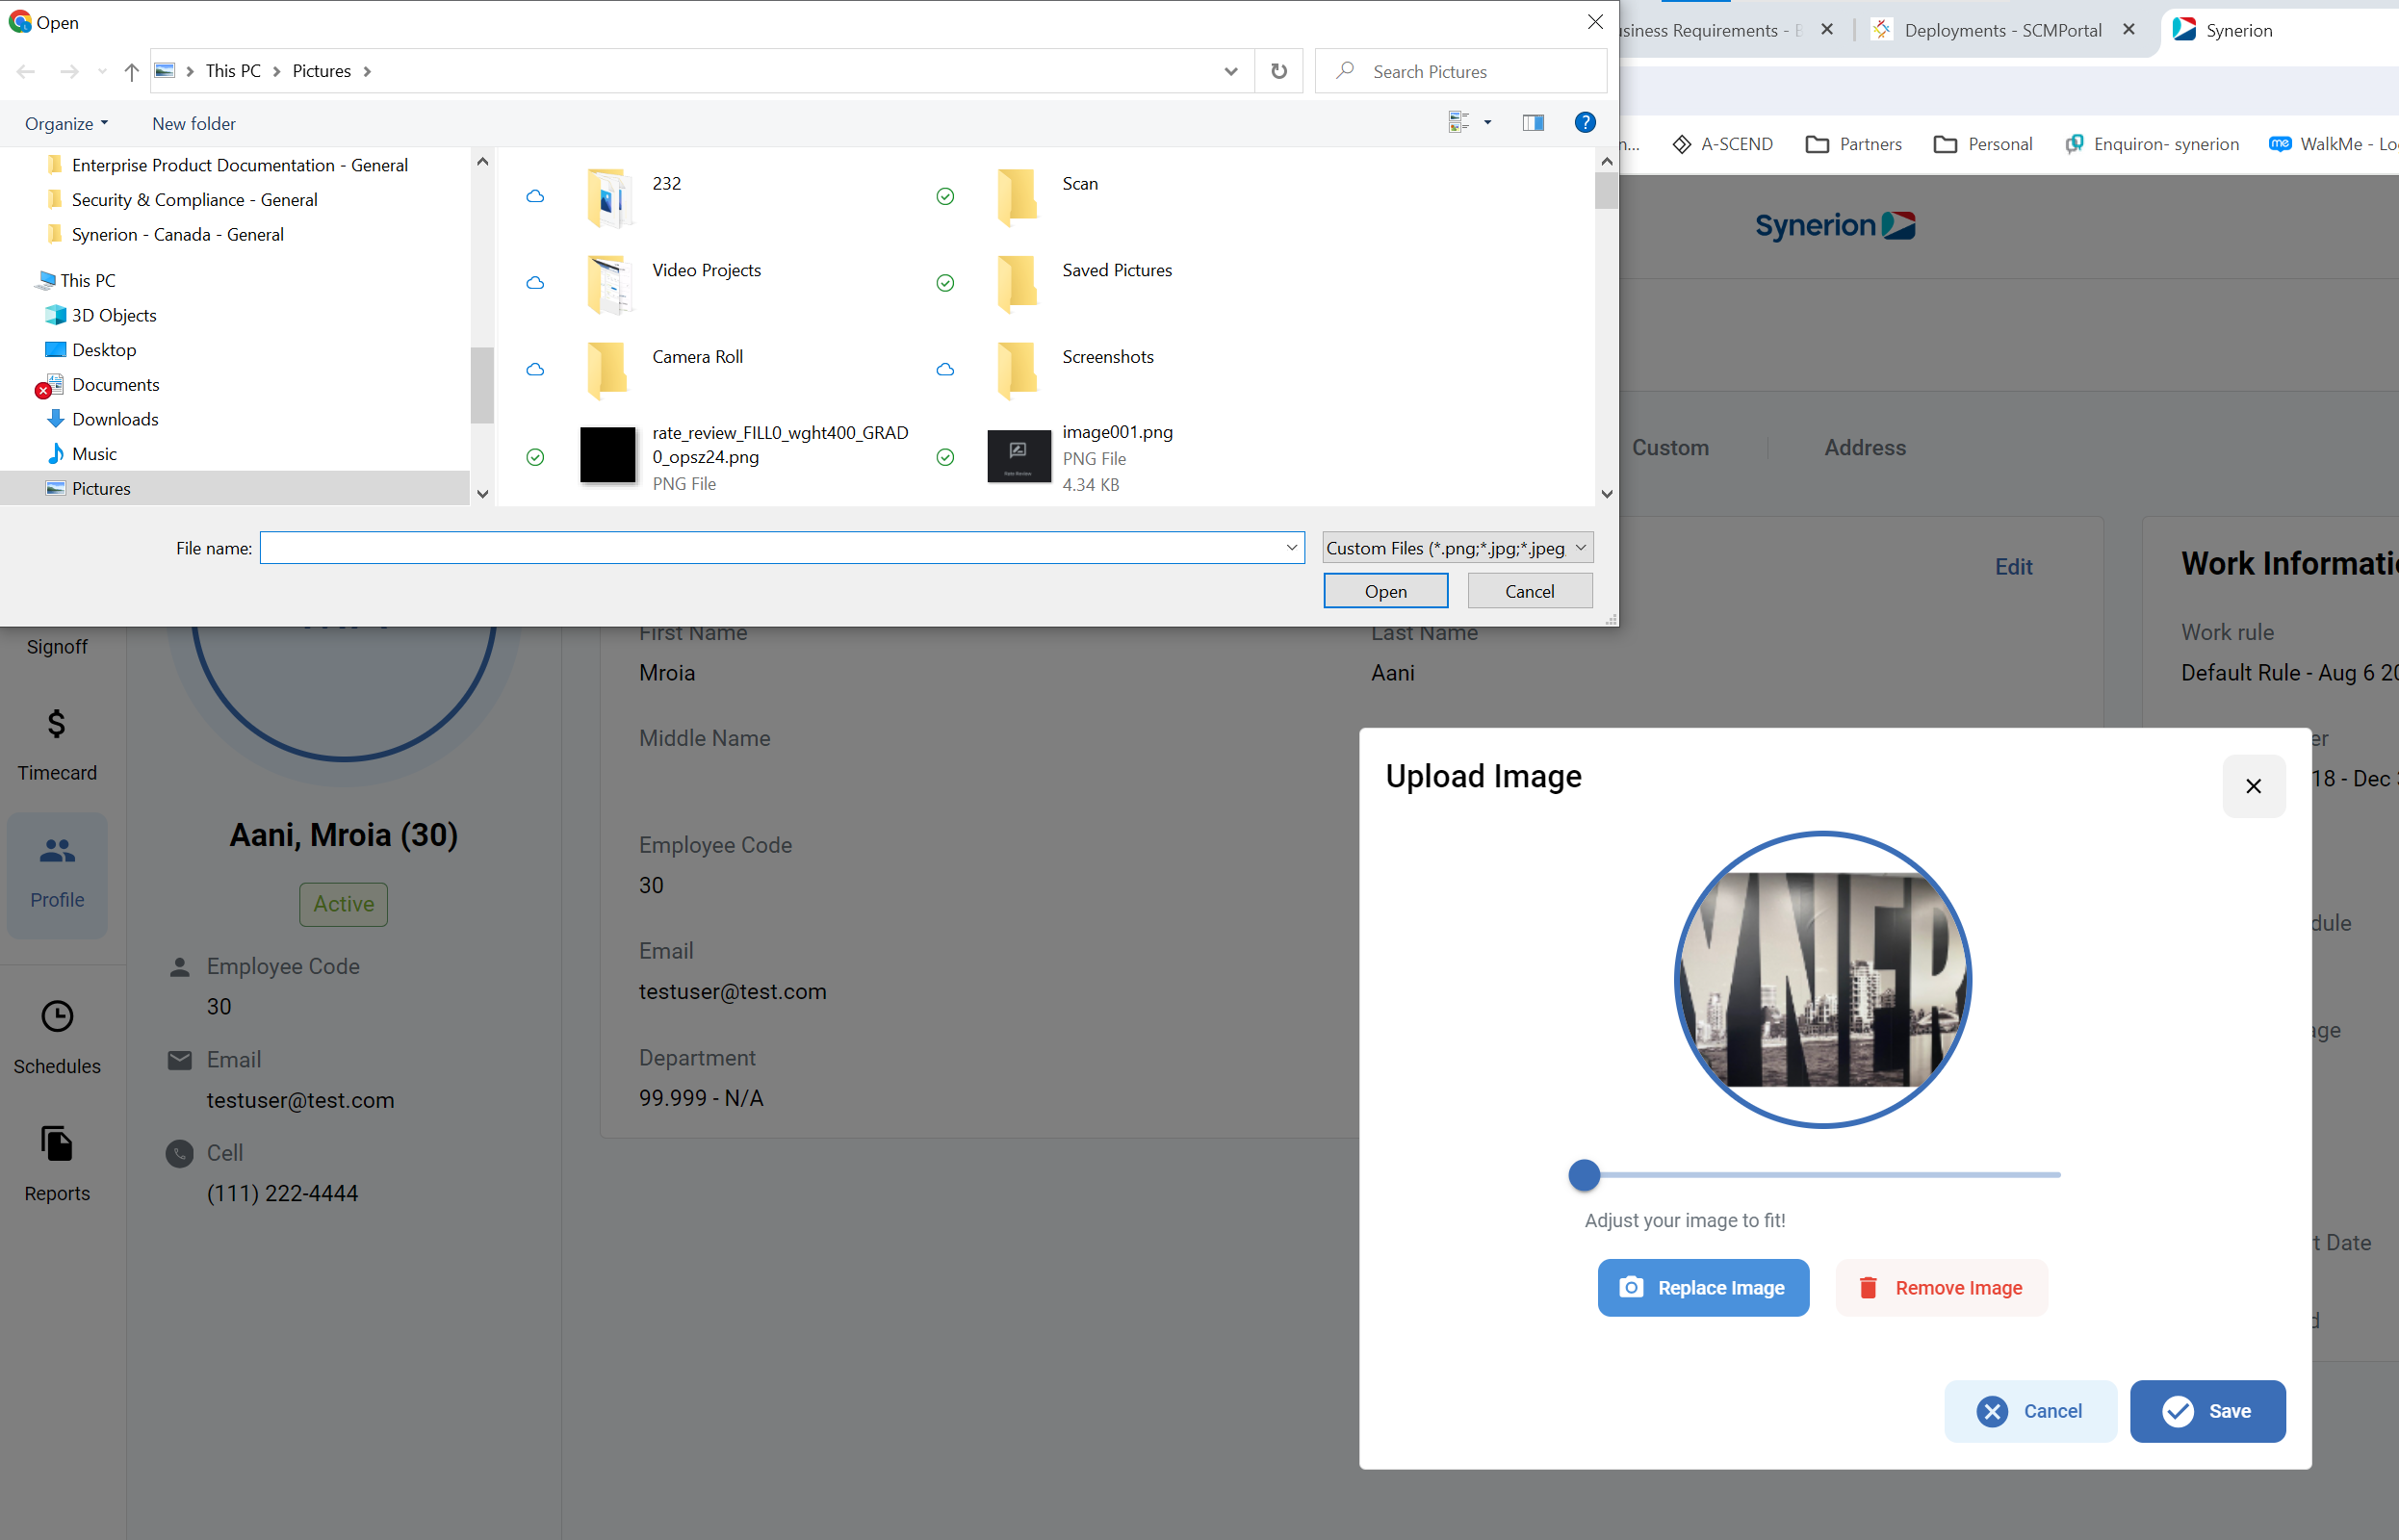
Uploading a picture
It is now possible to upload pictures for employees or have employees upload it themselves through the employee self service (if enabled).
From the employee profile:
- Navigate to the desired employee
- Click on their avatar
- Click on upload image
- Click on replace image
- Select the relevant file from your computer or network share
- You can use the slider to zoom in/out and make the picture fit properly in the window
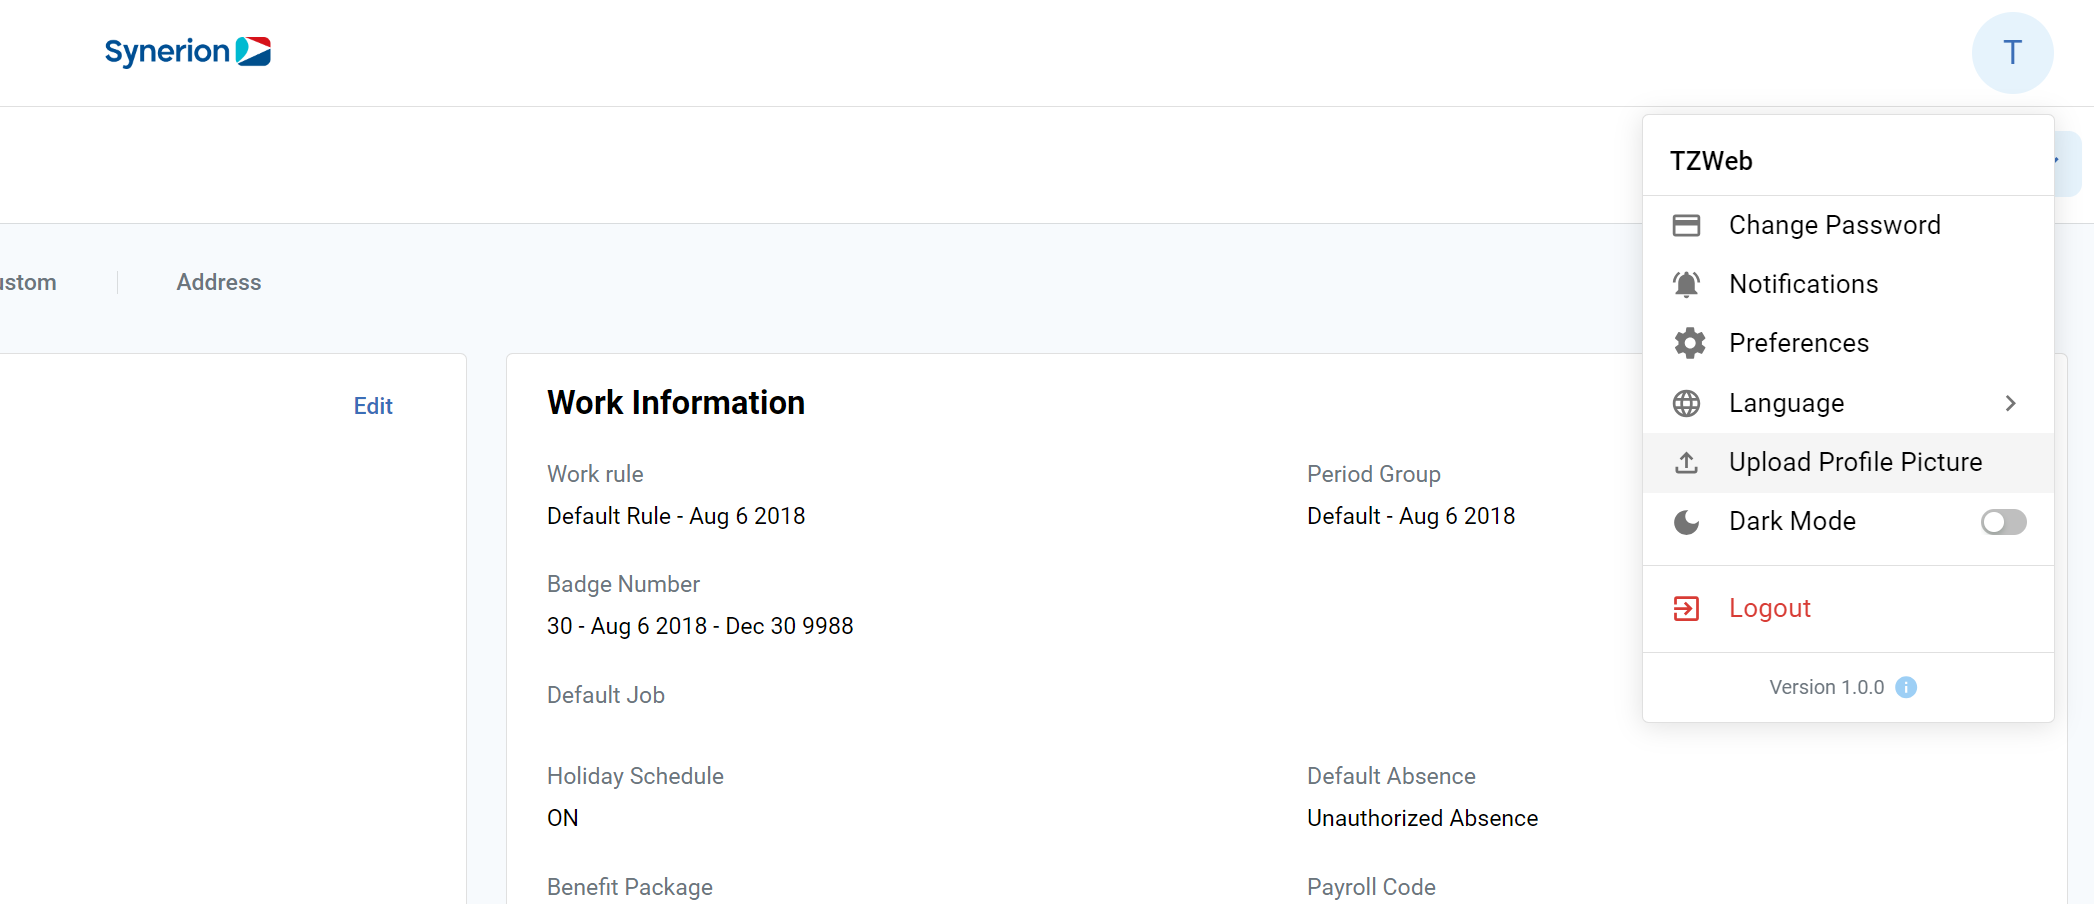
A similar process should be followed by the employee or for the user’s own picture, but you must click on the top right of the screen where the avatar is located and select “Upload profile picture”
Note: Pictures that existed in Agile Classic will not automatically be available in Bolt ! They must be re-added.
All new Access Tab !
Due to customer input, we added a new tab in the employee profile called the access tab. This tab will allow users to see information relating the employee’s usage of the Synerion system. It will show the employee’s Username, if they are an employee self service user. It will allow users to reset the password on behalf of an employee. It will show the employee’s configured language. It will show the user which other users can see this employee (from a security point of view). Since there is only one official absence request approver per employee, the information on which user is set up to approve the employee’s absences is shown.
There is another sub-tab within access which shows the employee’s permissions/preferences as it relates to time clocks.
The clock role indicates whether a particular employee can enroll people at the clock.
The Verify by indicates what is the method the clock is using to verify the employee – i.e. finger through the user of finger biometrics, facial, etc.
The language shows which language the employee will be prompted with they clock in.
The PIN field shows what is the configured PIN code for that employee if they are using a PIN to clock in.
Renaming custom fields
There are a number of fields and former tabs that allowed customers to define their labels and meaning by themselves. There are five text fields and five date fields that are part of each of the following sub tabs: Private Information, Public Information and Corporate Information.
To rename these fields:
- From the “Custom” Tab – click on the actions button in the top right corner
- Select “Configure Field Names”
- Edit the fields names to the desired new name and click save on the bottom of the screen
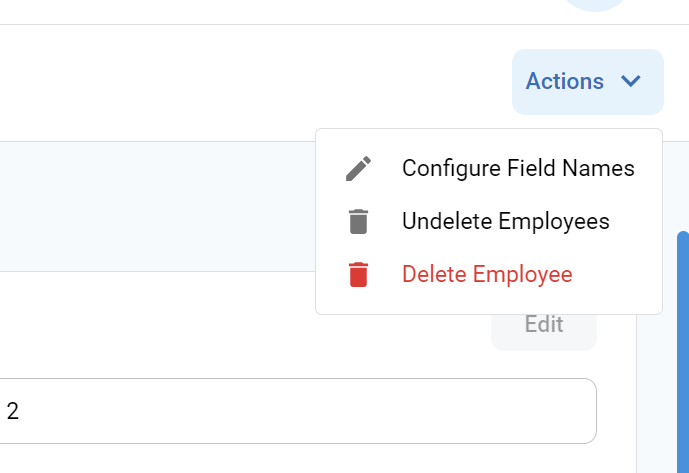
Undelete employees:
In Synerion Agile Classic in order to recover employees that had been deleted, you needed to navigate to the employee maintenance page.
In Synerion Agile Bolt, you can undelete employees from the employee profile.
Press the action button from any tab within the employee profile.
Press Undelete employee
A side panel will open, allowing you to select from deleted employees
Choose the ones you want to restore and press apply
Period Signoff Grid:
Period signoff grid, similar to the screen in Agile Classic, allows payroll admins a grid view of a period totals for a selection of employees.
At the top of the screen the user can select the Time category groups to display. This will determine which columns will appear in the grid.
If there is a zero value for all employees in a particular time category selected in the given period, the column will not be shown.
By clicking on an employee’s name, you will be directed to the timecard editor, filtered for just that employee’s records for the period in question. This will allow you to see details on the totals shown.
You can filter the page to show only those who are not yet signed off.
In order to signoff on the period, click the checkbox on the left of the row and then click signoff on top. Once signed off, you will be able to see who signed off the record by username and when.
If you have multiple period groups configured, you can select which one to display by clicking on the date selector. Only 1 period group will be shown at one time.
If an employee has errors or exceptions, his period will be appeared locked and the user will not be able to sign off on the period until the errors and exceptions are addressed (either signed off or fixed).