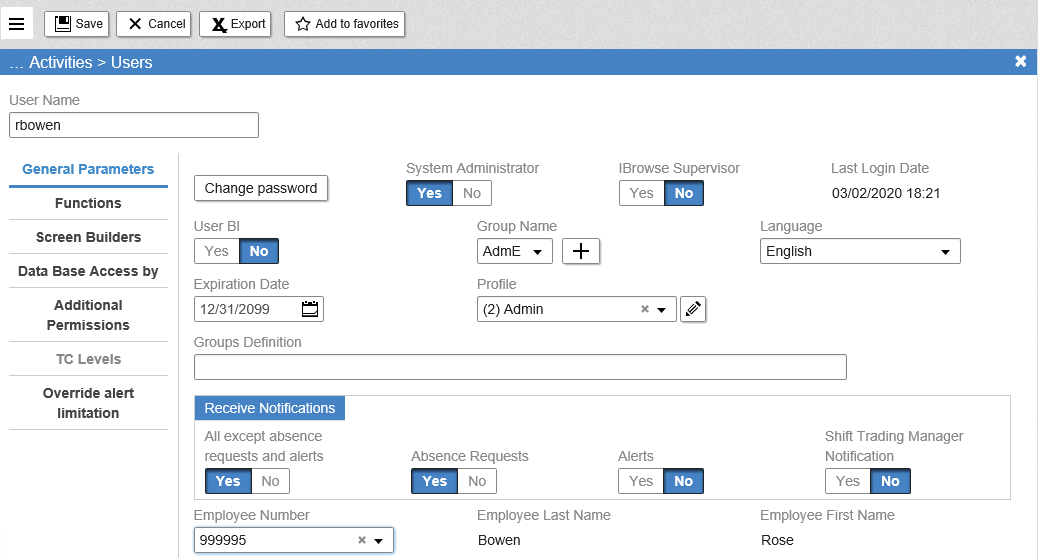
User Access refers to access for those who need to monitor other Employees’. This is generally only Managers and Administrators. This section does not refer to Employee System Access.
- Log into Synerion Enterprise.
- Click on the Admin tab.
- Start typing users into the search bar then select the Users option when it appears.
- Select a user similar to the one you want to create from the user name drop down list (upper left corner of the screen) and click the Duplicate button.
- Most items can stay the same but you must change the following items in the General Parameters tab.
- User ID
- Password
- Profile (only if different than the template profile)
- Employee Profile (you must not assign the same employee profile to more than one User as it will cause system issues.)
- Click on the Data Base Access by tab on the left side of the screen.
- This is where you designate which Employees a User can see. Click on the first table. Here you have two options:
- All Allowed (access to everything)
- Selected (allows you to restrict access to certain selections)
- Select All Allowed or Selected. If you choose All Allowed skip to step 10.
- If you’ve chosen Selected you must now select each option the user has access to. Locate the first option you wish to allow access to then click on the drop-down list on the right side. Here you will select either Read-Only or Read-Write depending on what type of access you wish to grant. Repeat for each option in this table that you wish to allow access to.
- Repeat steps 7-9 until you’ve made all of your selections.
- Click Save


