Overview:
Synerion ESS (Employee Self Service) is a tool that allows employees to punch in and out, view their time cards, schedules, upcoming absences, accrual balances, and messages on any internet connected device (such as a computer, tablet, or mobile phone). Different pay periods can also be selected (up to 8 previous, current, next) in order to see time card history or upcoming schedules.
Synerion ESS is not an App, the app that exists on the Google Play Store and the Apple Store is for a different Synerion system and will not work for Agile.
Login:
Please visit https://companyname.synerionagile.com/ESS on any internet connected device (computer, tablet or mobile phone).
By default, your username is your employee number, and your password is your first name (first letter capitalized) @ your employee number.
Example: If your name is John Smith, and your employee number is 12345, your credentials will be as follows:
- Username: 12345
- Password: John@12345
You will be prompted to change your password at your first login. Passwords must be at least 8 characters in length, with at least one upper case letter, one lower case letter, and one number.

Navigation:
Clicking on the Synerion Logo at the top of the page will always bring the user back to the Employee Self Service homepage.
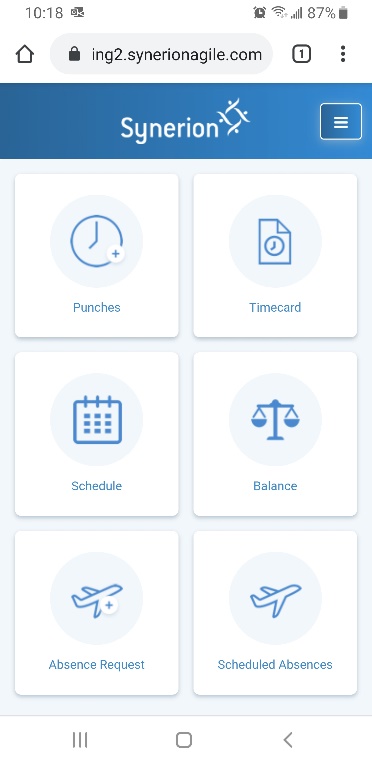
Clicking on the menu icon ( ![]() ) will bring up the navigation menu which allows the user to navigate to other parts of the system.
) will bring up the navigation menu which allows the user to navigate to other parts of the system.
Note: The Employee Self Service home page may appear differently depending on the options your system administrator has enabled.
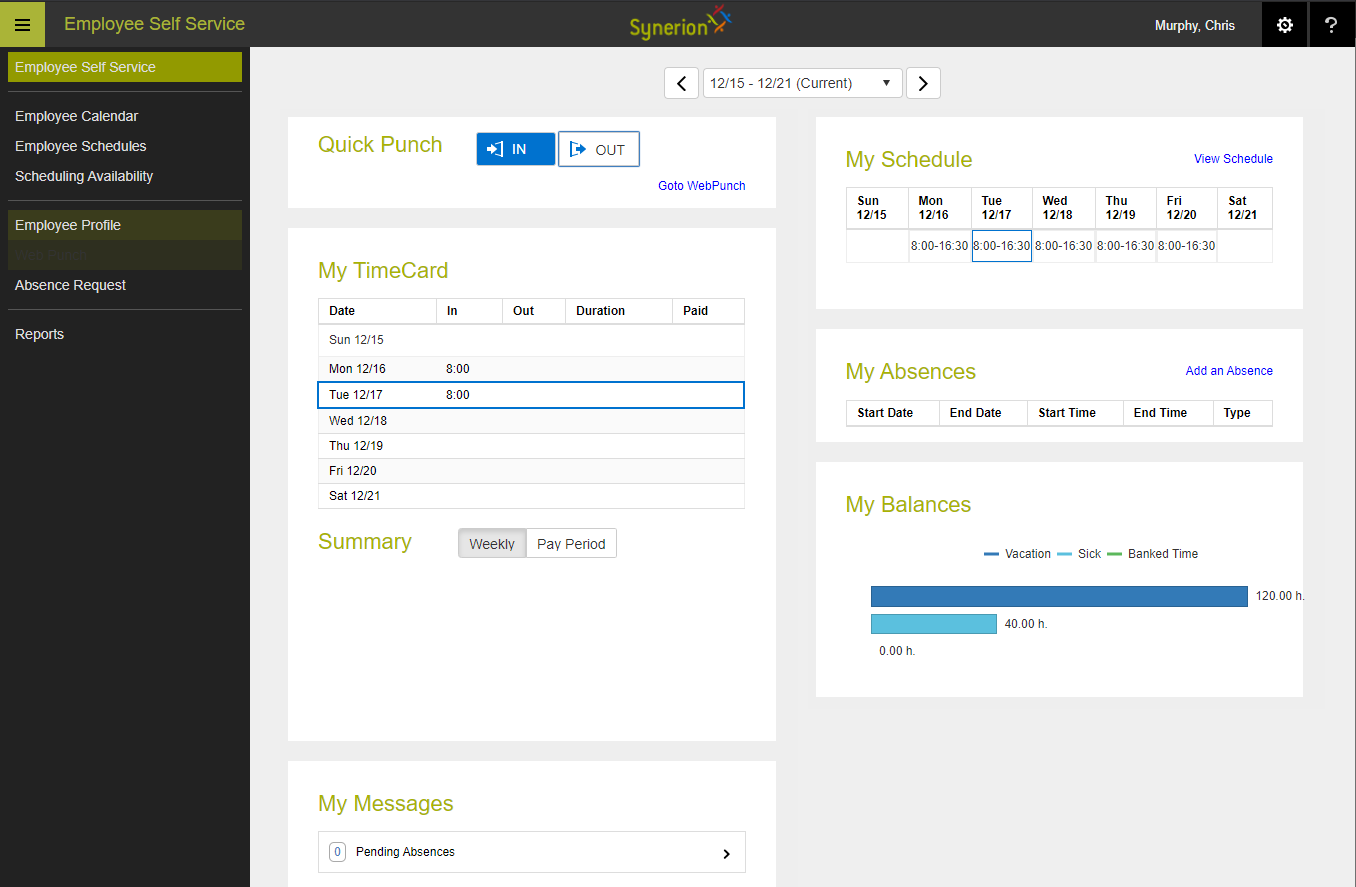
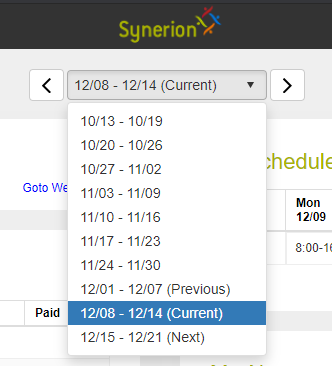
Pay period selector:
This drop-down list (top, middle of the screen) defaults to the current pay period but allows a user to select up to 8 previous pay periods, as well as the next pay period in order to view pertinent information related to specific pay periods. On mobile, the Pay period selector is only available in the Schedule page.
Quick Punch:
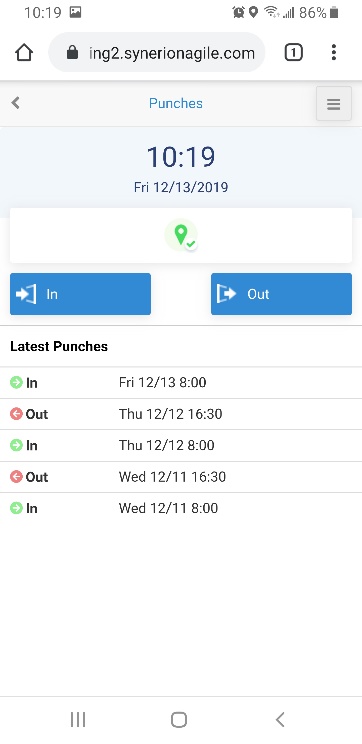 The Quick Punch function allows a user to punch in and out on any internet connected device (computer, tablet, mobile phone). Department punches are also possible if allowed by the system administrator. Clicking the ‘Goto WebPunch’ link will bring the user to the Web Punch page in the ESS. (See Web Punch).

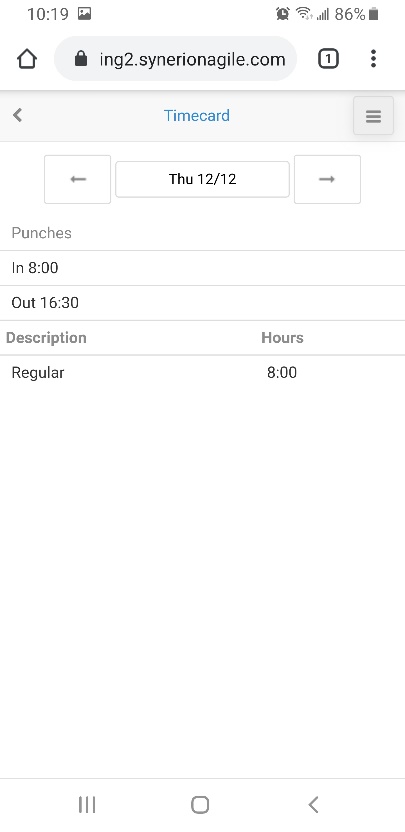
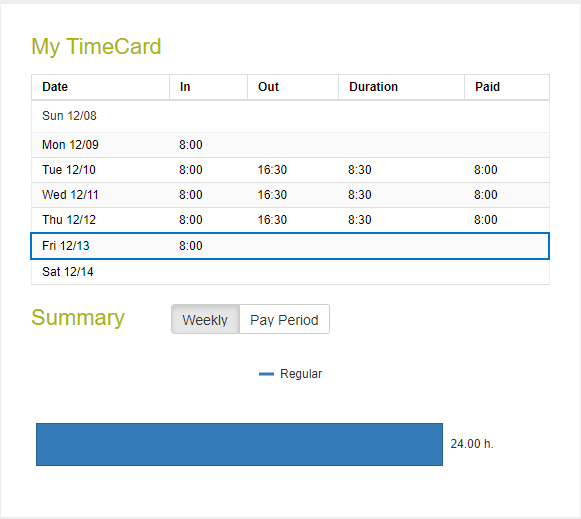
My TimeCard:
My TimeCard allows a user to see their In and Out punches for a specific pay period (selected by the Pay Period Selector), as well as the daily duration and paid hours for each day. The user can also view a summary of their hours worked for that week or pay period.
My Messages:
My Messages shows messages pertaining to the user. These will usually be responses to absence requests. If there are any unread messages, the text will be in bold, and the number of unread messages will be displayed. My Messages is not available on mobile.

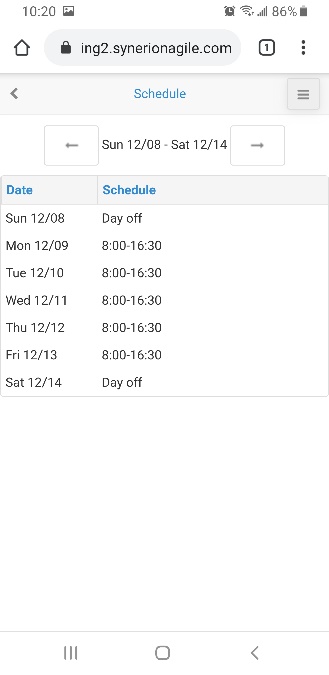
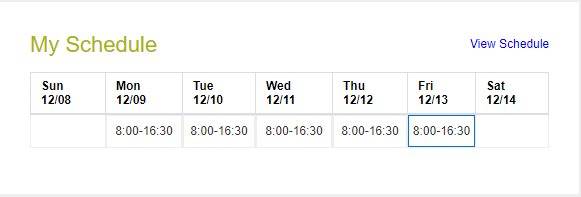
My Schedule:
The My Schedule section will allow a user to view their schedules for the selected pay period (as selected with the Pay Period Selector at the top of the page). Clicking on the ‘View Schedule’ link will bring the user to the Employee Calendar page, which allows the user to view a calendar in Day, Week, Month, or Timeline format. The calendar will show the user’s schedule, as well as any scheduled, pending or rejected absences. (See Employee Calendar)
My Absences:
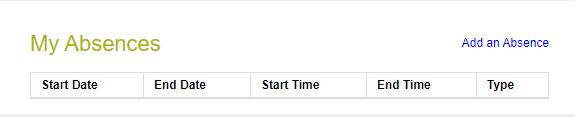
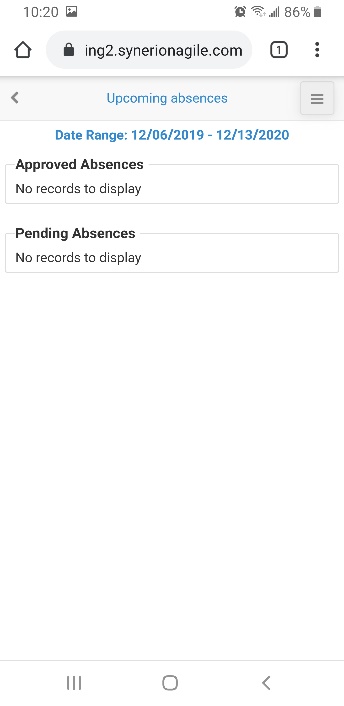 The My Absences section allows a user to view their upcoming absences. Clicking on the ‘Add an Absence’ link will bring the user to the Absence Request page where they can request future absences. On mobile, the Absences section is split into 2 parts, Upcoming absences and Absence Request. (See Absence Request)
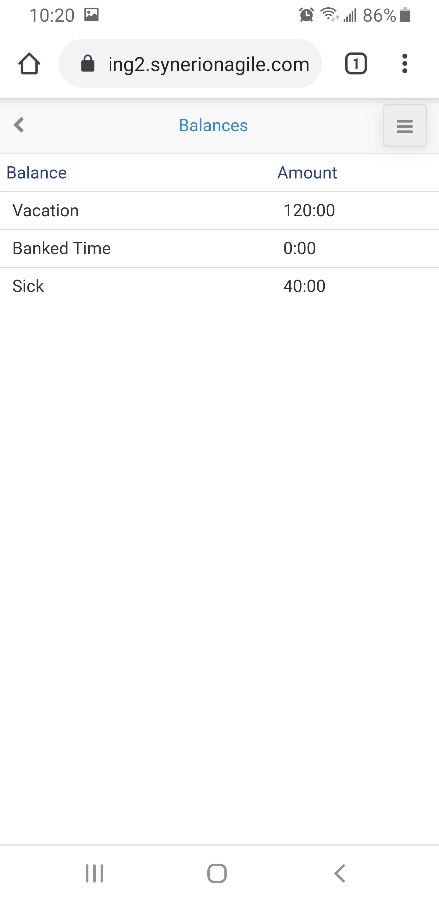
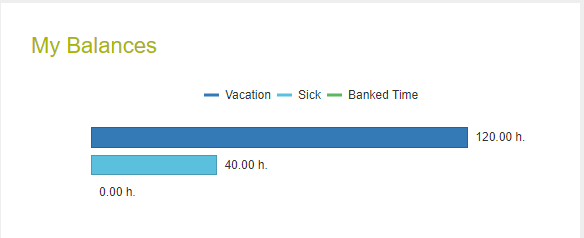
My Balances:
The My Balances section allows a user to view their banks of vacation, sick, and banked time in hours.
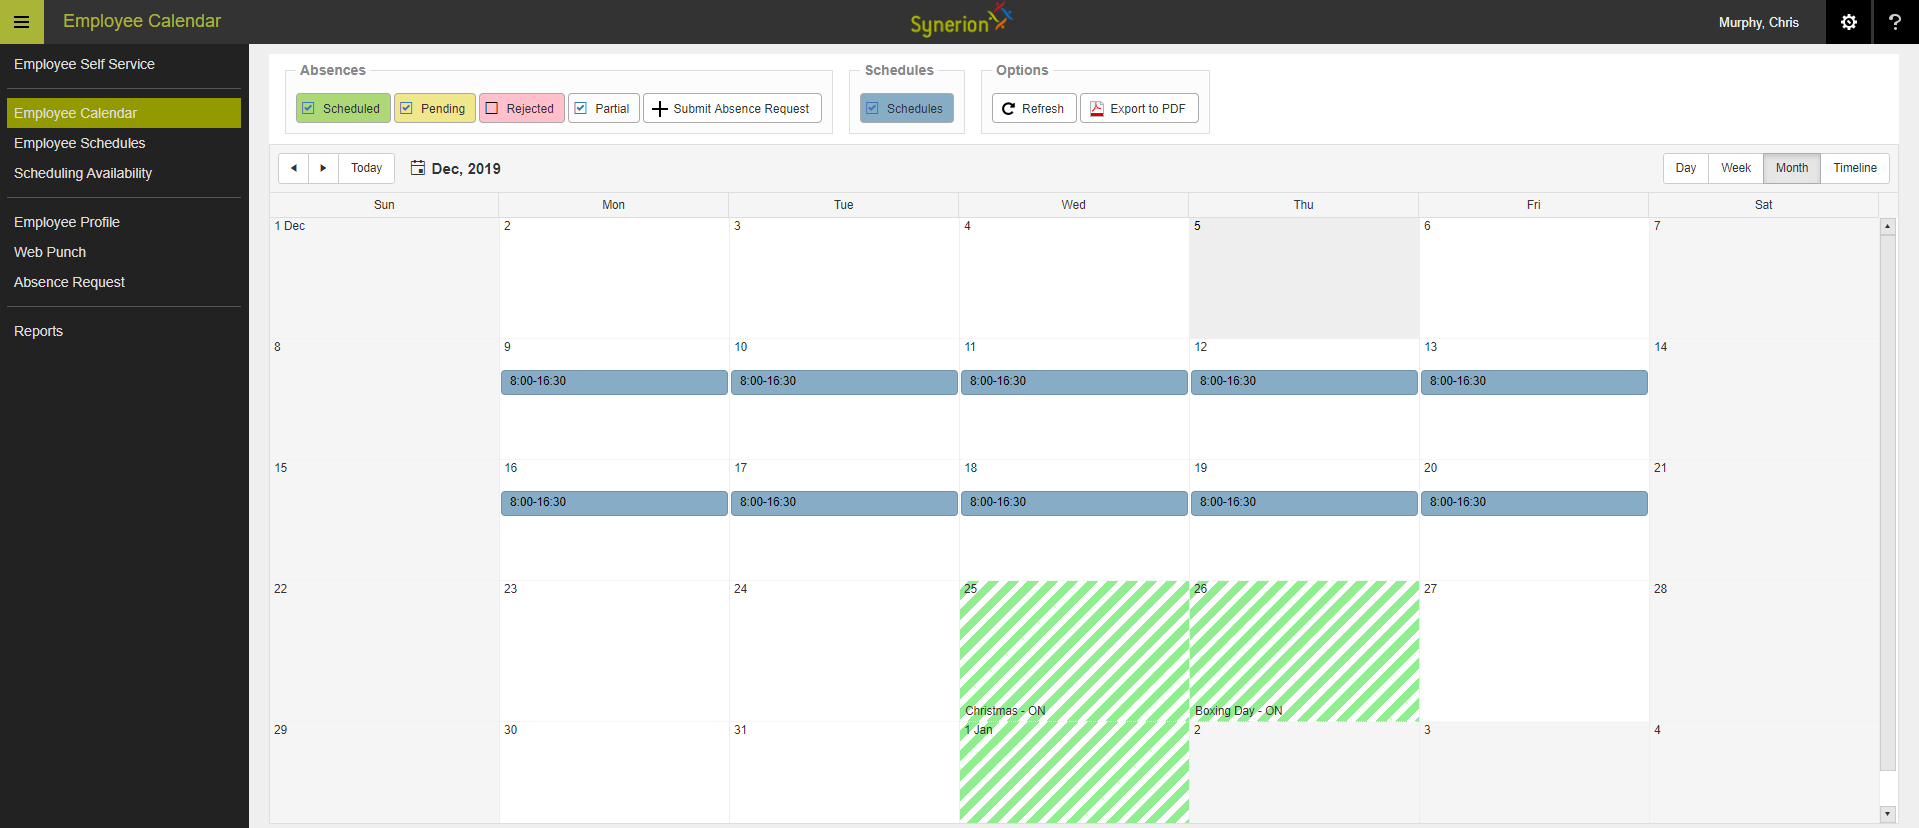
Employee Calendar:
The Employee Calendar page allows a user to see their work schedules, as well as pending, rejected and scheduled absences. Absence requests can also be made from this page. The calendar can be shown by day, week, month or timeline. In timeline view, the date range can be selected by modifying the start and end date at the top left of the calendar. The calendar can also be exported to PDF to be emailed or printed.
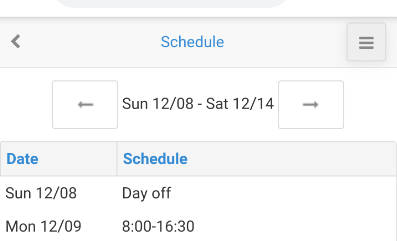
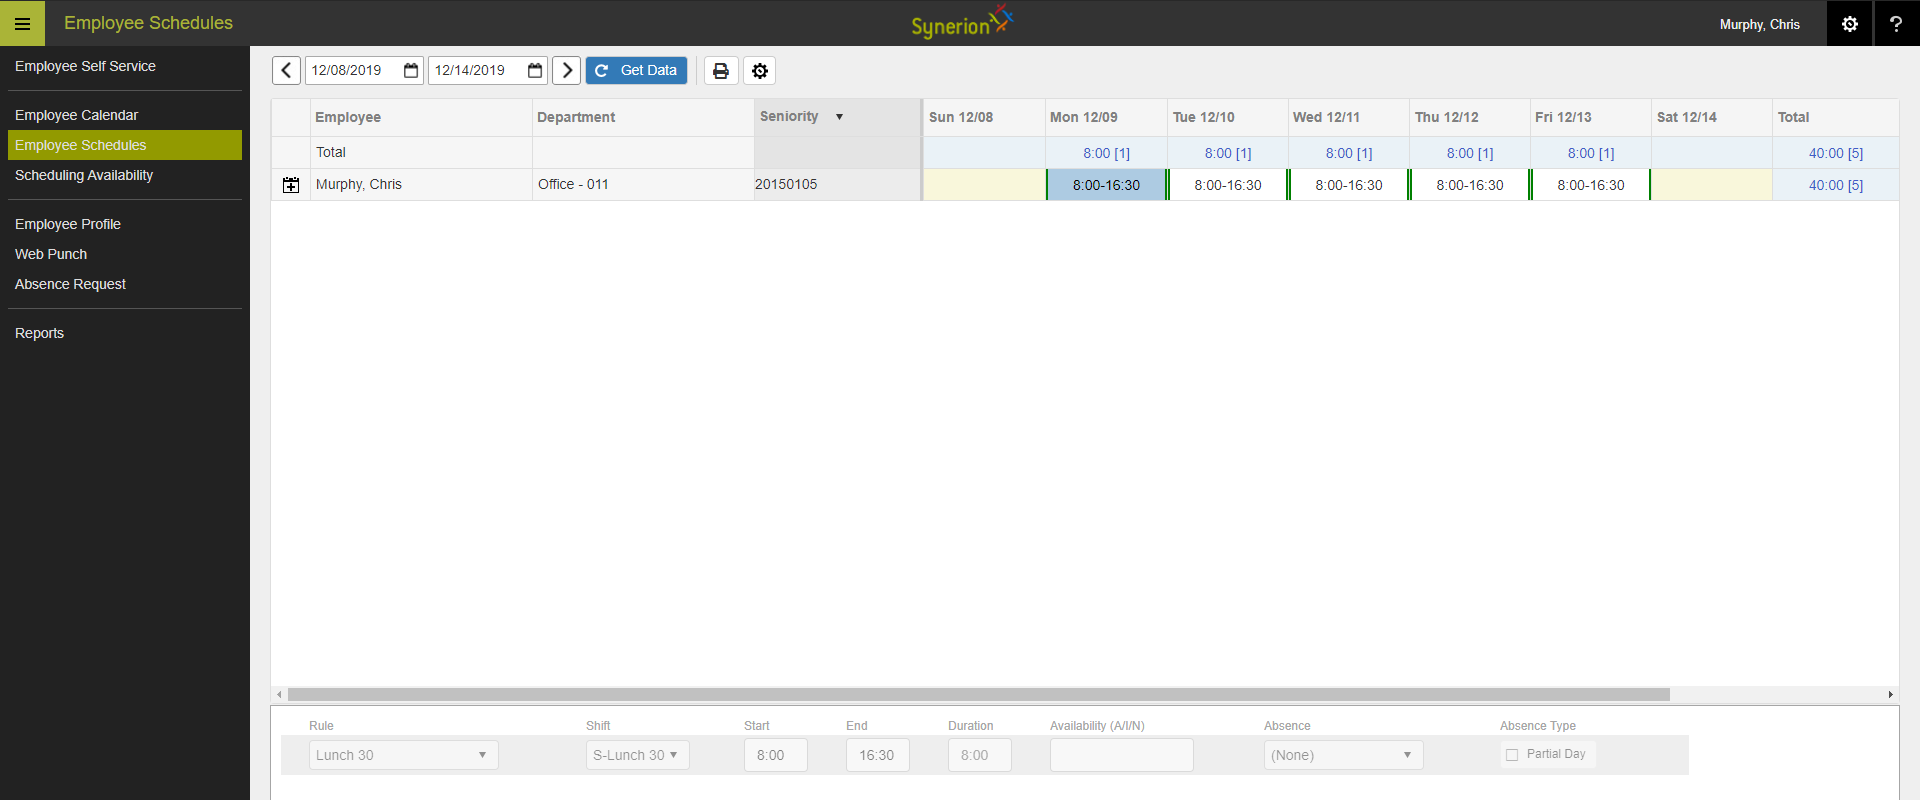
Employee Schedules:
The Employee Schedules screen shows a different view of the employee schedules. The date range is customizable by entering the date range at the top left and clicking ‘Get Data’.
Scheduling Availability:
This page allows a user to define when they are available to work or not available to work. The Availability section allows a user to define their availability on a weekly basis (same day(s) repeating every week). By clicking the pencil icon, a user can enter whether they are available to work or not available, as well as the start and end time. If no preference is entered, the employee can be scheduled to work on that day.
The Availability Overrides section allows an employee to set their availability on a specific date.

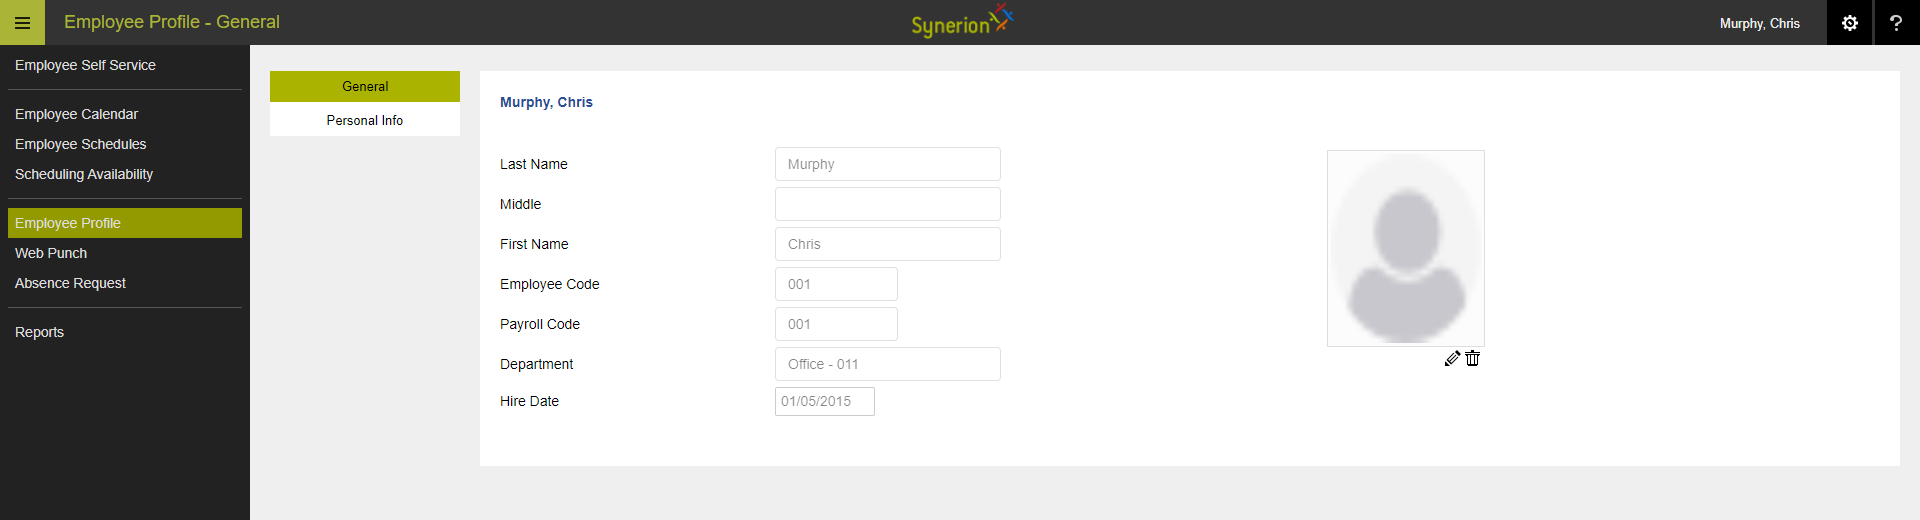
Employee Profile:
The employee profile allows a user to see their profile information in the system. The user may be able to edit this information if allowed by the system administrator.
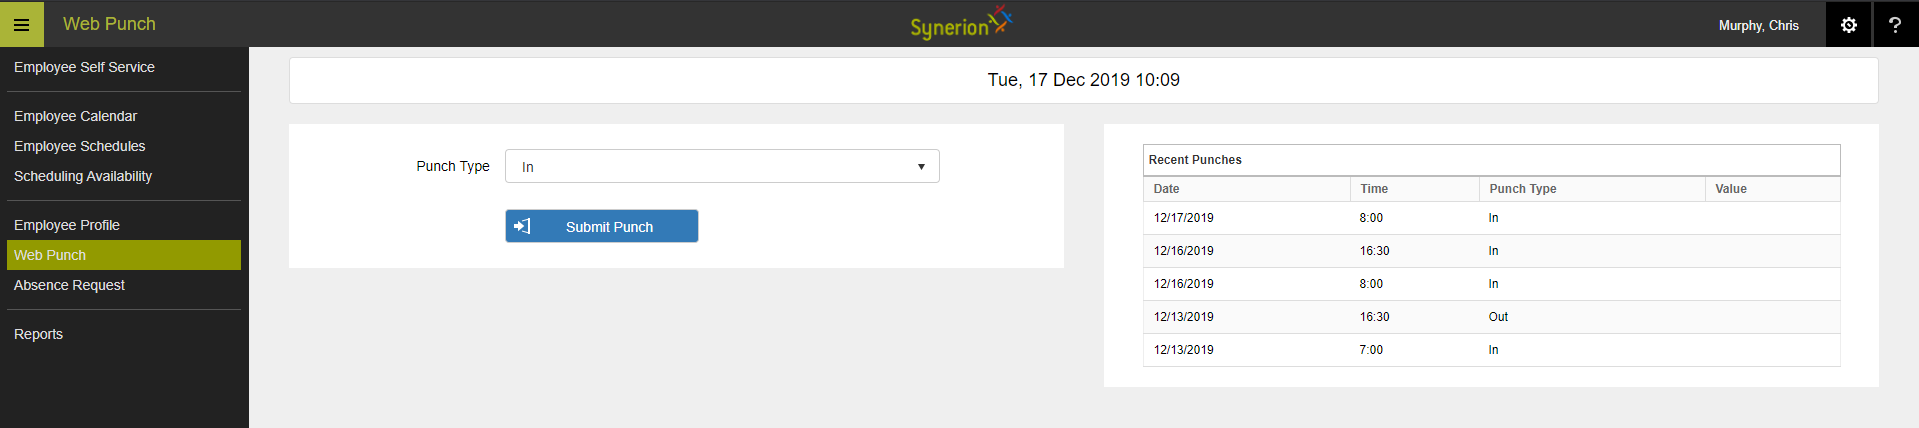
Web Punch:
The Web Punch screen allows the user to punch in and out. It also allows the user to see their recent punches.
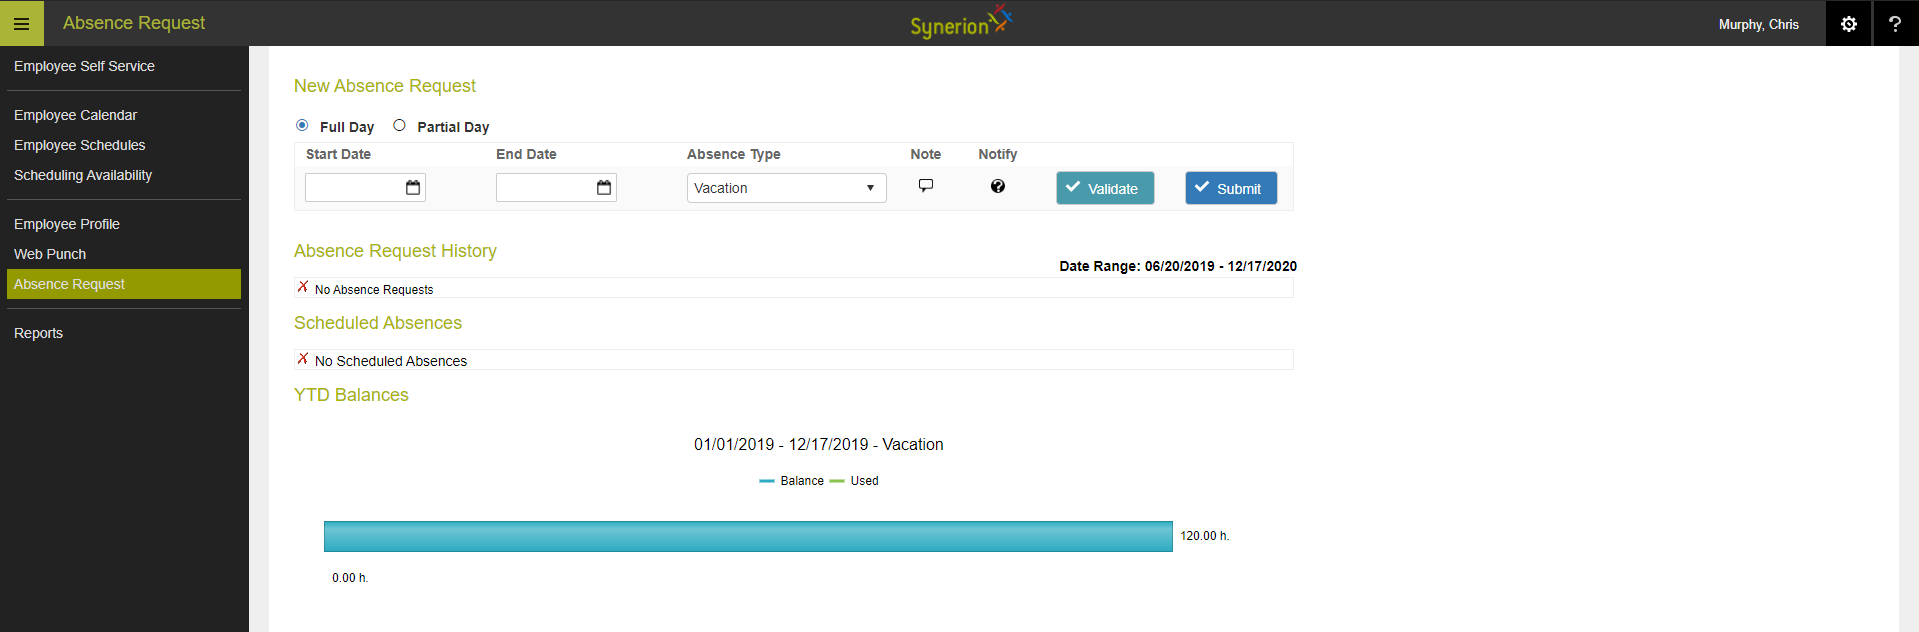
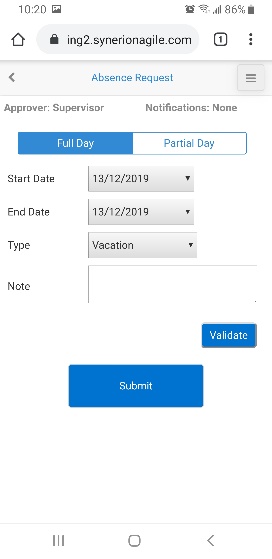
Absence Request:
The Absence Request page allows a user to submit an absence request, view their absence request history and scheduled absences, and view their accrual balances. The user can request a full day or a partial day, as well as choose the absence type (vacation day, sick day, etc.). The user can also enter a note that will be displayed to the supervisor who receives the absence request.
Reports:
 The Reports screen allows a user to run reports in order to view pertinent information. Reports include the Accrual Summary, the Pay Period Summary, Schedule Posting (with or without Labour Allocation), among others. There are different parameters and preferences, depending on the report chosen. There are also several output formats, including PDF, rich text, text, Excel and HTML. To run reports, ensure that popups are not blocked in your browser for the Synerion Agile system.
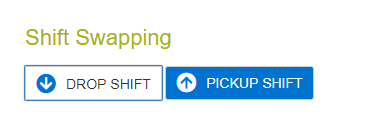
Shift Swapping:
Shift Swapping allows a user to drop their shift, as well as pick up dropped shifts by other users.
Dropping a shift: When a user selects Drop Shift, they will be brought to the Employee Calendar where they will be able to select the shift they want to drop. Although all shifts on the calendar are displayed here, the system administrator may have set up a cutoff time restricting the user from dropping a shift too soon in the future. If this is the case, the user will get the message ‘The shift swap window has expired’, and the user will not be able to drop that shift. If the shift is far enough in the future and is able to be dropped, the user will be able to enter a note that will be sent with the shift drop request to their supervisor or the system administrator.
Picking up a shift: When a user selects Pickup Shift, they will be brought to the Employee Calendar where they will see their scheduled shifts, as well as available shifts in orange. When the user selects the shift they want to pick up, they will be able to enter a note that will be sent with the shift pickup request to their supervisor or the system administrator.
Depending on the system configuration, swapped shifts may need to be approved by a supervisor or administrator.